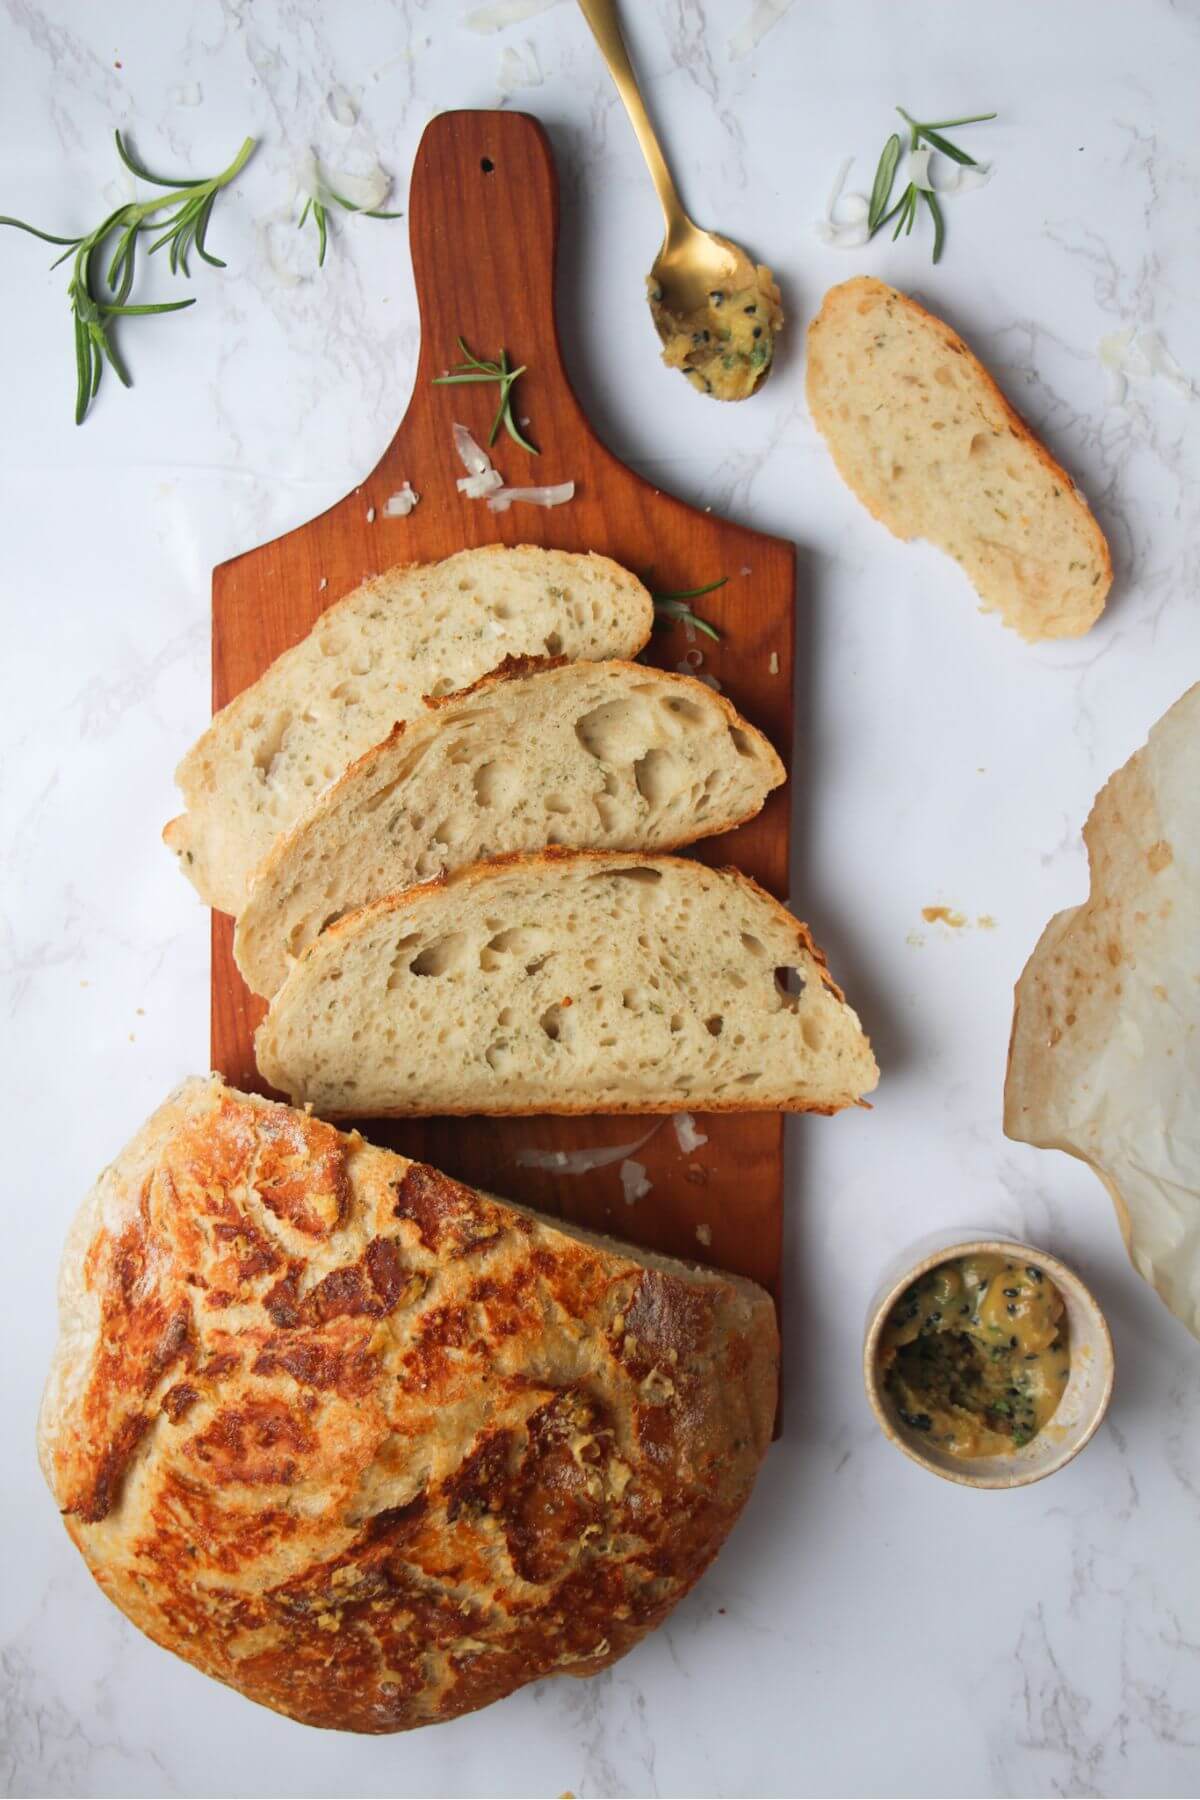
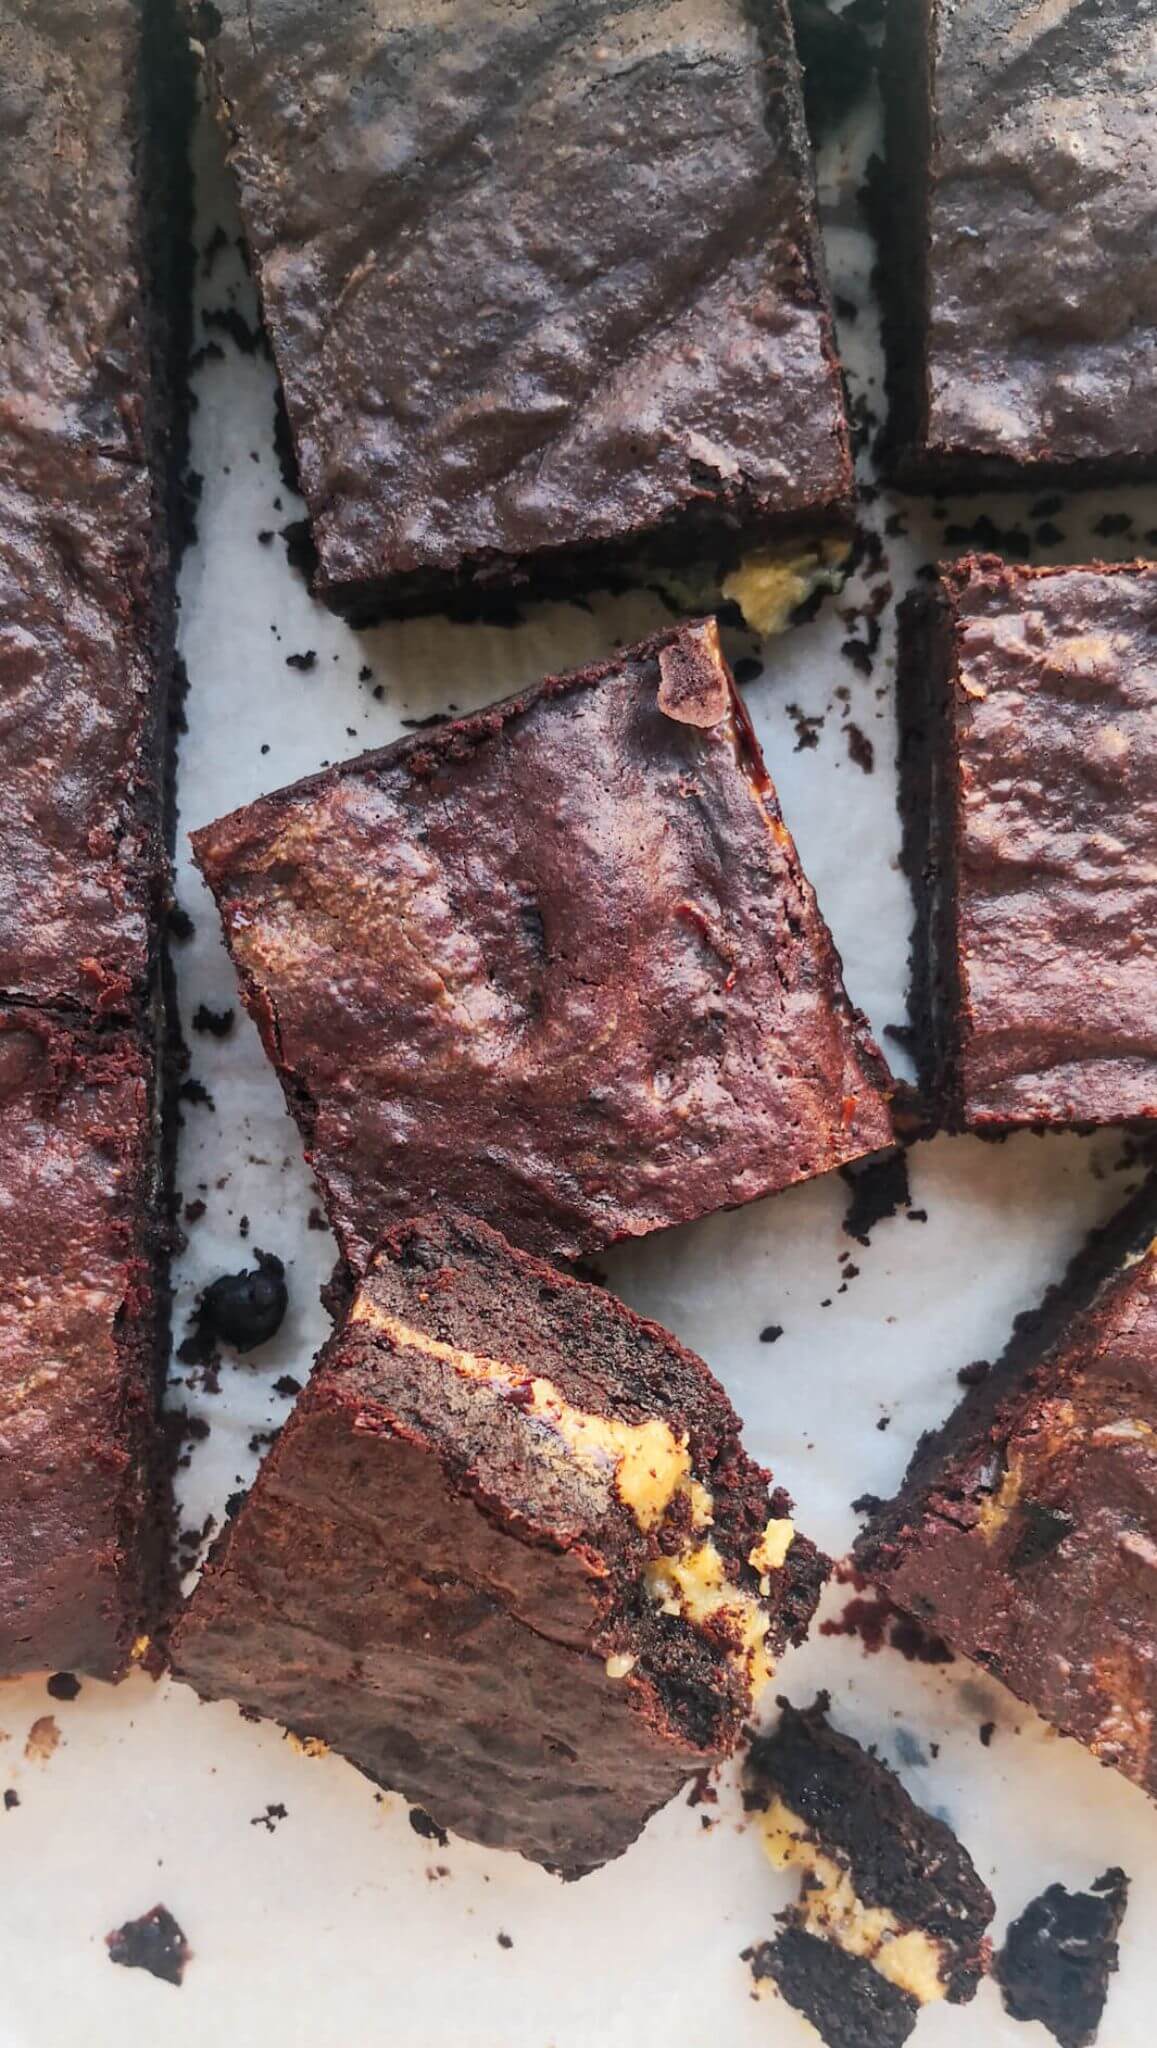
This super fragrant, super savoury rosemary parmesan bread is truly the easiest bread recipe you’ll ever make. No kneading, no long or overnight rise here – just mix, let rise until doubled and bake. It’s golden, crispy, airy, and light deliciousness you’ll love.
I always consider this no-knead bread technique my gateway into bread making. If you’ve never made bread before, or have always thought it’s too hard or intimidating, I seriously urge you to give this a try because it honestly is SO easy. The technique comes from Jim Lahey’s recipe and it is a serious game-changer.
Most no-knead bread recipes require a long, all-day or overnight rising time, and while it’s true that flavour develops over this time, sometimes you want bread fast. You could start this recipe late in the afternoon and have fresh bread to enjoy with your dinner that evening. It makes WONDERFUL dipping bread for soup (try it with roasted tomato and red pepper soup, carrot and coriander soup or roasted cauliflower cheese soup) and is equally perfect for a light, summery lunch like burrata toast with hot honey. Slathering it with roasted garlic butter also comes highly recommended.
All you have to do is mix your ingredients into a shaggy dough, let it rise, shape it into a very rustic ball then pop it into the oven to bake. The only semi-tricky part of this is the shaping itself. But seriously, even if it looks like a bit of a flat mess when you put it in the oven, it’ll rise up into a gloriously golden, crusty loaf in the oven and you’ll be amazed at how easy it really was to make.
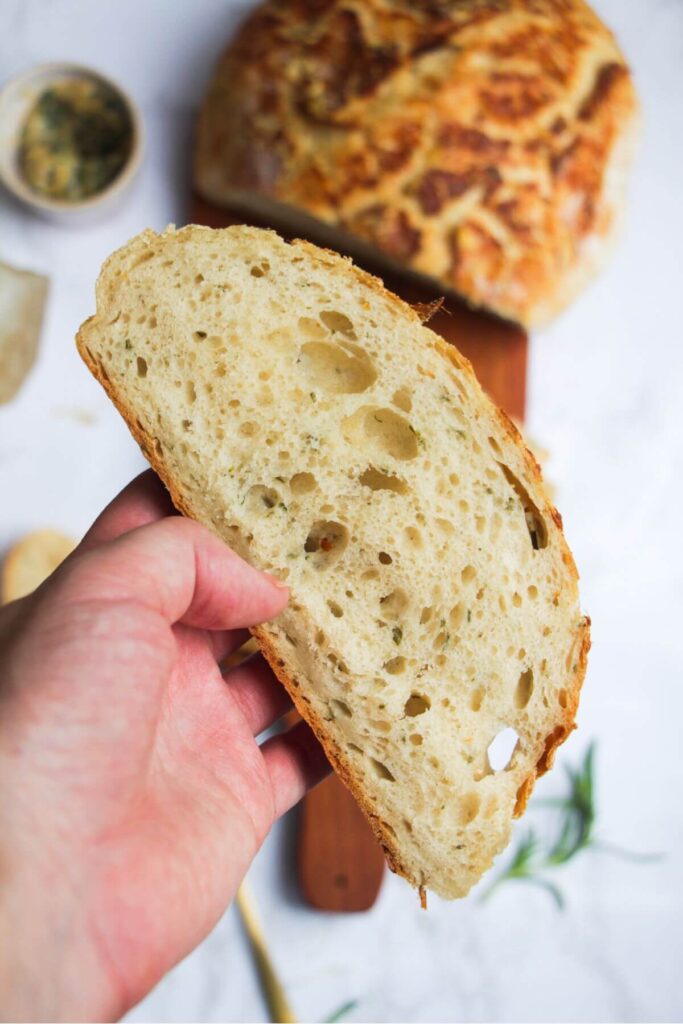
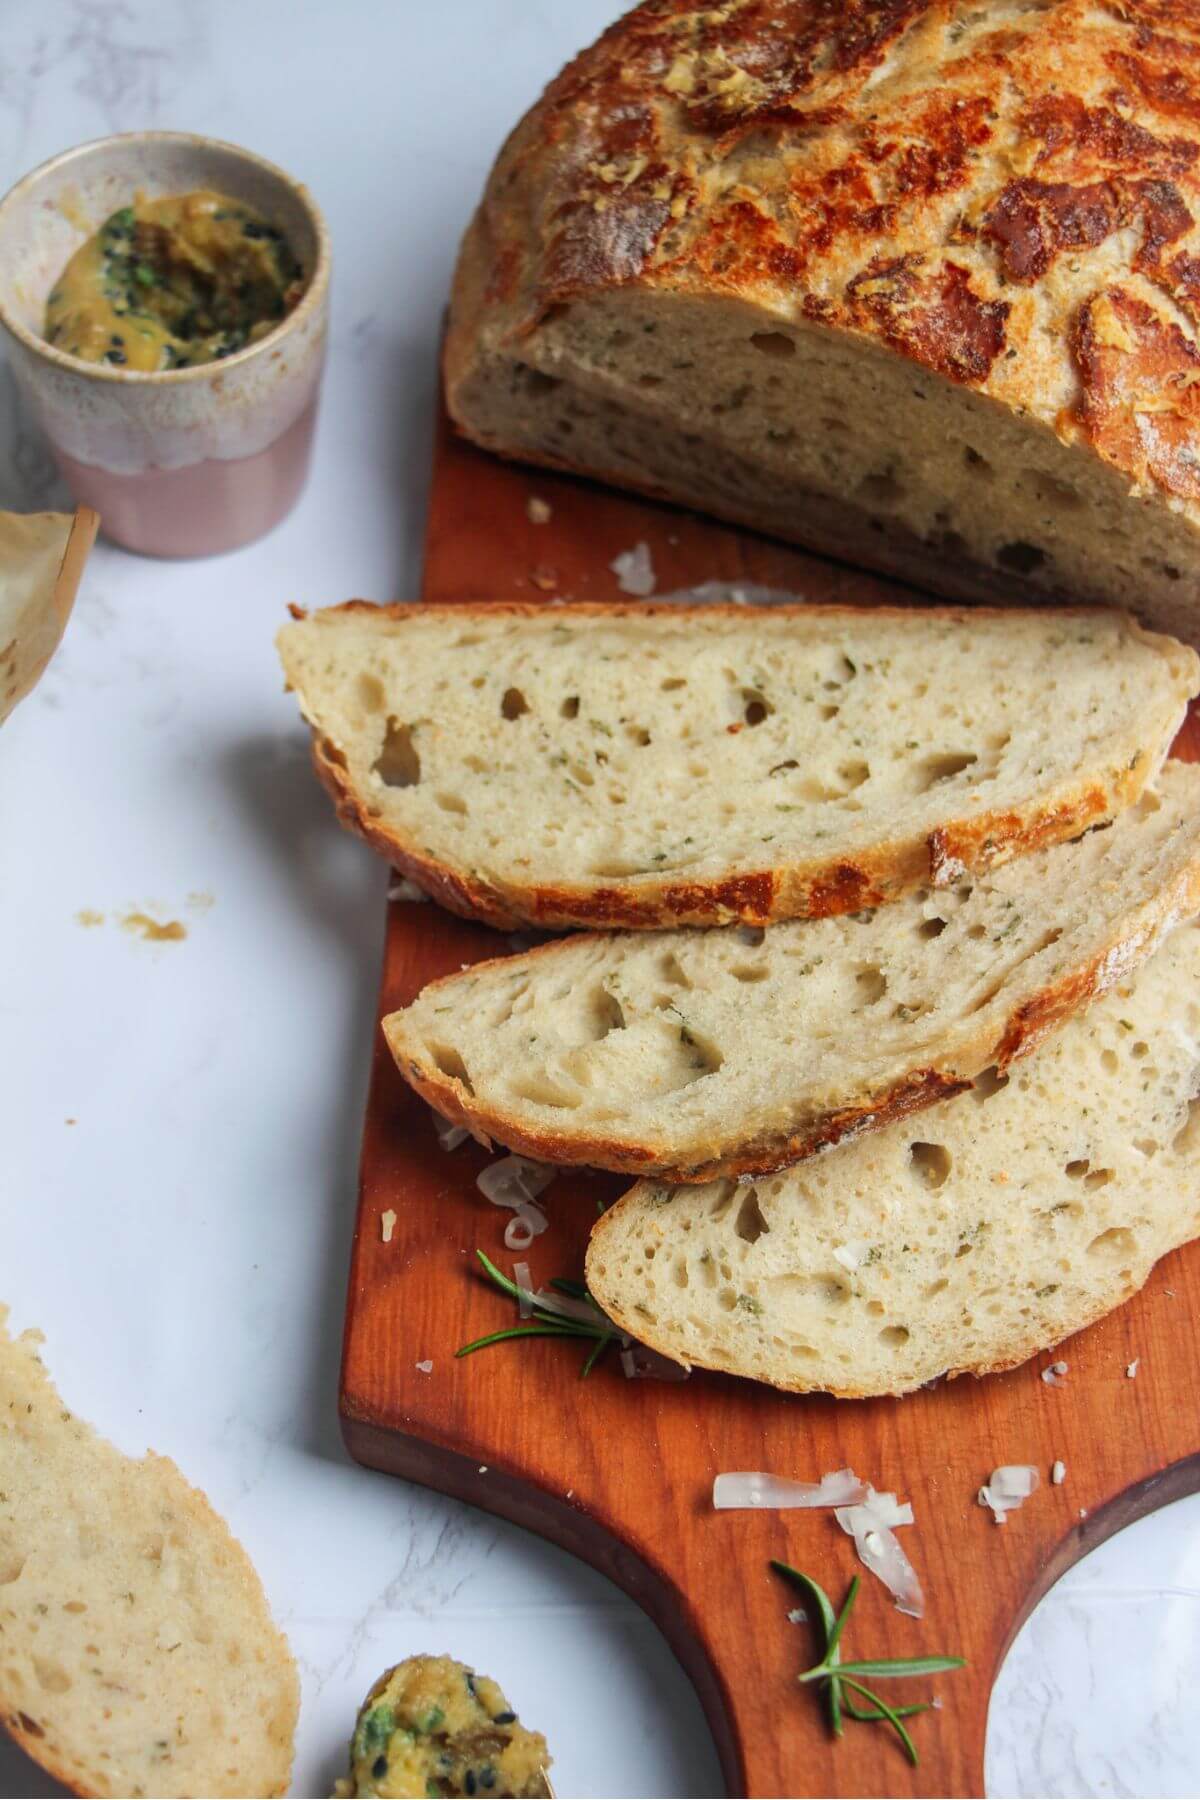
This one is really special because it’s stuffed with a perfect combination of fragrant rosemary and super savoury parmesan, which just enhances the flavour of the bread and if you’re like me, there’s no way you can stop at one slice..!
Ingredients
You only need SIX ingredients for this gorgeous bread.
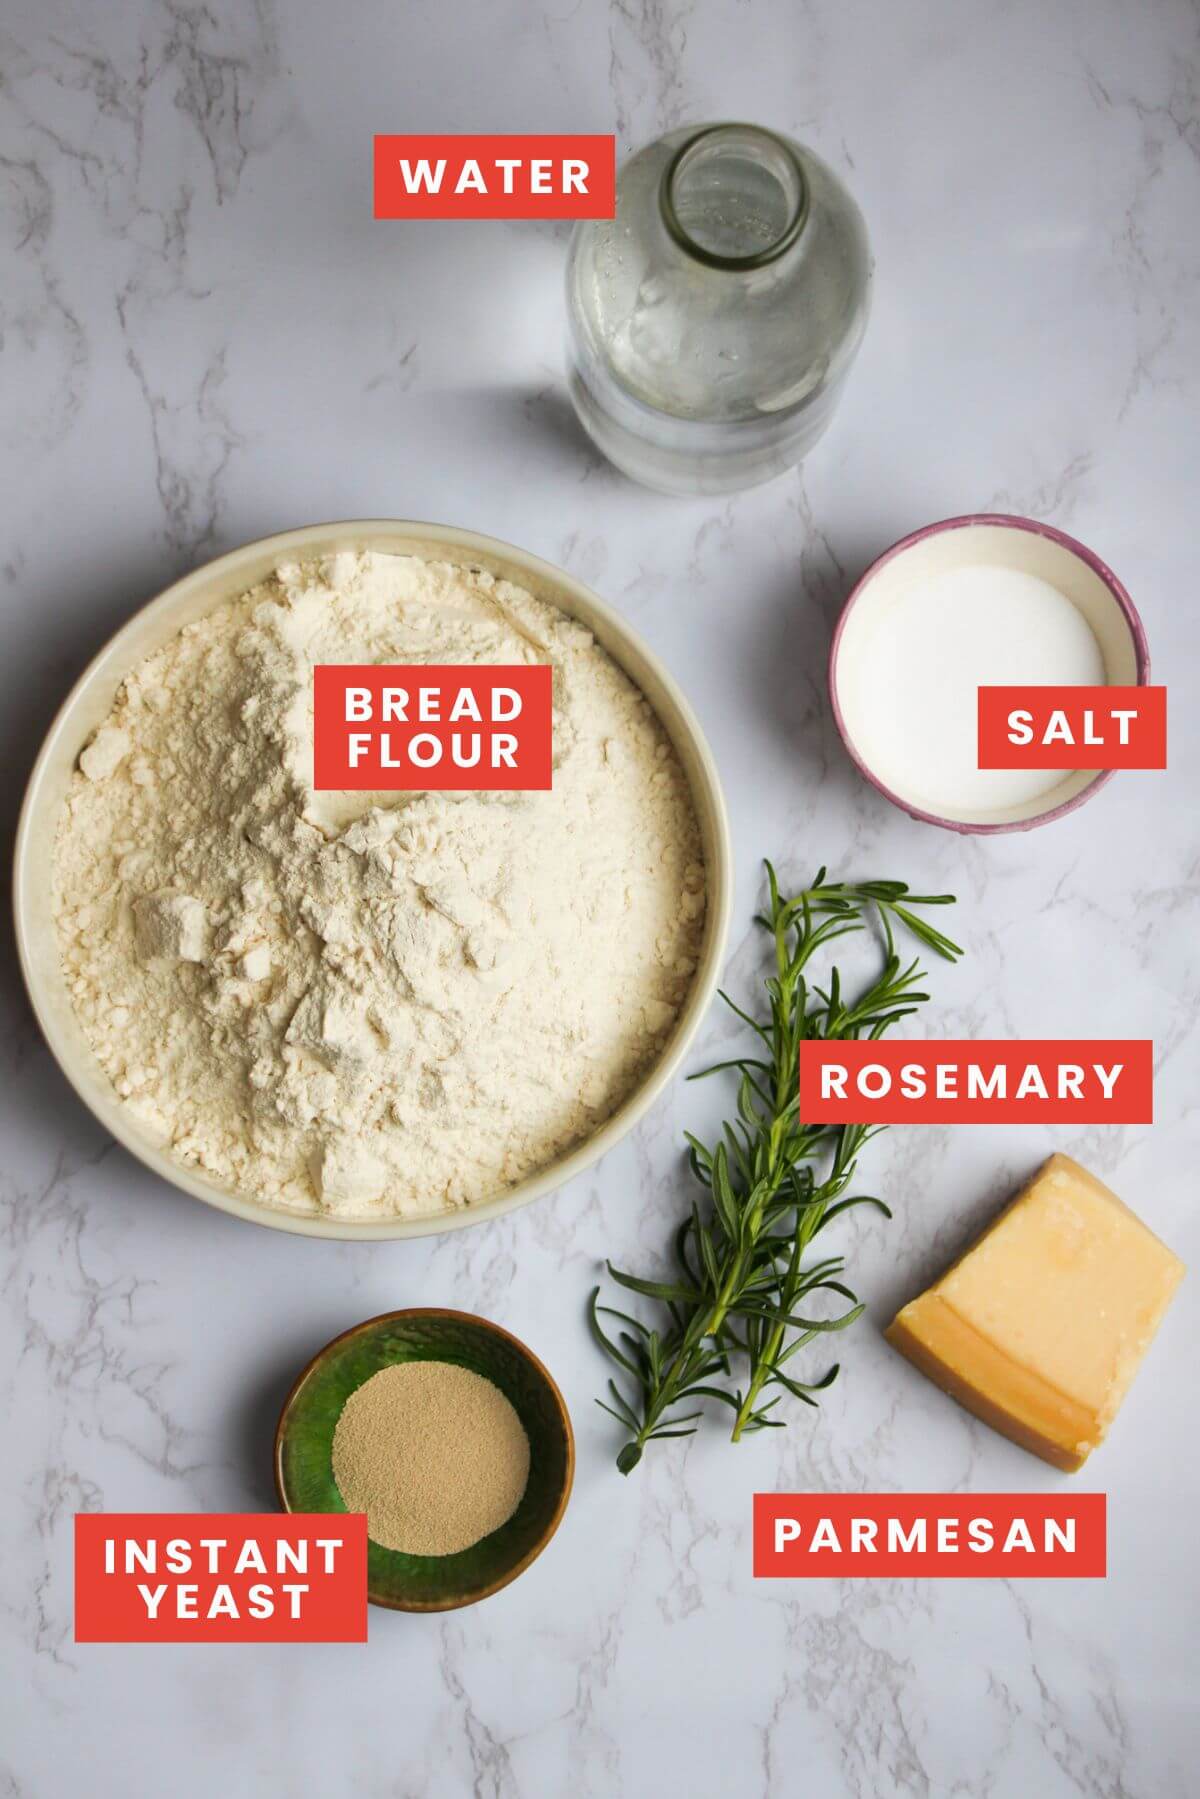
- Bread flour. Ideally, you want to use bread flour for this recipe for the best texture in your finished bread, but plain flour will work well, it just won’t be QUITE as light and airy.
- Instant yeast. I love using instant yeast because you can add it straight in with your dry ingredients and you don’t have to wait and ‘activate’ it. However, you can definitely use active yeast in this recipe, but you’ll need to sprinkle it onto your lukewarm water first and let it sit for 10 minutes. You’ll see it foam up a little (this is a sign it’s alive). After 10 minutes, you can continue with the recipe and mix the yeast and water with the rest of the ingredients.
- Rosemary. You can use dried rosemary if you don’t have fresh – or use another herb like thyme, marjoram or oregano.
You’ll need either a Dutch oven or a regular large stock pot or you can use a pizza stone or oven tray/sheet pan to bake the bread. A Dutch oven or a regular pot is best to create a steamy environment to help the bread create a lovely, crispy crust.
How to make it
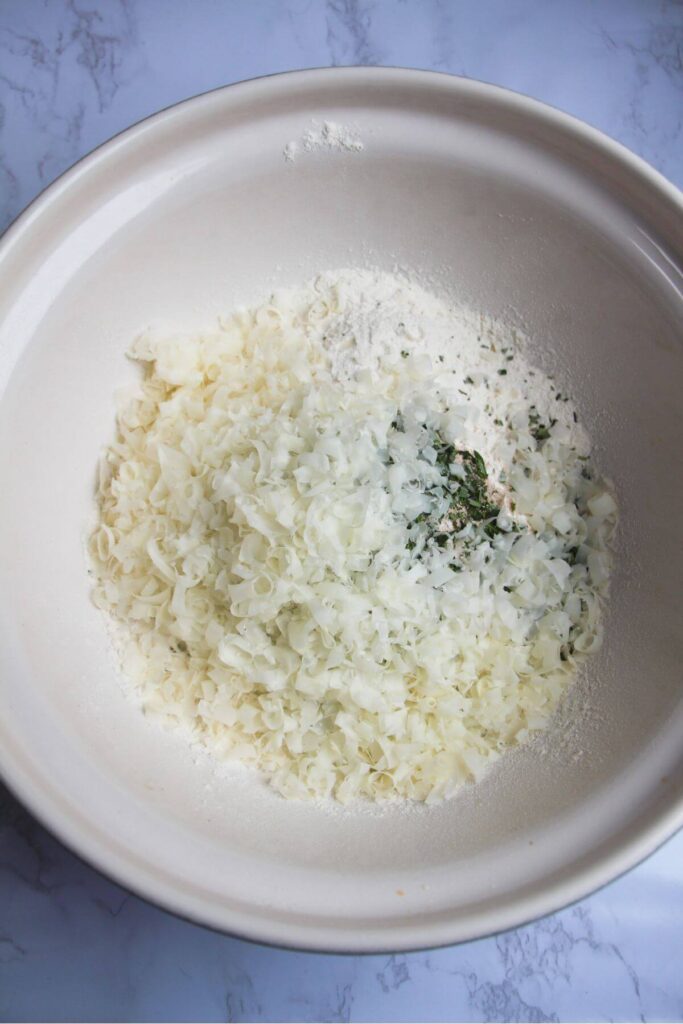
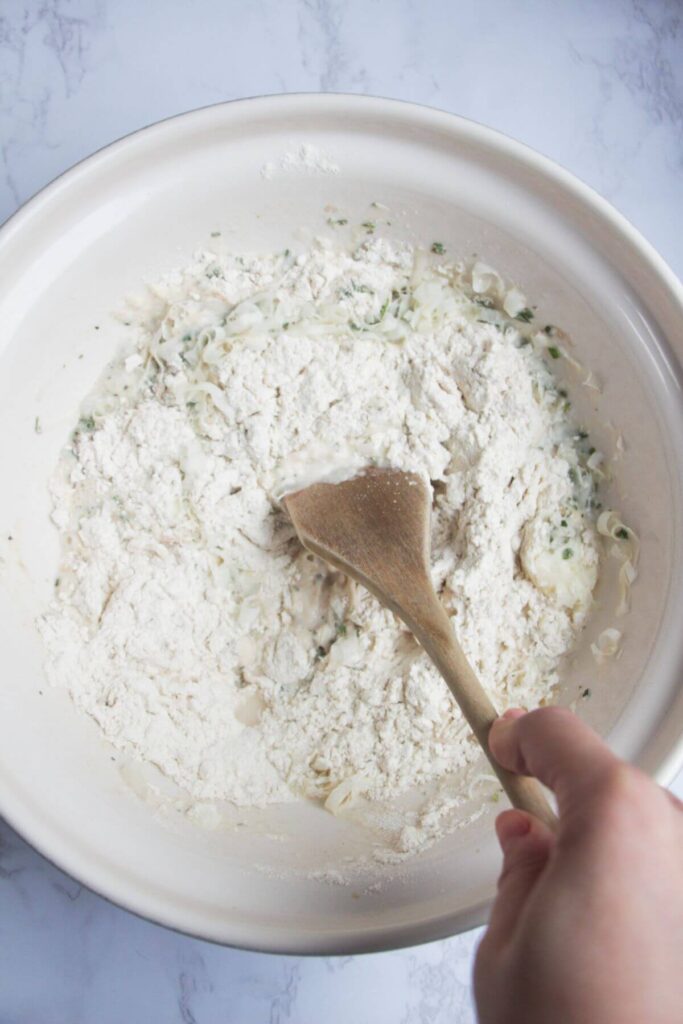
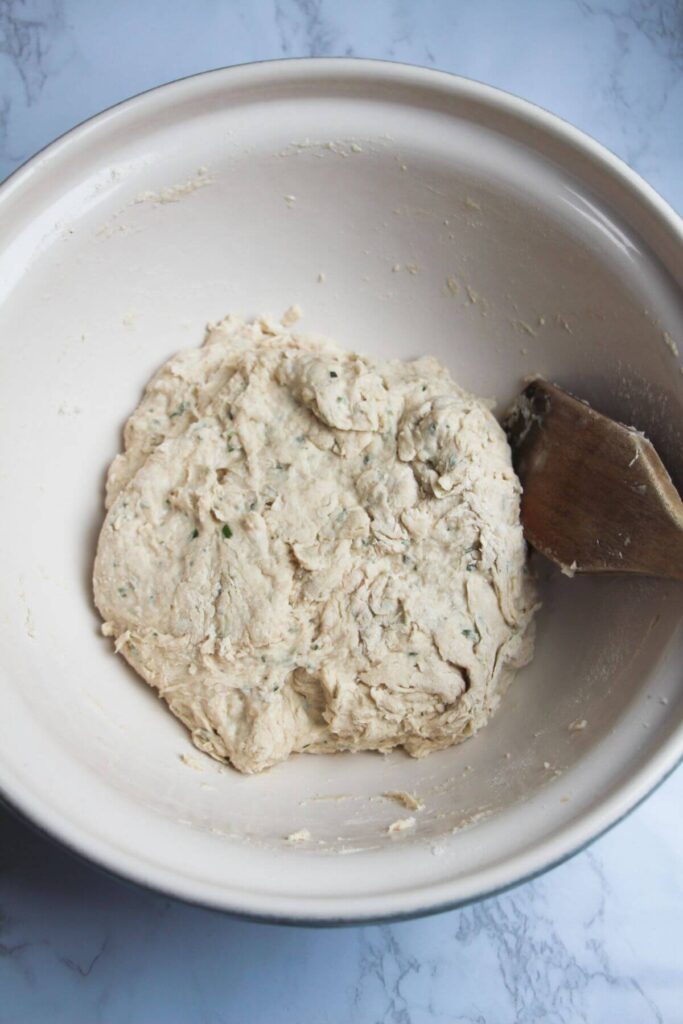
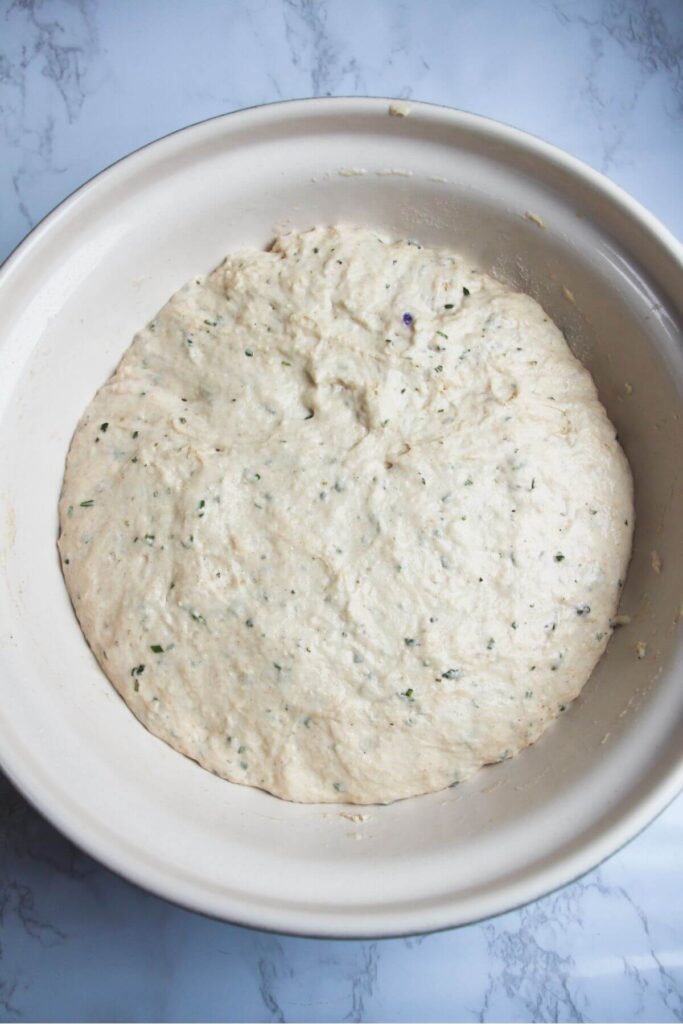
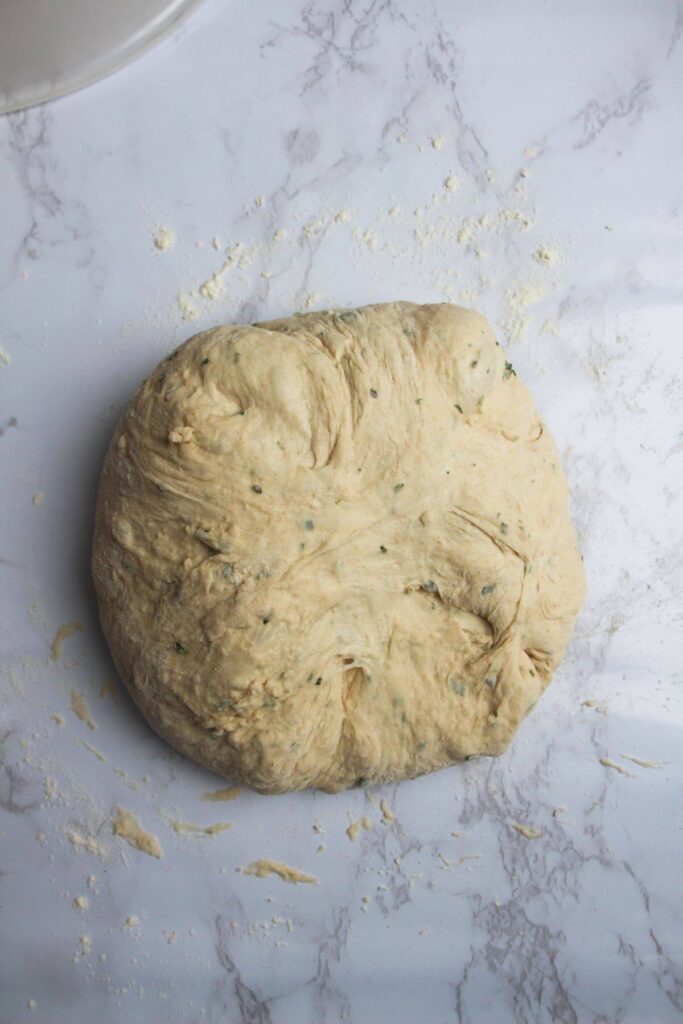
Mix flour, instant yeast, salt, grated parmesan and chopped rosemary. Pour in the water and mix to combine into a shaggy dough, making sure there are no streaks of flour. Cover with cling film and let the dough rest in a warm place until it’s doubled in size, is looking super wobbly and there are lots of bubbles on top.
PRO TIP: The time it takes for your dough to rise is going to completely depend on the temperature and the humidity of your kitchen. In summer it can take as little as 45 minutes to rise, but in winter it can take up to 2 hours. Take a photo of the dough as you cover it so you can easily compare and check in with how it’s progressing.
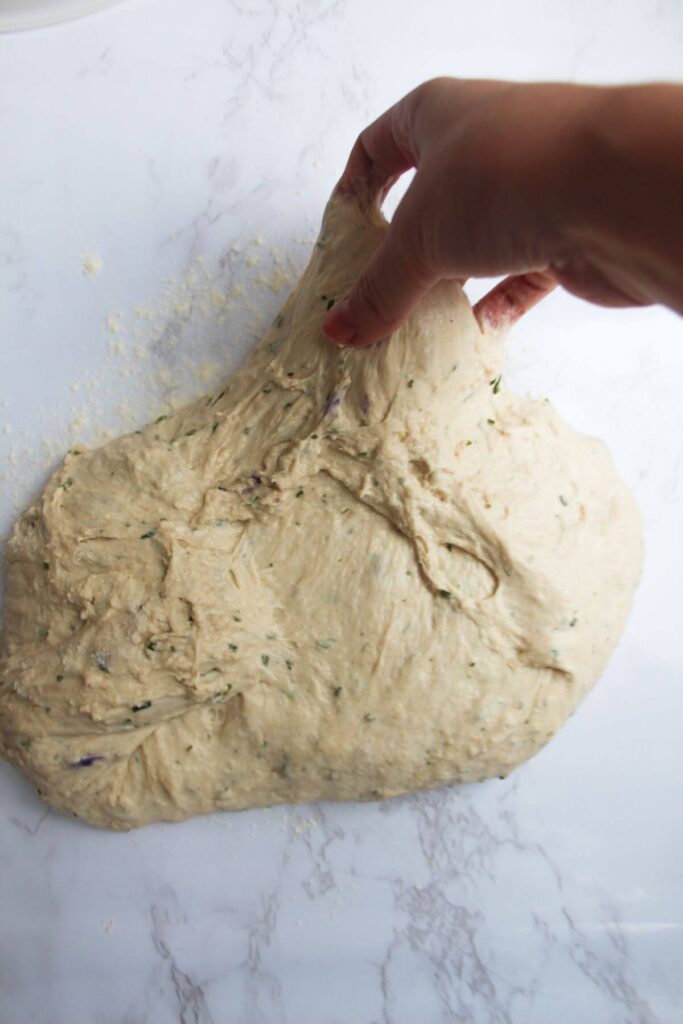
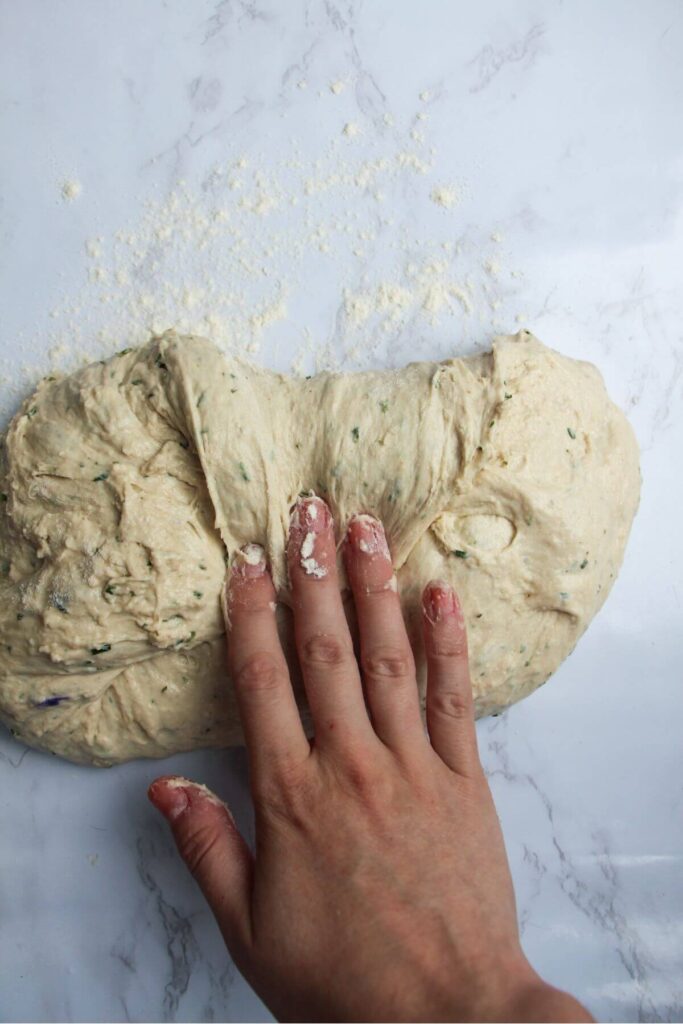
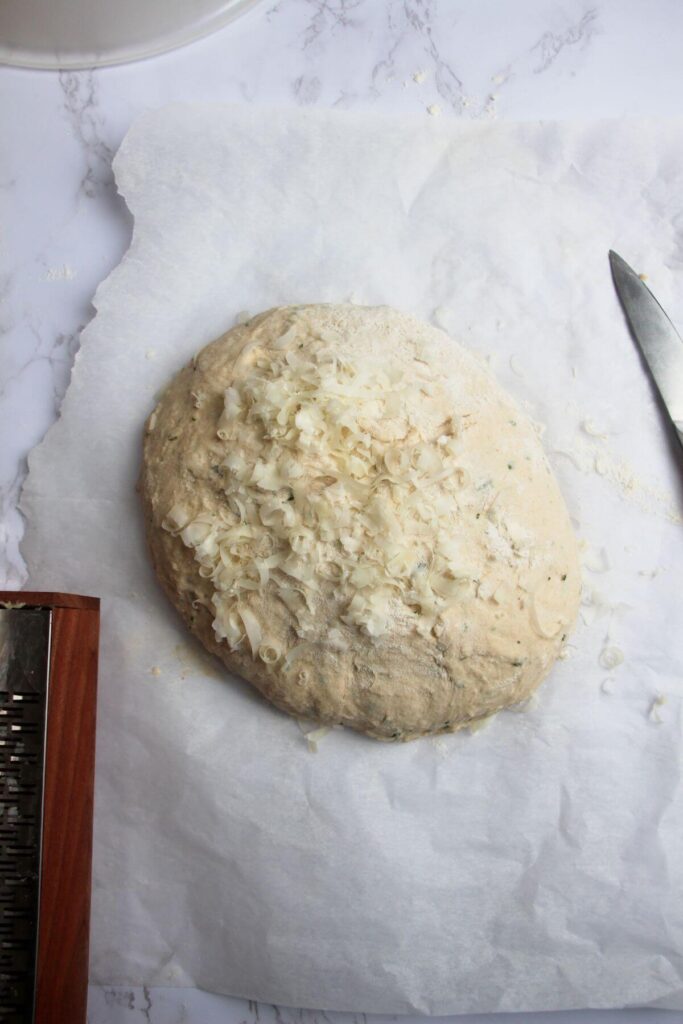
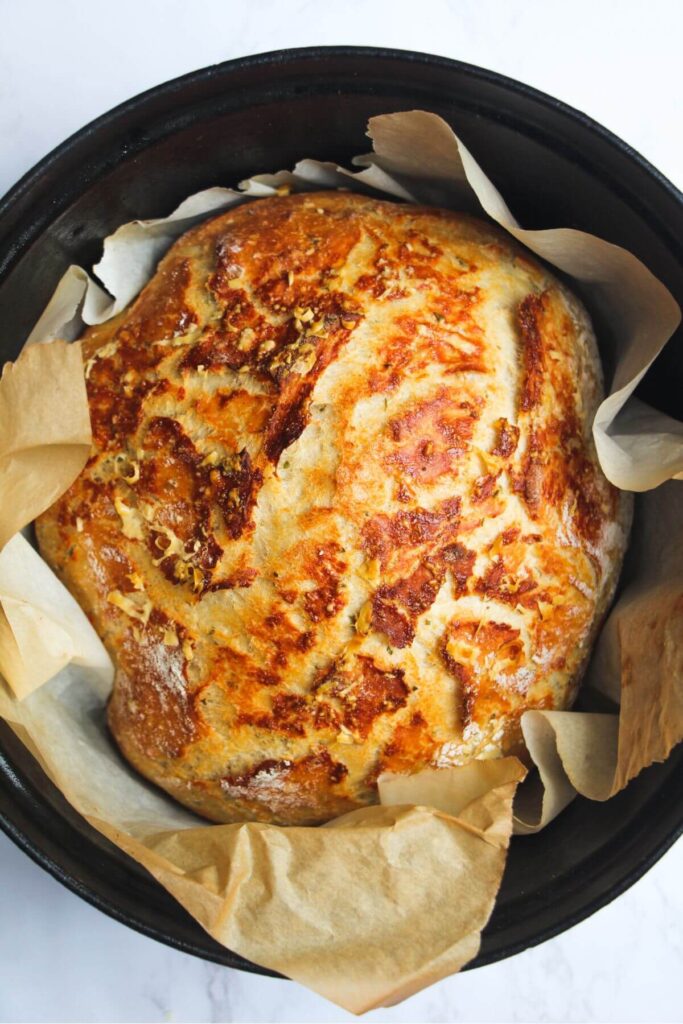
Turn the dough out onto a lightly floured surface and fold each corner up into each other, to create a very rough ball. Flip the dough onto a piece of baking paper and with floured hands, arrange it into a ball. If it’s a bit messy that’s totally fine! Make a cut in the dough with a sharp knife, then scatter more parmesan on top.
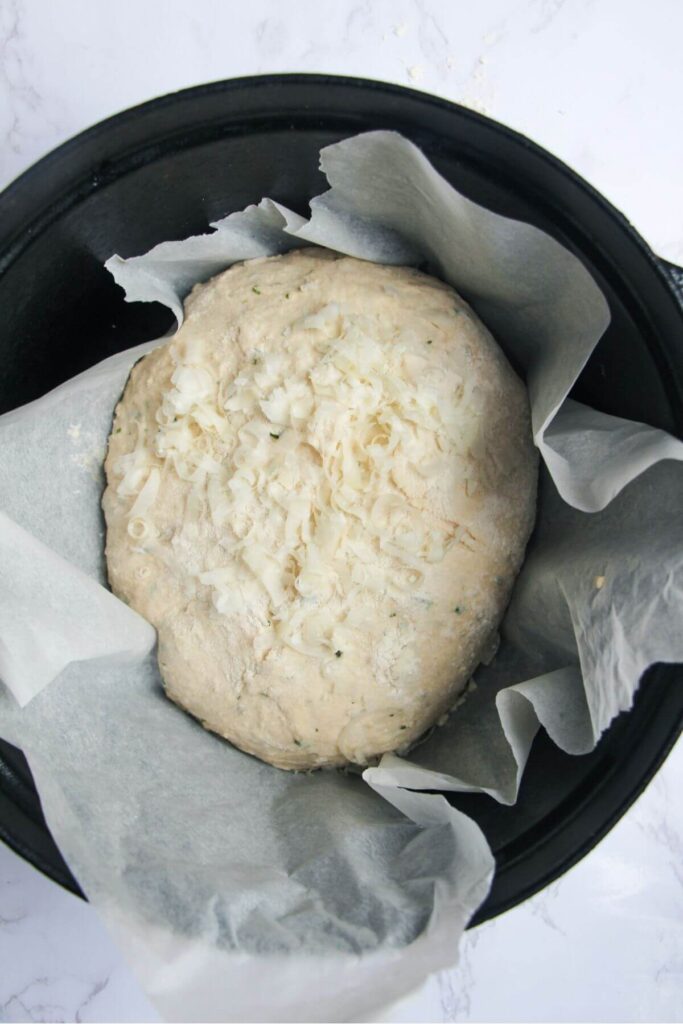
Transfer the dough (on the baking paper) into a preheated Dutch oven, a large pot that has a lid, a pizza stone, steel or a sheet pan. Bake for 30 minutes with the lid on, then remove the lid and bake for another 15 minutes.
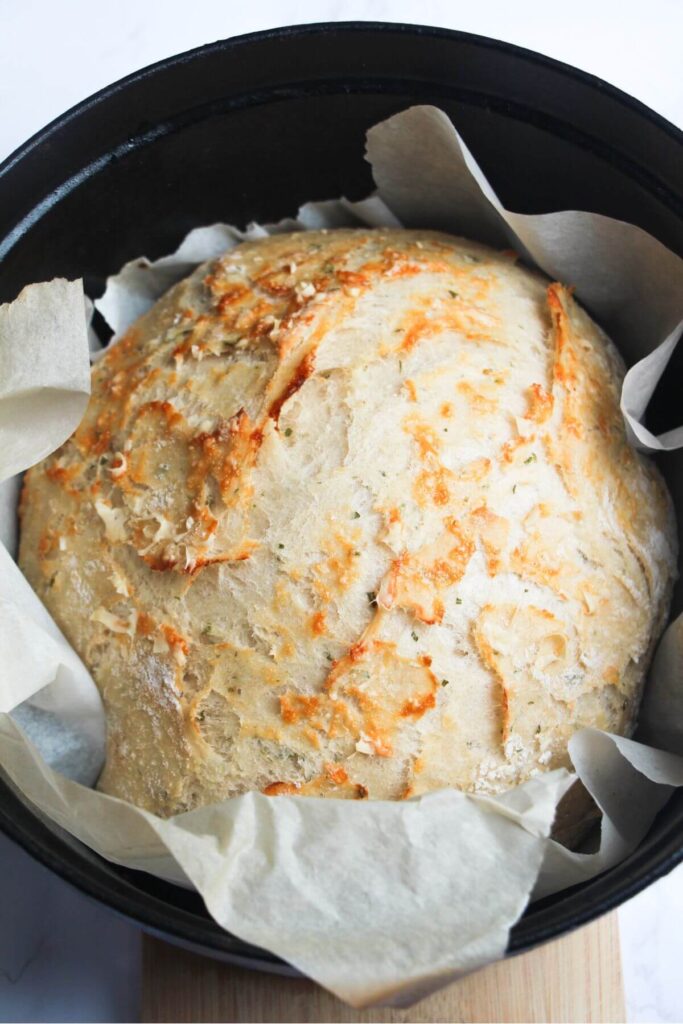
Let the bread cool on a wire rack before slicing and devouring. Serving it with roasted garlic butter is highly recommended.
No Dutch oven? Here are two alternatives
- Use a regular, large stock pot. Just make sure it’s oven-proof! If it has a lid, that’s great, otherwise, you can use a baking tray/sheet pan on top, or cover the pot with aluminium foil. You won’t need to pre-heat a regular pot (it will heat too quickly and could burn the base of your bread).
- Use a pizza stone, pizza steel or regular sheet pan or oven tray. To mimic the steam-filled environment inside a pot or Dutch oven that’s crucial for achieving a lovely, crispy crust, you’ll also need a small oven-proof dish filled with about 1 cup of water. Place it on the rack underneath the bread as it bakes for the first 30 minutes, and then you can remove it for the last 15 minutes of baking. Pre-heat your pizza stone or steel, but don’t worry about pre-heating a regular sheet pan or oven tray (like a regular pot, it will heat too quickly and could burn the bottom of your bread).
How to make the bread ahead of time
This recipe is WONDERFULLY adaptable based on your schedule. Once mixed, you can cover the dough and pop it into the fridge for up to 2 days, then just bake it whenever you’re ready.
Similarly, at any point during the rising time you realise you aren’t going to have time to bake it that day, you can pop it in the fridge and come back to it later.
Take the dough out of the fridge about 45 minutes before you want to bake it (you can pre-heat your oven during this time), just to take the chill out of the dough.
Got a question?
Yes! Dried rosemary (or another herb like thyme, marjoram or oregano) is perfectly fine in this recipe.
Yes, plain flour is fine in this recipe. The texture of the finished bread won’t be QUITE as light and airy, but it’ll still be wonderful.
Active yeast is totally fine to use, but you’ll need to activate it first. To do that, sprinkle it on top of the lukewarm water and let it sit for about 10 minutes. You’ll see it foaming up – this is a sign the yeast is alive and will work! After 10 minutes, continue with the recipe and add the yeasty water.
The bread will keep well for about 3 days, stored at room temperature in a bread bag or container. The crust will soften after day 1, and I like to pop slices in the toasted to freshen up after day 1 too. It also freezes really well. Slice then pop into zip lock bags to freeze, then you can defrost straight in the toaster.
Why should you bake with grams?
Baking is all about precision, and while this is a flexible recipe, you’ll get the best result if you weigh your ingredients, rather than use cup measurements. Cups are just too inconsistent and can vary hugely based on how you pack your flour, so I always recommend weighing ingredients when baking.
I have a simple digital scale I found on Amazon and there are lots of cheap options on there.
Like this recipe? Here are more baking ideas you might enjoy


If you make this recipe, I’d love to hear from you! You can leave me a comment below.
Print
The EASIEST No Knead Rosemary Parmesan Bread
- Total Time: 1 hour 50 minutes
- Yield: 1 large loaf 1x
- Diet: Vegetarian
Description
This super fragrant, super savoury rosemary parmesan bread is truly the easiest bread recipe you’ll ever make. No kneading, no long or overnight rise here – just mix, let rise until doubled and bake. It’s golden, crispy, airy, and light deliciousness you’ll love.
You’ll need either a Dutch oven, a regular large stock pot or a pizza stone, pizza steel, a regular sheet pan or a baking tray to bake your bread on.
Ingredients
- 450g bread flour (or use plain flour) + more for shaping
- 2 teaspoons instant yeast
- 2 teaspoons salt
- 1 cup grated parmesan cheese + 1 tablespoon to top
- 2 tablespoons rosemary, finely chopped
- 375g lukewarm water
Instructions
- Mix the dough. Add 450g bread flour, 2 teaspoons instant yeast, 2 teaspoons salt, 1 cup grated parmesan and 2 tablespoons of finely chopped rosemary to a large mixing bowl. Give it a mix to combine, then pour in 375g lukewarm water. Mix with a wooden spoon or spatula until a shaggy dough forms, making sure there are no streaks of unmixed flour. Cover the bowl with cling film and let it rise in a warm place until it’s doubled in size, and looks super bubbly and wobbly. This can take anywhere from 45 minutes if you’re in a hot climate, to 2 hours. Take a photo of the dough as you cover it so you can easily check to see how it’s going – watch the dough, rather than the clock. PRO TIP: You can put the dough in the fridge at this point, for up to 2 days. Then just remove it about 45 minutes before you’re ready to bake and proceed with the recipe.
- Heat your oven. Once the dough has increased in size by about 50%, heat your oven to 250C/480F fan and place your dutch oven or pizza stone/steel inside. PRO TIP: If you’re using a regular aluminium pot or regular sheet pan/oven tray you don’t need to preheat them.
- Shape the dough. Lightly flour a clean, flat surface and turn the risen dough out onto it. Scatter another tablespoon of flour on top, then using a bench scraper or with floured hands, pick up each edge of the dough and fold it back onto itself to form a very rough ball. Set a piece of baking paper that fits inside your dutch oven, next to the dough, then turn the dough onto it, so the seam side is down. Use both hands to rotate the dough and form it into a rough ball. Don’t worry if it’s not perfect or looks a little flat – this is rustic bread! Make a crisis cross slash in the top of the dough, then sprinkle the extra tablespoon of grated parmesan on top.
- Bake the bread. Carefully remove your pre-heated Dutch oven from the oven, then transfer the dough, still on the baking paper, into the pot and put the lid on (or use a sheet pan/aluminium foil if your pot has no lid). Bake for 30 minutes, then remove the lid and bake for another 15 minutes, until the top is golden brown and the bread is smelling gorgeous. Transfer it to a wire rack to cool for about 15 minutes, then slice and devour. PRO TIP: If you’re using a pizza stone, steel or baking tray, place the dough on the baking paper onto it in the oven, then set a small oven-proof dish filled with 1 cup of water underneath it. Bake for 30 minutes, then take out the dish with the water in it for the last 15 minutes.
Notes
INGREDIENT NOTES: It’s SUPER important you use instant yeast when following this recipe as written. If you only have active yeast, that’s fine, but you will need to sprinkle it on top of the lukewarm water and let it sit for 10 minutes first, before adding it to the flour mix. This is going to activate the yeast. If you try adding active yeast straight into the bowl, you’ll end up with strange grainy yeasty bits throughout your bread and it won’t rise as well. Using bread flour gives the bread a lovely, light, airy result, but you can use regular plain flour in this recipe too.
SUBSTITUTIONS: You can use dried rosemary here (or another herb like thyme, marjoram or oregano) if you don’t have any fresh rosemary.
NO DUTCH OVEN? No problem. You can use a regular, large stock pot (just make sure it’s oven-safe!) that has a lid. If it doesn’t have a lid, just use an oven tray/sheet pan or use aluminium foil. If you use a regular pot, you don’t need to preheat it. You can also use a pizza stone, steel or a regular baking tray/sheet pan and a small oven-proof dish with water in it to mimic the result you get from a pot. The key to the crackling, crispy crust of the bread is the steam that’s produced by a dutch oven, so this is a way you can get that result without a pot. Preheat the pizza stone or steel, then set the dish of water in the tray underneath in the oven when you put the dough in. Remove the water dish for the last 15 minutes of baking.
MAKE AHEAD: This is a very flexible recipe. You can mix the dough, then cover the bowl and pop it in the fridge for up to 2 days, then continue with the recipe when you’re ready. Bring the dough out of the fridge as you’re pre-heating your oven, to allow some of the fridge chill to come off it. I love to mix the dough in the evening, pop into the fridge and then bake it the next morning!
- Prep Time: 5
- Rising time: 60
- Cook Time: 45
- Category: baking
- Method: oven
- Cuisine: mediterranean
Nutrition
- Serving Size: 2 slices
Keywords: no knead bread, artisan bread


0 Comments