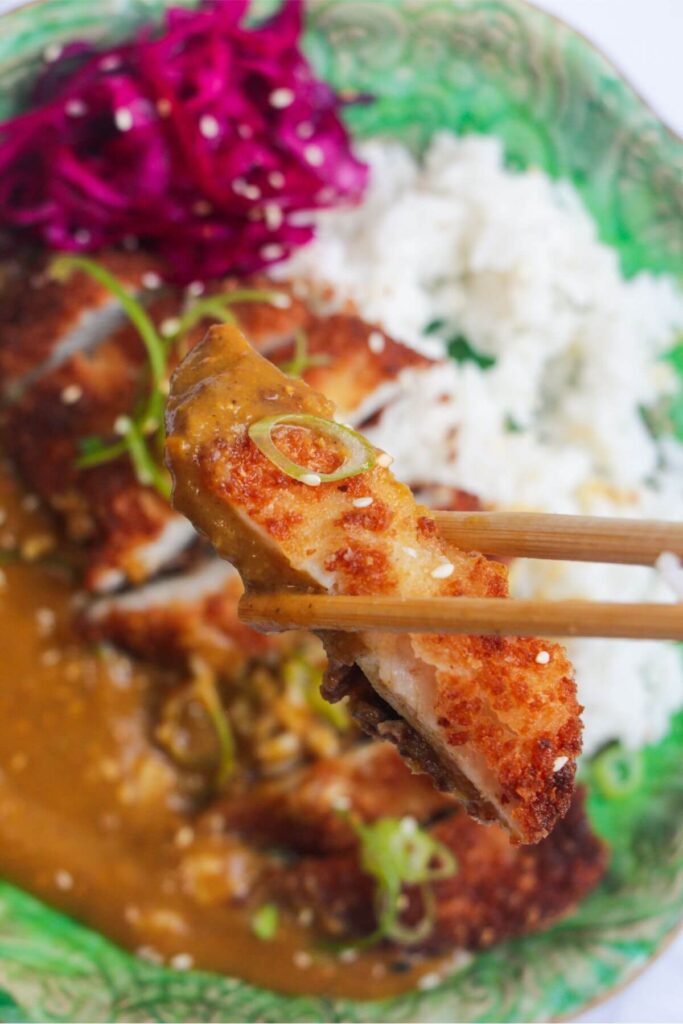
Crispy, golden chicken piled on top of creamy, sweet, spicy sauce and fluffy rice makes chicken katsu curry an undisputed fakeaway favourite. It’s quicker and easier to make than you’d think, and uses mostly store-cupboard ingredients.

I was only introduced to katsu curry when I visited the UK – for some reason, I hadn’t come across it in New Zealand and was surprised by how much the Brits truly LOVE katsu curry. Especially the Wagamama katsu curry. But then I tried it, and I understood. Crispy chicken, creamy, spicy, super umami sauce and rice combine to make a very tasty plate of food, and the perfect fakeaway.
This recipe is my twist on the Japanese favourite. The ingredients are relatively cheap and really, aside from the chicken, you probably have everything you need to make this wonderful family-friendly fakeaway already!
Why you’ll love this recipe
- Learn how to make a takeaway favourite at home.
- Uses mainly cheap and store-cupboard ingredients.
- Minimal hands-on time – most of the time is just letting the sauce simmer.
Ingredients
Nothing is tricky to find here – everything can be picked up from a regular grocery store.
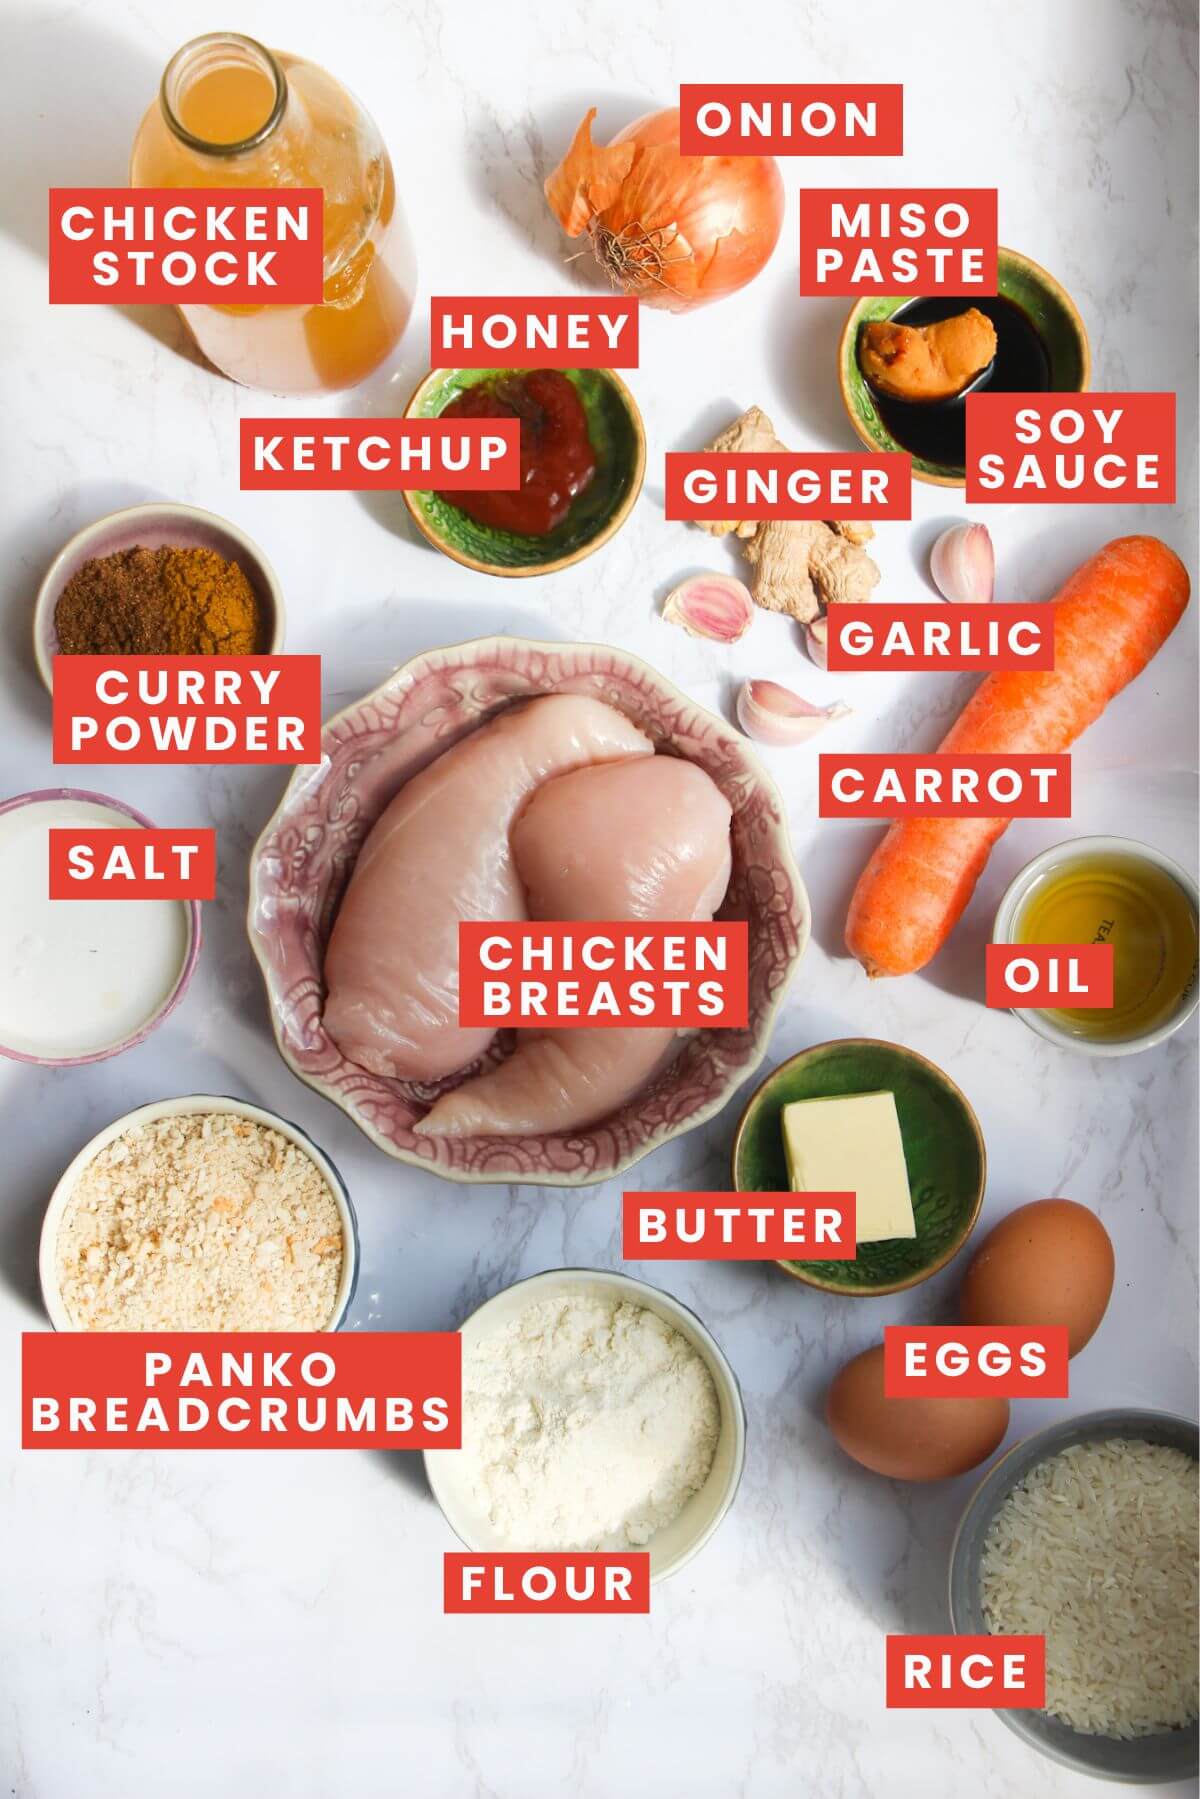
- Chicken breasts. Chicken breasts love to dry out, but because we’re cutting them in half, they have a super quick cook time so they’re much easier to manage. You could use chicken tenders, or use thighs. Thighs will need longer to cook, so just keep that in mind if you do go for them.
- Katsu sauce. I don’t peel the ginger here because it’s fiddly, and because the sauce is blended at the end anyway, I don’t think you can tell. The ketchup may seem like a strange addition, but it provides a sweet, acidic layer to the sauce. I LOVE soy sauce and miso paste here too, as they also provide another layer of lovely umami flavour, but if you don’t have miso, you can leave it out. Regular light soy sauce is fine.
- Panko breadcrumbs. These Japanese breadcrumbs are lighter and chunkier than regular breadcrumbs, and they give a crispier coating. You should be able to find them easily at large grocery stores, otherwise, use regular breadcrumbs.
You’ll also need either a stick (immersion) blender, a regular blender or a food processor for the recipe, to blitz the sauce into the super smooth consistency we want in a katsu.
How to make it
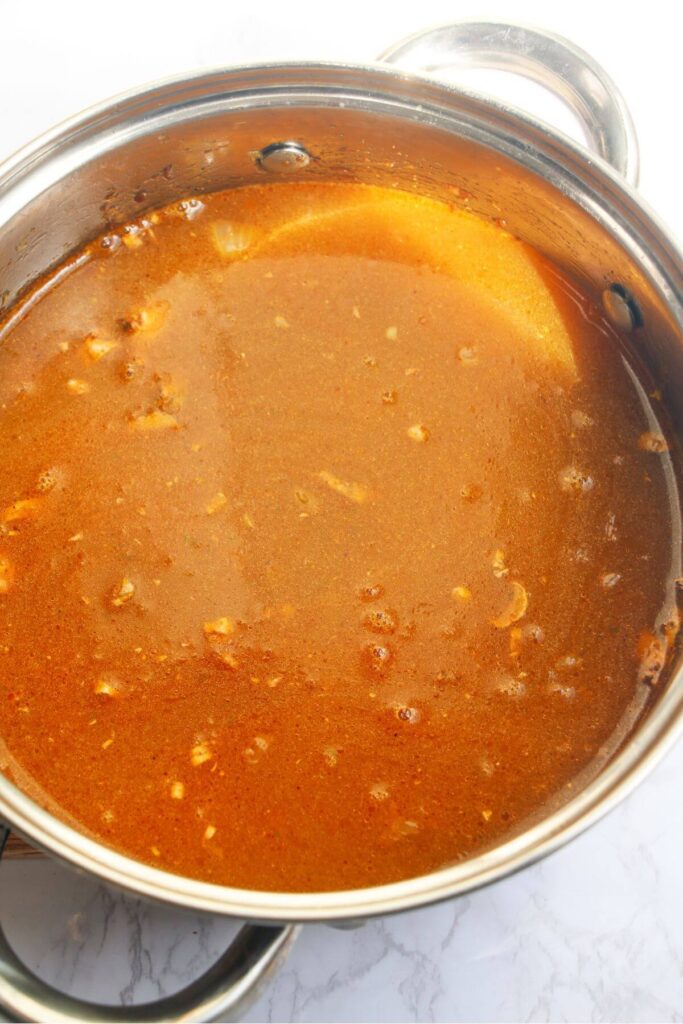
Start with your curry sauce – my version uses vegetables to make a thick, glossy sauce, rather than relying on flour, which I prefer. Cook your diced onion and chopped carrots in butter, then add ginger, garlic, curry powder, soy sauce, ketchup, honey and miso paste if you’re using it.
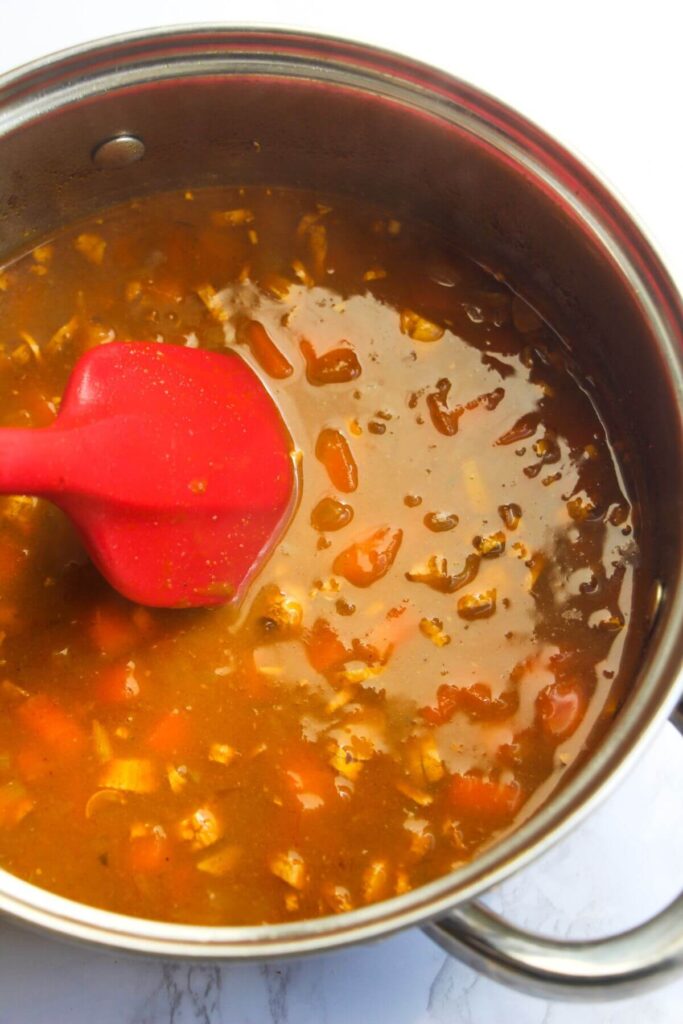
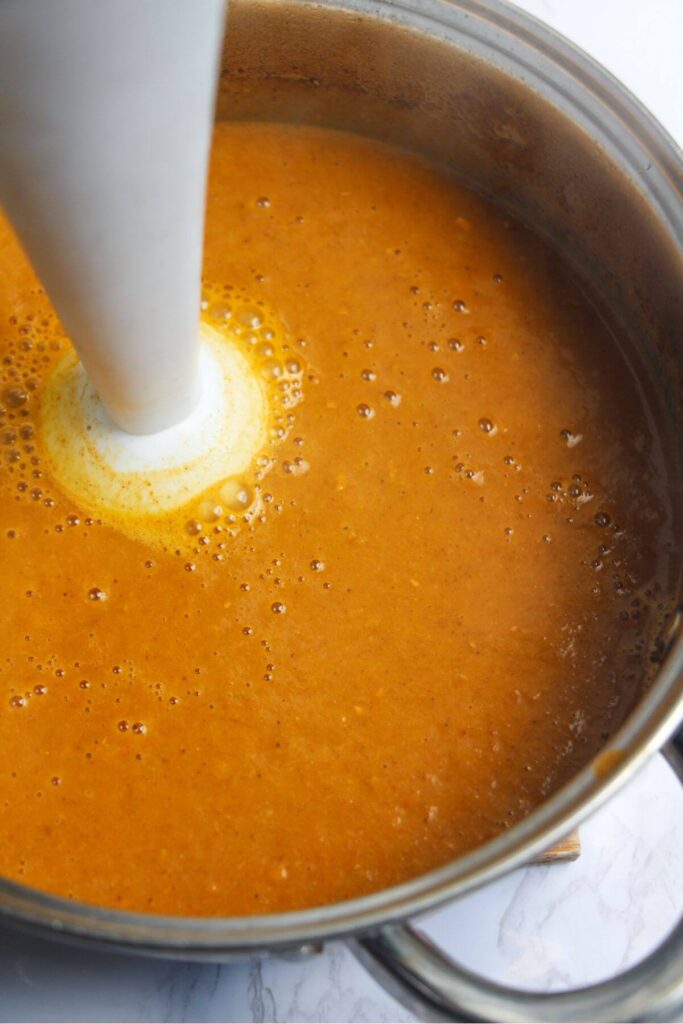
Pour in the stock, then leave to simmer for about 20 minutes. Cook your rice while the sauce simmers. The sauce should reduce by about one-third, and the veggies should be super soft. I like to cut into a carrot to check! At this point, use your immersion blender to blitz it into a super smooth sauce.
PRO TIP: I like to use an immersion blender here because it’s easier and creates less mess and washing up – but you can use a regular blender or a food processor. If you do, make sure you let the sauce cool for about 10 minutes before blending, because if you add hot liquid to a blender or food processor it can explode out the top and make a big mess.

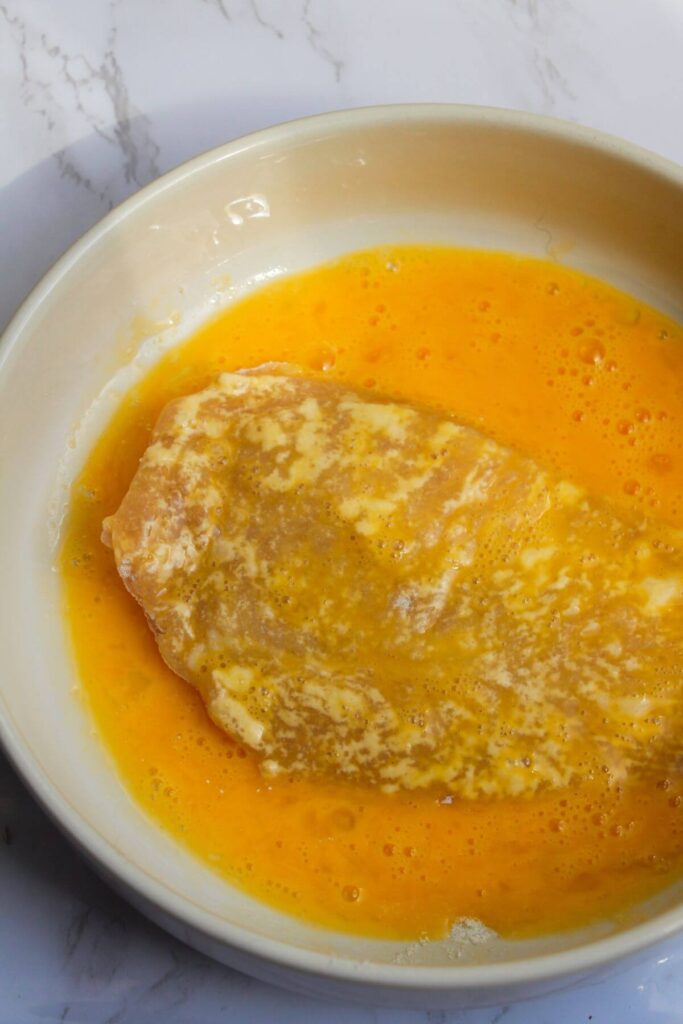
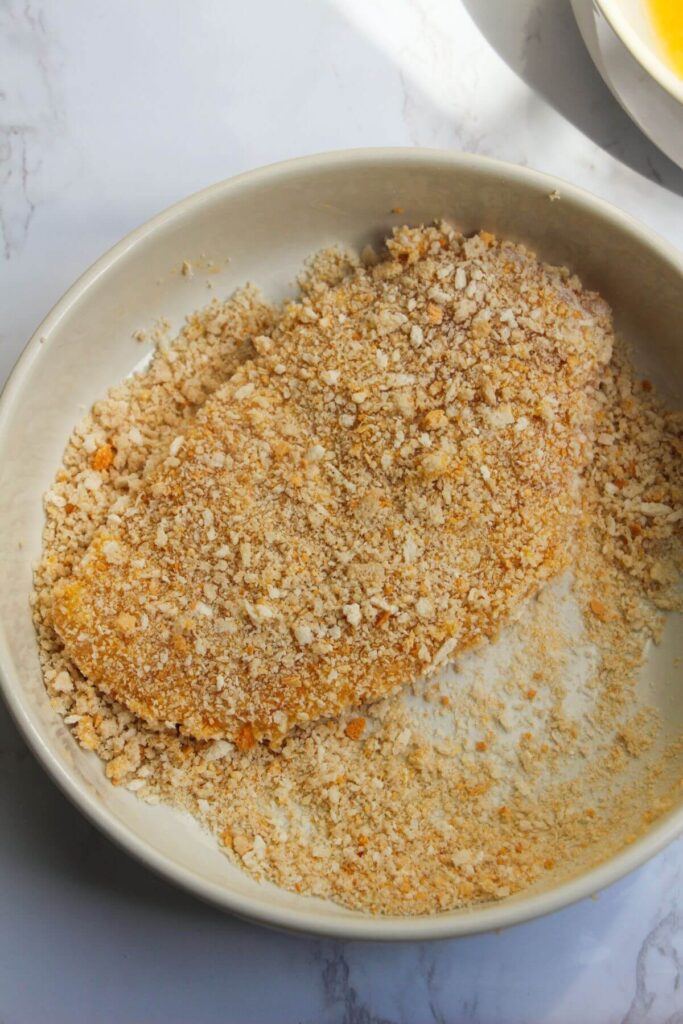
Slice each of the chicken breasts down the middle, lengthways, so you’re left with 4 pieces. Sprinkle a little salt over each piece, then dunk each piece in flour, then egg and then the panko breadcrumbs.
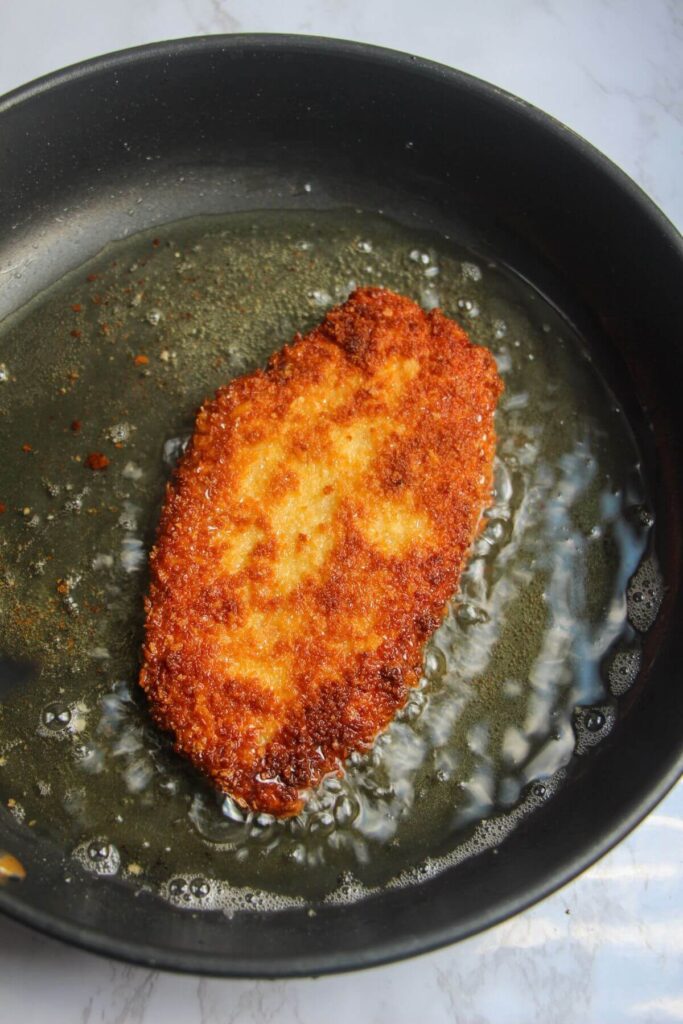
Heat your oil in a pan (I like to use a non-stick pan just to make sure no breading sticks to it), the cook the chicken for about 3 to 4 minutes on each side – it doesn’t take long. Transfer it to a paper towel to drain, and then you’re ready to serve.

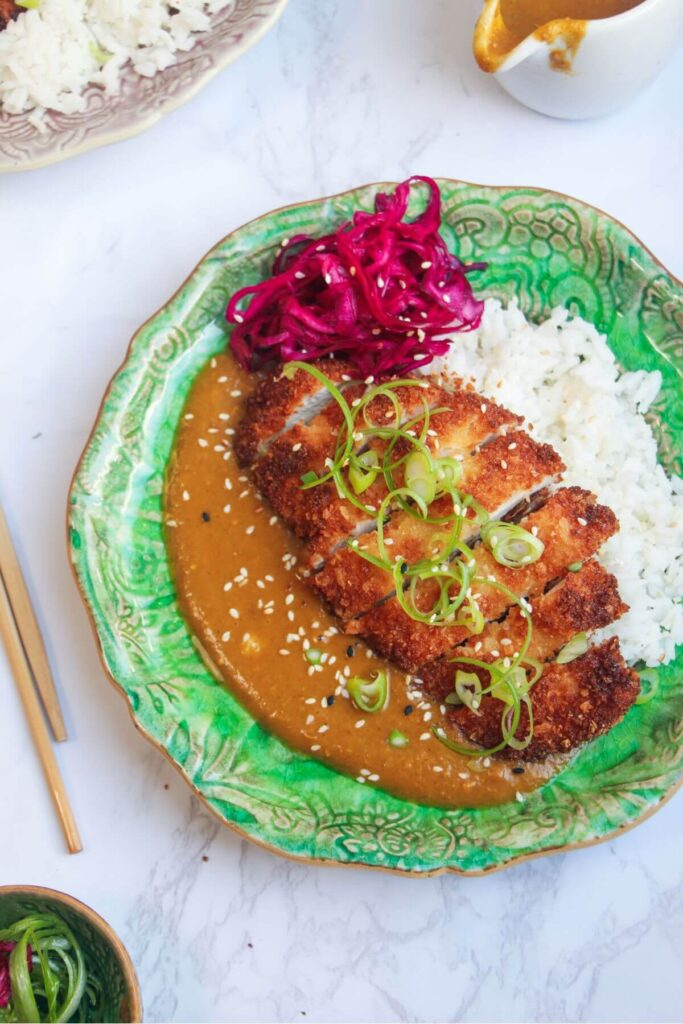
Slice the chicken, then divide your rice between plates and pour over the katsu sauce. Place the chicken on top, then add any fresh garnishes and you’re done.
Got a question?
Katsu is a mild curry, with a hint of sweetness, so it’s a great family-friendly option. Remember though, this does depend on the heat of your curry powder. Check yours is mild if you’re worried – some are spicier than others.
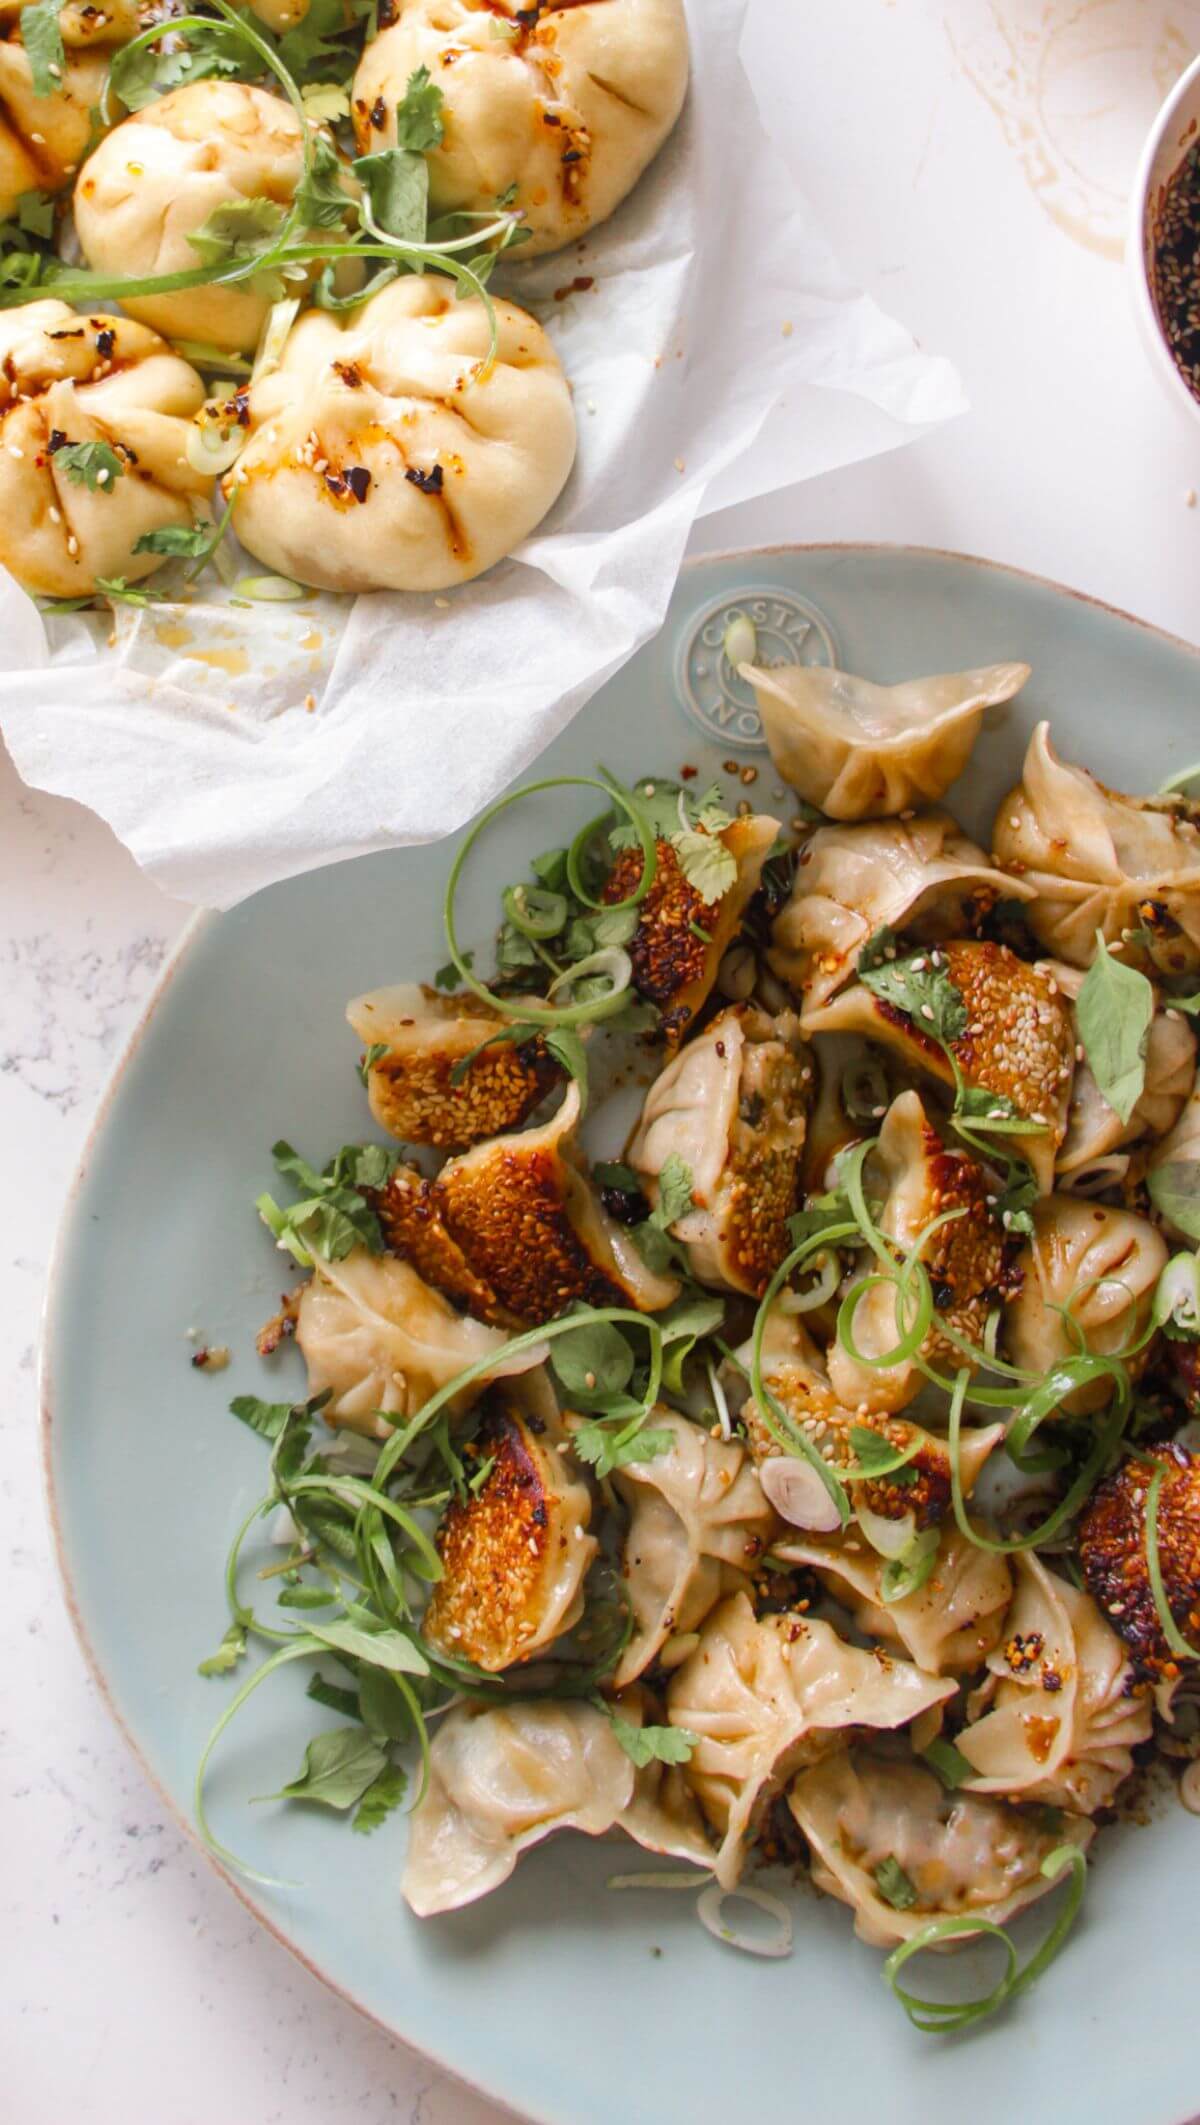
You could add some extra steamed or stir-fried greens – spinach, bok choi, asparagus or tenderstem broccoli would be great. You could also stuff the chicken into soft, fluffy bao buns! Or, pile it on top of poke bowls or 2-ingredient dough garlic naan.
You can make the sauce up to 5 days in advance, and you can bread the chicken pieces the day before you want to cook them. The curry is best eaten right after the chicken is cooked – it will lose its crispiness if you store it in the fridge (but it will keep for 3 days – it just won’t be crispy when you reheat it). You could try reheating it in the oven or in an air-fryer to get a little of the crispiness back, but microwaving it will make it soggy.
This recipe uses the vegetables themselves to thicken the sauce, rather than relying on thickeners like cornstarch or flour. Blending the sauce once the veggies are lovely and soft automatically creates a lovely, thick sauce.
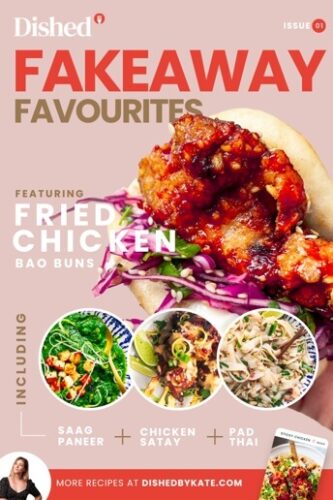
Do you have my FREE Fakeaway Favourites e-book?
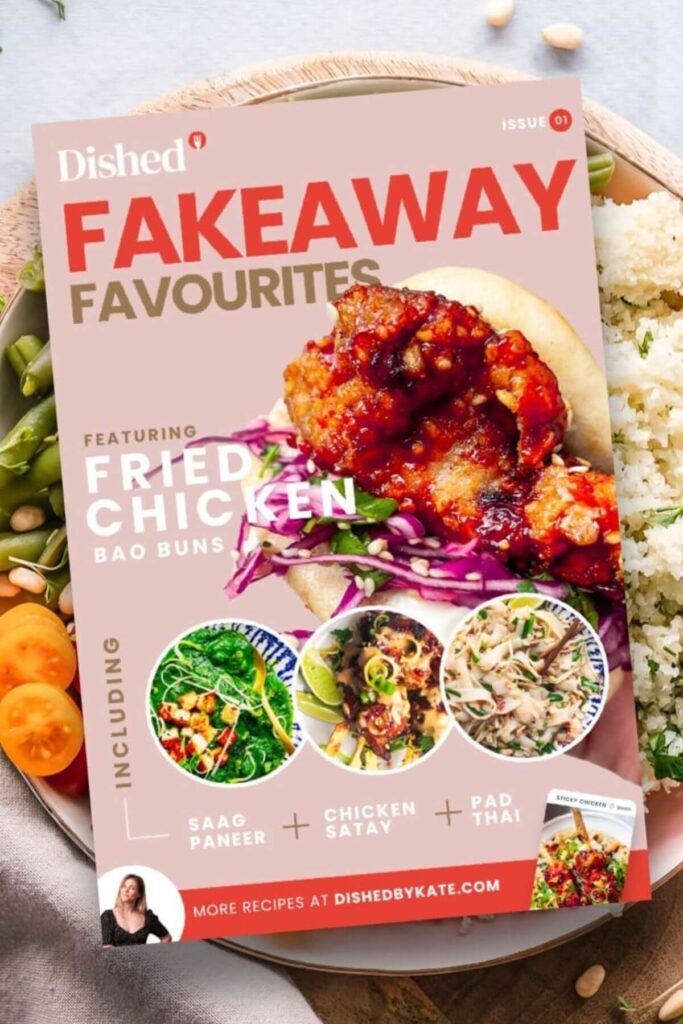
It’s filled with my absolute favourite takeaway dishes you can make at home!
From a quick pad thai and saag paneer, to Korean fried chicken, beef rendang and chicken satay, you’ll love exploring the book.
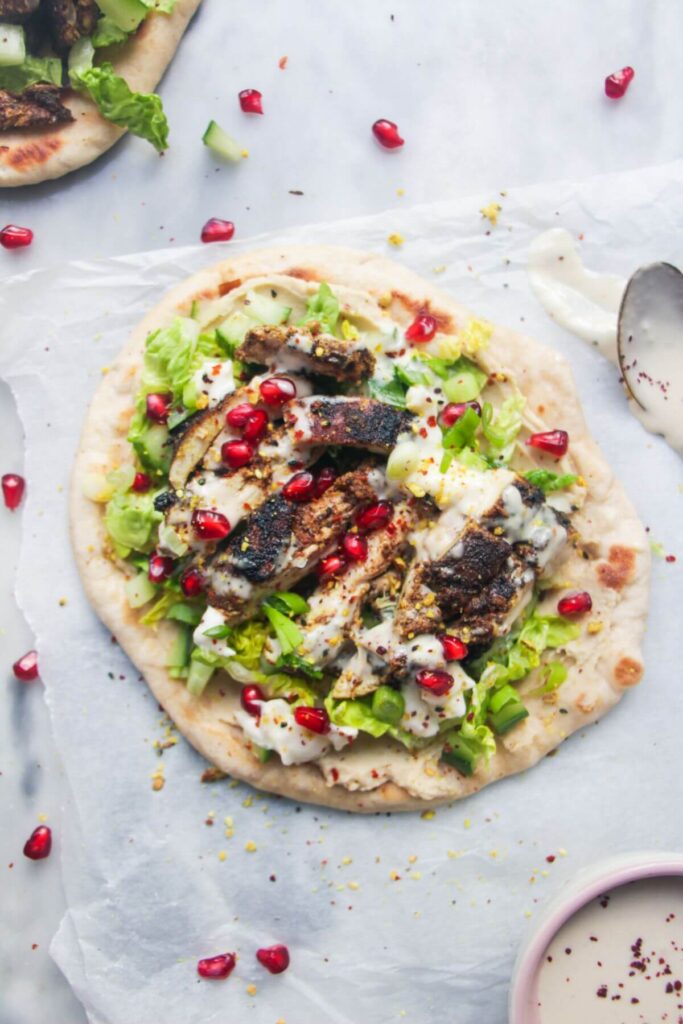
Like this recipe? Here are more you might enjoy
If you make this recipe, I’d love to hear from you! You can leave me a comment below.
Print
Crispy Chicken Katsu Curry
- Total Time: 40 minutes
- Yield: 4 servings 1x
- Diet: Low Salt
Description
Crispy, golden chicken piled on top of creamy, sweet, spicy sauce and fluffy rice makes chicken katsu curry an undisputed fakeaway favourite. It’s quicker and easier to make than you’d think, and uses mostly store-cupboard ingredients.
You’ll also need a stick (immersion) blender, a regular blender or a food processor for this recipe.
Ingredients
For the curry sauce –
- 2 tablespoons butter
- 1 carrot, chopped
- 1 onion, diced
- 4 garlic cloves, chopped
- 1-inch piece of ginger, chopped (or use 1/2 tablespoon of ginger paste)
- 2 tablespoons curry powder
- 1 tablespoon honey
- 1 tablespoon ketchup
- 1 tablespoon miso paste (optional)
- 1 tablespoon soy sauce
- 2 1/4 cups chicken stock
For the rice –
- 1 1/2 cups rice
- 3 cups water
- 1 teaspoon salt
For the breaded chicken –
- 2 boneless, skinless, free-range chicken breasts
- 1 teaspoon salt
- 1/3 cup plain flour
- 2 eggs
- 3/4 cup panko breadcrumbs
Instructions
- Make the katsu curry sauce. Set a small pot over medium heat, then add 1 tablespoon of butter. Let it melt, then add the diced onion and chopped carrot, and cook, stirring occasionally, for about 5 minutes until the onion has started to soften (you’ll see it start to change colour and become more transparent). At this point, add the crushed garlic and ginger and cook for another minute. Then add 2 tablespoons of curry powder and stir it through the vegetables so the spices can bloom. Add 1 tablespoon of honey, 1 tablespoon of miso paste (if you’re using it), 1 tablespoon of ketchup and 1 tablespoon of soy sauce and stir again. Finally, pour in 2 1/4 cups of chicken stock, stir, bring the sauce to a simmer then set the heat to low and let it simmer for 20 minutes until the veggies are super soft.
- Cook the rice. Add 1 1/2 cups of rice, 3 cups of water and 1 teaspoon of salt to a pot you have a lid for (or use a board or a plate as the lid if you don’t). Set the pot over high heat, and when you can see foam on top of the water, pop the lid on and turn the heat right down, then leave for 12 minutes. After that, turn the heat off and leave the pot with the lid on until you’re ready to serve.
- Prep the chicken. While the sauce cooks, prepare the chicken. Set yourself up with three separate bowls and a large plate or chopping board. Crack the eggs into one bowl and give them a good whisk with a fork, add 1/3 cup of flour to another bowl, then add 3/4 cup of panko breadcrumbs to another bowl. Carefully slice your chicken breasts, lengthways, so you’re left with four long pieces.
- Bread the chicken. Dunk each side of a piece of chicken into the flour, let any excess flour come off as you pick it up, then dunk each side in the egg, picking it up and letting any excess drip off into the bowl. Finally, transfer it to the bowl with the panko breadcrumbs, pressing the chicken into the breadcrumbs firmly, and picking up breadcrumbs from the bowl and scattering them on top. Turn the chicken over, pressing firmly to make sure it’s well coated. Transfer the breaded chicken to your prepared plate or chopping board, then repeat with the rest of the chicken. PRO TIP: Try to keep one hand as your ‘wet’ hand and the other as your ‘dry’ hand, so that you don’t end up with super messy, sticky fingers (use one for the egg, and the other for the flour and panko).
- Blend your sauce. After simmering for 20 minutes, your katsu sauce should have reduced and the veggies should be soft (cut into a carrot to check). Use a stick blender to carefully blitz the sauce until it’s super smooth and thick. Give it a taste, then add any salt if you think it needs it. Set aside while you cook the chicken. PRO TIP: If you’re using a regular blender or a food processor, make sure you let the sauce cool for about 5/10 minutes before blending – if it’s piping hot, it can make the lid of the blender/processor blow off and make a big mess.
- Cook the chicken. Over high heat, add 1/4 cup of oil to a large, ideally non-stick skillet or frying pan. Once it’s looking shimmery (this means it’s hot), add the breaded chicken, and cook for about 4 minutes on each side, until crispy and golden. You may need to do this in batches, depending on the size of your pan. Transfer to a plate or board lined with a piece of kitchen towel, then sprinkle with a little flaky sea salt.
- Garnish and serve. Divide the rice between plates, then pour over the sauce. Slice each breaded chicken fillet into pieces, and layer on top of the rice and sauce. Finish with a scattering of sliced scallions and sesame seeds, and dig in.
Notes
INGREDIENT NOTES: I love the deep savoury note the miso paste brings to the curry, but you can leave it out if you can’t find it. I don’t peel the ginger or the carrot – the sauce is blended up anyway and I don’t think you can notice.
MAKE AHEAD: The sauce can be made up to 5 days ahead of time, then stored in a container in the fridge until you’re ready to use it. You can bread the chicken a day in advance, but don’t cook it until you’re ready to serve – it’s tricky to reheat crispy, breaded chicken. The best way to do it is either in the oven (10 minutes at 180C/360F fan) or in an air-fryer (5 minutes at 200C/390F), but it’ll never be quite the same.
- Prep Time: 10
- Cook Time: 30
- Category: fakeaways
- Method: stove top
- Cuisine: japanese
Nutrition
- Serving Size: 1 bowl
Keywords: chicken rice curry, katsu curry


0 Comments