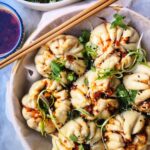
Korean Chicken Steamed Bao Buns
These sticky Korean chicken steamed buns wrap juicy, sweet, spicy gochujang chicken in gorgeously soft, fluffy dough. They’re easier to make than you might think and, frankly, irresistible. Brilliant for using leftover roast chicken, they freeze beautifully, and can be steamed or pan-fried. Drizzle with lots of spicy chili oil and dumpling dipping sauce for a fabulous better-than-takeout night in.
Servings: 12 buns
Calories: 490kcal
Ingredients
For the chicken -
- 1 lb (500g) boneless, skinless, free-range chicken thighs (you can also use pre-cooked chicken or use leftovers from a roast chicken)
- 1 teaspoon salt
- 1 tablespoon olive oil
For the sticky gochujang sauce -
- 1 tablespoon sesame oil
- 2 garlic cloves crushed
- 1 tablespoon ginger grated (or use ginger paste)
- 2 tablespoons gochujang paste
- 2 tablespoons light soy sauce
- 1 tablespoon rice vinegar
- 3 tablespoons honey or use sweet chili jam
For the bun dough -
- 350 g all-purpose flour
- 2 teaspoons baking powder
- 2 teaspoons instant yeast
- 1 teaspoon salt
- 1 ½ tablespoons neutral oil
- 180 g lukewarm water
To serve -
- 1 tablespoon chili oil
- 1 tablespoon toasted sesame seeds
- 2 scallions (spring onions), finely sliced
- A handful of fresh cilantro (coriander)
Instructions
- Make the chicken (skip this step if you're using leftover or rotisserie chicken)Heat your oven to 400℉ (200℃) and line a sheet pan with parchment paper. Arrange the chicken thighs on the tray and scatter with salt and 1 tablespoon of olive oil. Pop into the oven and cook for 20 to 25 minutes, until charred and golden. Let cool for a few minutes, then roughly shred or chop into small pieces.
- Mix the gochujang sauce with the chicken.Add 2 tablespoons of gochujang paste, 2 tablespoons of light soy sauce, 3 tablespoons of honey (or sweet chili jam), 1 tablespoon of rice vinegar, crushed garlic and ginger to a large mixing bowl. Mix well, then add the chicken and toss to coat in the sauce.
- Make the dough.Add 350g flour, 2 teaspoons of baking powder, 2 teaspoons of instant yeast, and 1 teaspoon of salt to a large bowl. Mix with a large wooden spoon or spatula, then add 1 ½ tablespoons of neutral oil and 180g lukewarm water. Keep mixing with the spoon until it comes together into a rough, shaggy dough.At this point, turn it out onto a lightly floured surface and knead for about five minutes, until it’s soft, supple, and smooth. It shouldn’t be sticky.
- Form the buns. Roll the dough into a long sausage, then cut it into 12 equal pieces. You can weigh the dough to make the pieces super accurate, but don’t worry if you don’t have a scale.Working with one piece at a time and keeping the others under a clean kitchen towel to prevent them from drying out, form them into a ball. Flatten the ball out into a circle, then using a rolling pin, roll it out to a circle about 4 inches, or 10cm in diameter. If you can, try to make the edges thinner than the middle to help prevent any leakage.
- Pleat and seal the buns.Place a couple of heaped tablespoons of sticky chicken into the middle of the dough. Start with the side furthest away from you. Pick up the edge of the dough and fold a small piece back on itself. The dough will stick to itself to make this easier for you. Repeat this action, rotating the bun all the way around as you do. As you complete the circle, press the dough together at the top to seal the bun, then give it a little twist.If you're steaming the buns, place them into a lined steamer basket and repeat with the remaining dough. If you're pan-frying them, place them on a parchment paper-lined plate and cover.
- Let the buns rest briefly.Once all the buns have been formed, they need to rest for 30 minutes to puff up a little. This can take longer or shorter depending on the temperature in your kitchen.
- Cook the buns.Once the buns are looking a little puffier, they're ready to cook. If you're steaming them, place your steamer on top of a pot of boiling water, cover, and steam for 10 minutes. Remove the basket from the pot and set it aside to cool slightly.If you're pan-frying them, drizzle a little oil into a large, non-stick skillet you have a lid for. Set over medium-high heat, then add the buns. Cook for a couple of minutes, until the bottoms are golden, then pour in enough water to come about one-third up the sides of the buns. Lower the heat, pop the lid on, and steam for 10 minutes.
- Garnish and serve.I like to serve these directly from the steamer basket if I've steamed them, as it’s easier and looks fun! If you've pan-fried them, transfer them to a serving platter.Drizzle with 1 tablespoon of chili oil (or more if you like), chopped scallions, cilantro, and sesame seeds before serving while hot.
HOW TO TELL IF YOUR CHICKEN IS COOKED: Use a probe thermometer in the thickest part of your chicken - it should read at least 165℉ or 74℃. You can also cut into your chicken and check that there are no opaque or pink areas.
STAND MIXER INSTRUCTIONS: Add all the ingredients to the bowl of your mixer, then with the dough hook attached, knead at medium speed for about six minutes, until the dough is soft, supple, and not sticky to the touch.
PRO TIP: Take a photo of the buns as they go into the steamer basket so you can easily compare how they’re looking.
Notes
ON PLEATING THE DOUGH: I know this might seem a little tricky at first, but I promise it gets easier the more you do it. It’s basically a little ‘pinch and seal’ movement (take a look at the process shots earlier in this post for a demo of how I do it). The dough sticks to itself, which makes it easier. Don’t worry if it doesn’t look super pretty, it’ll still taste delicious!
STORAGE INSTRUCTIONS: The buns freeze really well. After cooking, pop them onto a parchment paper lined tray and freeze the buns until they're solid, about 30 minutes. Then transfer them to zip-lock bags to store in the freezer. You can steam them straight from frozen for 10 minutes.
INGREDIENT NOTES: Switch up the filling! I love using leftovers in steamed buns, and it’s a great way to make a little bit go a long way. Sticky pulled pork, herby roast chicken or roasted or stir-fried veggies are great. Even leftover curry, like Kiwi-style butter chicken or chicken saag, is great stuffed in buns.
SERVING SUGGESTIONS: I love to serve the buns with a fresh, zingy smacked cucumber salad, lots of chili oil and dumpling dipping sauce for drizzling and dipping.
PRO TIP: To make a perfect liner for your steamer basket, cut out a piece of parchment paper that will fit inside. Fold it in half, in half again, and in half one more time. Then make 4 cuts with scissors down the folded edge. Unfold it, and you'll have a liner with holes for the steam to get through and cook your buns.
Nutrition
Serving: 2buns | Calories: 490kcal | Carbohydrates: 58.5g | Protein: 24g | Fat: 17.3g | Saturated Fat: 2.7g | Polyunsaturated Fat: 6.5g | Monounsaturated Fat: 6.9g | Trans Fat: 0.02g | Cholesterol: 78mg | Sodium: 1460mg | Potassium: 341mg | Fiber: 2.3g | Sugar: 10g | Vitamin A: 183IU | Vitamin C: 1.8mg | Calcium: 138mg | Iron: 2mg