Forget raw eggs and the hassle of slowly drizzling oil – this instant, foolproof Kewpie mayo comes together in seconds with just one jar and an immersion blender. It’s rich, creamy, loaded with umami and totally egg-free. Honestly? It’s better (and more affordable!) than store-bought.

Kewpie mayo is easier to find in grocery stores these days, but it’s still a bit pricey and not always on the shelf. So this quick homemade version is my absolute go-to. It’s thick, creamy, slightly sweet, and honestly? Better than the original.
I always prefer using aquafaba (the liquid from a can of chickpeas) instead of eggs for mayo or aioli. Not just because the idea of raw eggs can be a little… icky (especially when you’re making it yourself!), but because it’s zero-waste, budget-friendly AND it tastes better. It’s the best of both worlds and makes the mayo accidentally vegan.
Why this recipe works
- Homemade mayo can be tricky (if you’ve ever had a batch split, you’ll know the pain). Traditional methods often require slowly drizzling oil into a running blender or food processor, which is easy to mess up. That’s why this immersion blender hack is a game-changer.
- Here’s how it works: oil is lighter than the other ingredients, so it naturally sits on top when everything’s added to a jar. Placing your immersion blender at the bottom and slowly lifting it creates a vortex effect that pulls the oil down and emulsifies everything instantly. Which also means no slow pouring and makes it genuinely foolproof.
- The only non-negotiable? Use a narrow jar or jug that’s just wide enough to snugly fit the head of your immersion blender. The blade must be fully submerged in the aquafaba and other ingredients before you blend, or the mayo won’t form properly. I like using a wide-lipped Kilner glass jar I picked up on Amazon (you can see it in the images below). Plus, blending right in the jar means less mess and no extra container to wash!
Ingredients you’ll need

- Aquafaba. It’s a bit of a mystery why this unctuous liquid from a can of chickpeas works as an egg replacement. But it does. You can use the liquid from any can or jar of chickpeas.
- Oil. Use a neutral-tasting oil, like canola, sunflower avocado or any other vegetable oil here. Olive oil is too strong for this mayo and can make it taste bitter.
- Rice vinegar. You could use apple cider vinegar instead if you like.
- MSG. A key ingredient in Kewpie mayo, MSG is a flavor enhancer that brings out savoriness in food, and it gives the mayo that umami boost it needs. It’s commonly used in Asian cuisine, especially, but can be tricky to find. You can buy it from Amazon or in Asian grocery stores.
How to make it
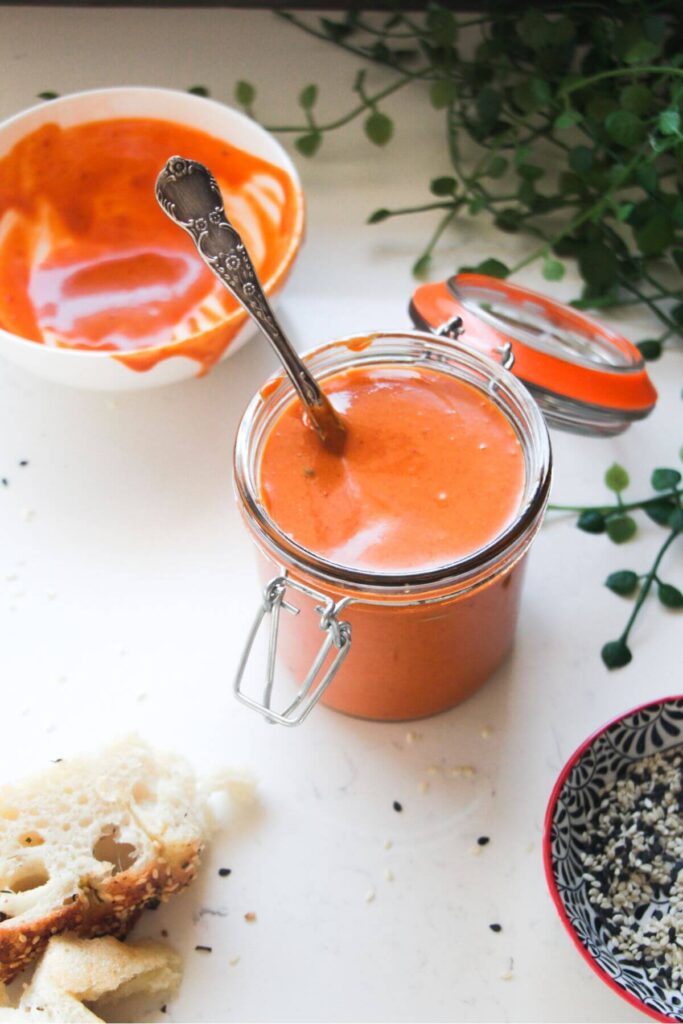
Add all the ingredients for your mayo into a wide-lipped jar or jug that snugly fits the head of your immersion blender. Switch the immersion blender on and slowly move the head up the jug.
You’ll notice a creamy, white sauce forming as you do this. Pulse up and down a couple of times, and you’re done.


And that’s it! So quick and easy. It’s now ready to use or store.


How does it compare to store-bought Kewpie mayo?
I thought it would be helpful to compare this homemade version to real, store-bought Kewpie mayo to see just how close to the real thing it is.

| STOREBOUGHT KEWPIE MAYO | HOMEMADE KEWPIE MAYO | |
| TASTE | Super rich and almost ‘eggy’ with a strong umami flavor. A little sweeter. | Lighter, but still loaded with umami flavor. No ‘eggyness’. |
| TEXTURE | Silky smooth, dense and very creamy. | Still silky smooth and very creamy, but not dense and too rich. Fluffier and lighter. |
| APPEARANCE | Thick and yellow, thanks to the egg yolks. | Whiter because we’re not using eggs. You could easily swap Dijon mustard for American mustard for a more yellow hue. |
Overall, while they might look slightly different (thanks in large part to the color), the homemade Kewpie mayo is remarkably similar to store-bought in taste and texture. And I prefer it because it’s lighter – the eggy flavor of Kewpie mayo can be a little overwhelming and that’s not a problem with the homemade version.
Got a question?
Make sure you’re moving the immersion blender slowly up the jar, blending as you go. If it’s still not thickening, try adding a little more aquafaba before blending again.
You also need to make sure you’re using a narrow jar that just fits the head of your immersion blender. It needs to be submerged in the liquid. If it’s not, you’ll struggle to emulsify and thicken the mayo.
I find this mayo lasts for at least three weeks when stored in the fridge. It’s much more stable than its eggy sister, which is another brilliant reason why this version is better. If you do find it separates a bit in the fridge, just give it a quick stir and that should combine it again.
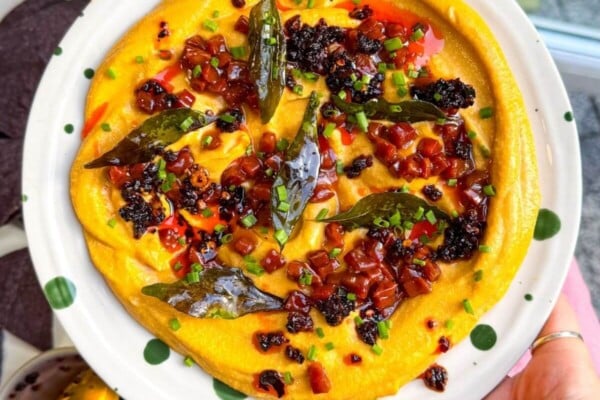
It’s PERFECT slathered on fluffy steamed bao buns, or drizzled over this salmon sushi bake, baked salmon poke bowls or grilled chicken poke bowls. You could also serve it alongside your favorite pizza for dipping (try this five minute Greek yogurt pizza dough for your crust) or use it as part of the sauce in these smash chicken Caesar tacos or smash banh mi tacos. Or, anywhere you’d use regular mayo!
Like this recipe? Try these easy sauces next


If you make this recipe, I’d love to hear from you! You can leave a recipe rating and a comment below. And remember to tag @DishedByKate on Instagram, Facebook and TikTok if you’ve made one of my recipes. Seeing your recreations really makes my day 😊.
Print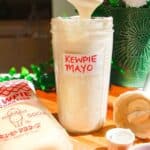
Instant Egg-Free Kewpie Mayo
- Total Time: 5 minutes
- Yield: 1.5 cups 1x
- Diet: Vegan
Description
Forget raw eggs and the hassle of slowly drizzling oil – this instant, foolproof Kewpie mayo comes together in seconds with just one jar and an immersion blender. It’s rich, creamy, loaded with umami and totally egg-free. Honestly? It’s better (and more affordable!) than store-bought.
Ingredients
For the Kewpie mayo –
- 1/3 cup aquafaba (liquid from a can of chickpeas)
- 1 tablespoon rice wine vinegar
- 1 teaspoon white miso paste
- 1 teaspoon Dijon mustard
- 1/2 teaspoon salt
- 1/2 teaspoon MSG
- 1 cup neutral oil (avocado, canola or sunflower oil, not olive oil)
Equipment you’ll need –
- An immersion (stick) blender. Check the notes below the recipe for how to make it using a blender, food processor or by hand if you don’t have one.
- A narrow jar or jug. This must snugly fit the head of your immersion blender for the recipe to work and for the mayo to emulsify properly. If the container is too wide, the blender won’t be able to do its job.
Instructions
- Add your ingredients to a jar. In a narrow, wide-lipped glass jar or jug, add ⅓ cup aquafaba, 1 tablespoon rice wine vinegar, 1 teaspoon white miso paste, 1 teaspoon Dijon mustard, ½ teaspoon salt, ½ teaspoon MSG and 1 cup of neutral oil.
- Prepare your immersion blender. Place the head of your immersion blender at the very bottom of the jar, ensuring it’s fully submerged in the liquid. The jar should be just wide enough to snugly fit the blender head. If it’s too wide, the mayo won’t emulsify properly.
- Turn on the blender and slowly lift. With the blender running, slowly lift it upwards through the mixture. As you do, you’ll see it transform into a thick, creamy white mayo. Pulse the blender up and down once or twice at the end to make sure all the oil is fully incorporated. This process should take just 10 to 15 seconds.
- Taste and tweak. Remove the blender and give your mayo a quick taste. Adjust the seasoning with a pinch more salt or sugar if needed. Your Kewpie mayo is now ready to use!
Notes
MAKE IT WITH A FOOD PROCESSOR OR REGULAR BLENDER: Add all the ingredients except the oil to the bowl. With the machine running on low, slowly drizzle in the oil in a thin stream until the mayo thickens. Scrape down the sides and blend again to fully emulsify into a thick, creamy mayo.
MAKE IT BY HAND: This one is a bit of a workout! Add all the ingredients (except the oil!) to a mixing bowl. Whisk the ingredients so they’re well incorporated, then slowly add the oil (it’s easiest to pour it from a lipped jug), just a few drops at a time to start, whisking constantly. As it thickens, you can add the oil in a faster stream, still whisking all the way. Keep whisking as the creamy, white mayo forms!
MAYO DIDN’T THICKEN? Your jar may have been too wide. The blender head needs to fit snugly and be fully covered by the ingredients. Try adding another tablespoon of aquafaba and blending it again.
STORAGE INSTRUCTIONS: Transfer your mayo to a clean, airtight jar or container and store it in the fridge. A glass jar works best for freshness – this is why I like blending it in a glass jar that has a lid! It’ll keep well for at least 3 weeks in the fridge. Give it a stir before using it – you might notice a little oil separation occurs, but this is normal! Just give it a mix and it’ll be smooth and creamy again. Always use a clean spoon when you’re scooping the mayo from the jar – this will help with any cross-contamination and ensure it keeps longer.
- Prep Time: 5
- Category: sauces
- Method: immersion blender
- Cuisine: japanese
Nutrition
- Serving Size: 1 tablespoon
- Calories: 86
- Sugar: 0g
- Sodium: 111.6mg
- Fat: 9.9g
- Saturated Fat: 8.1g
- Unsaturated Fat: 1.3g
- Trans Fat: 0g
- Carbohydrates: 0.1g
- Fiber: 0g
- Protein: 0g
- Cholesterol: 0mg