If you love cheeseburgers and dumplings, you’ll LOVE these super juicy cheeseburger dumplings. They’re everything you love about a cheeseburger, in a very fun little parcel. Perfect for a crowd-pleasing party bite, or a fun weekend project. Plus, they freeze beautifully and you can cook them straight from frozen, so they’re brilliant for prepping ahead of time.
THIS is the recipe I think I’ve had the most requests for, ever. I’ve made these dumplings A LOT recently. They’ve been making an appearance whenever I’m entertaining, and every time, they’ve disappeared SO QUICKLY. I’ve lost count of the times I’ve been asked for the recipe, so here it is!
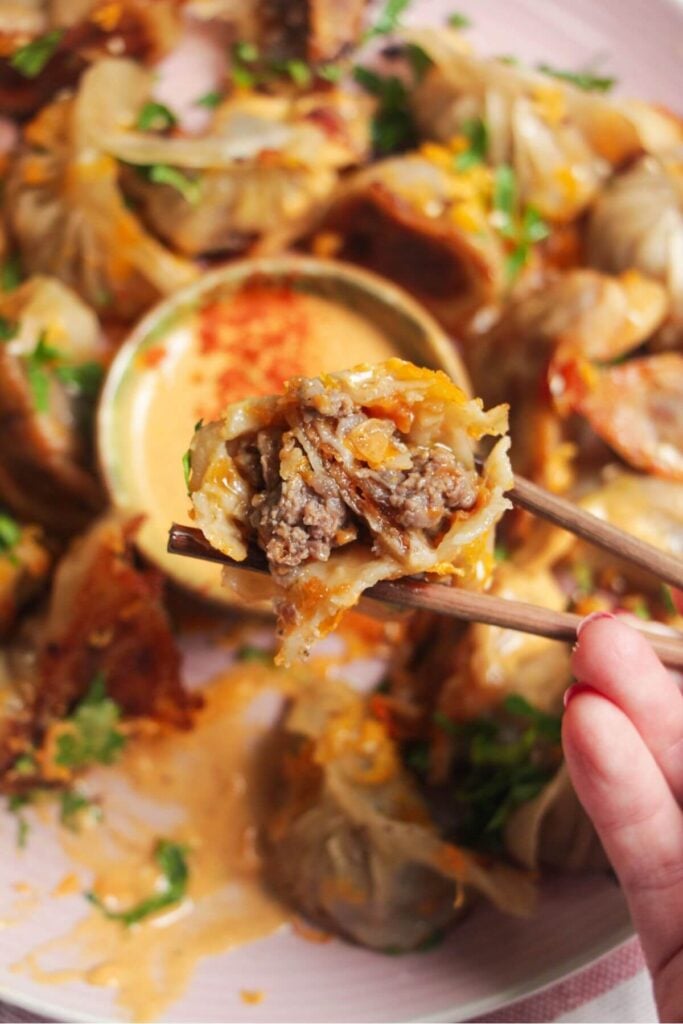
Essentially, I’ve taken the ingredients you’ll find in a great cheeseburger (think pickles, mustard, caramelized onions and of course, cheese) and mixed it all into an incredibly flavor-packed filling. The combination works incredibly well. These really do taste just like a cheeseburger, in one very satisfying, very juicy bite.
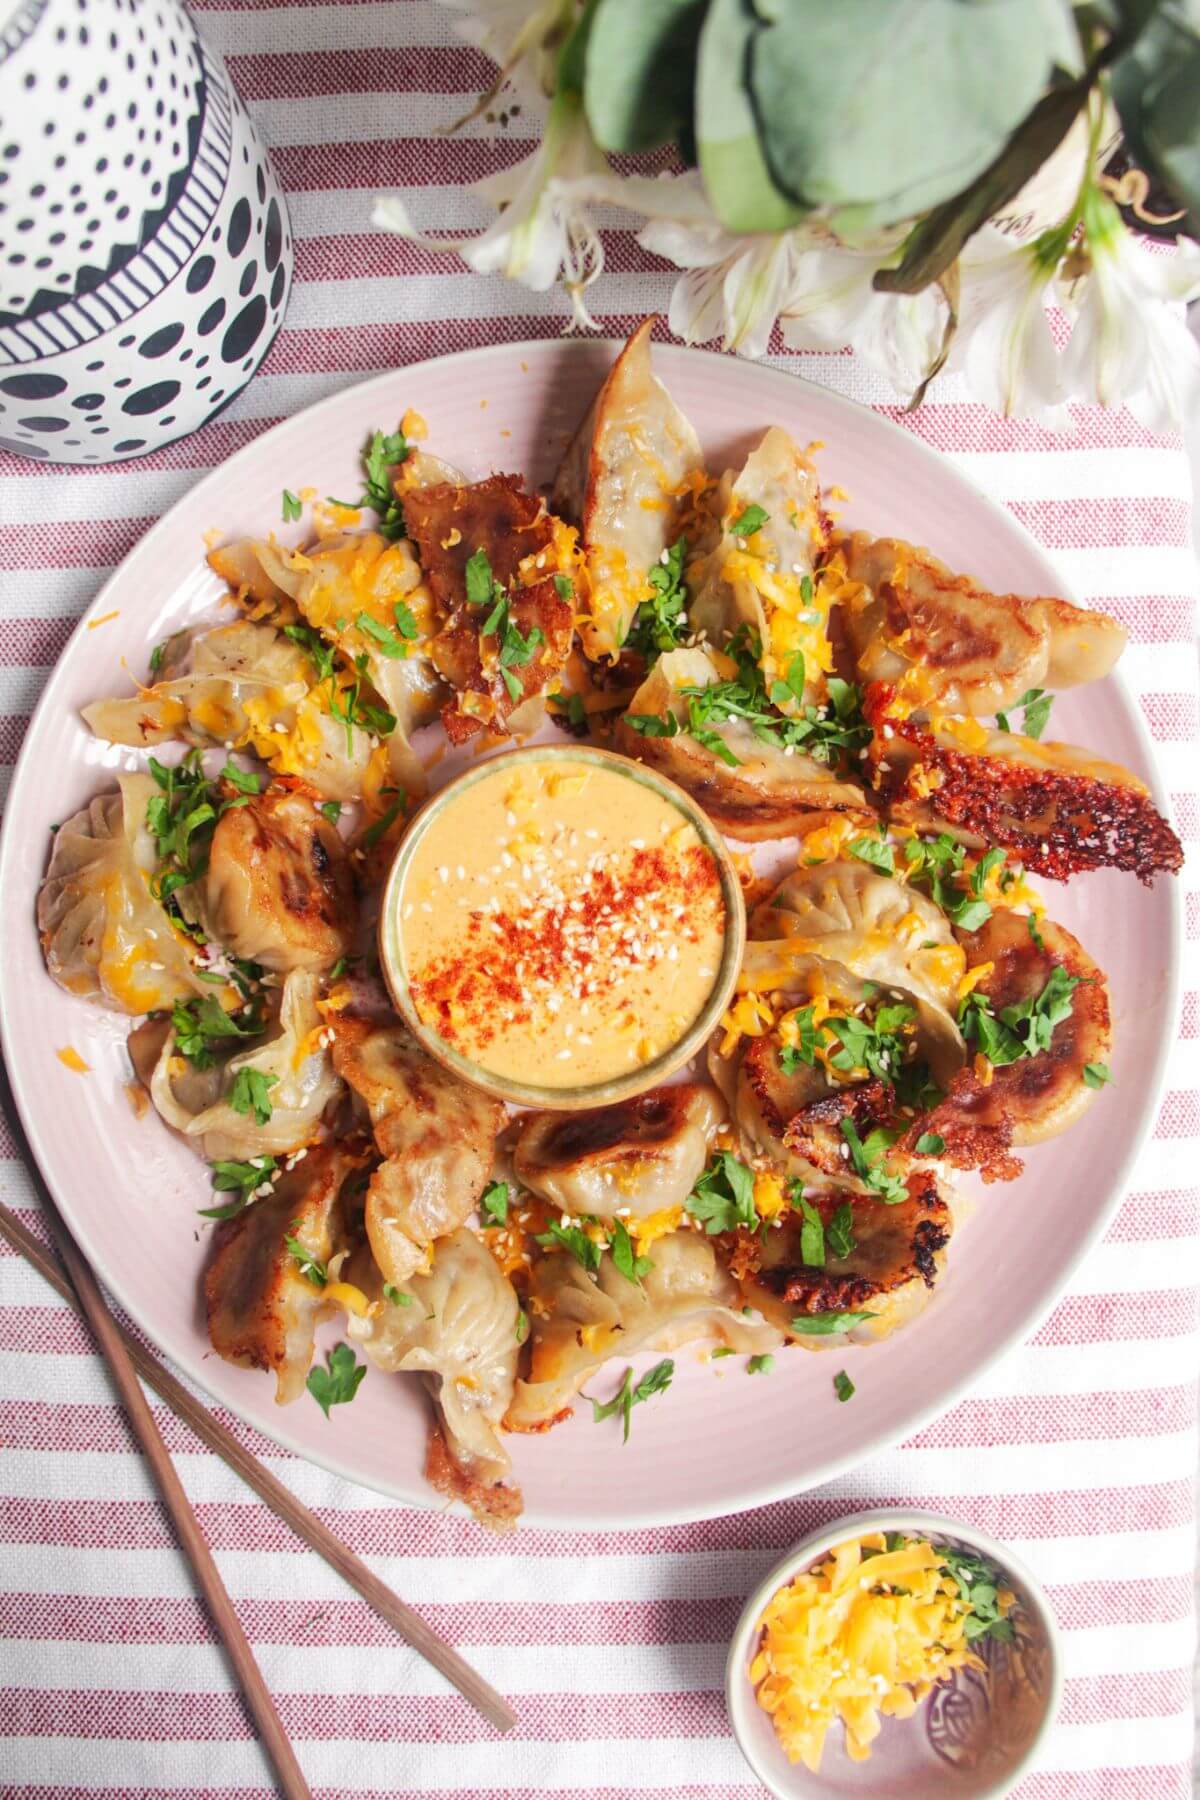
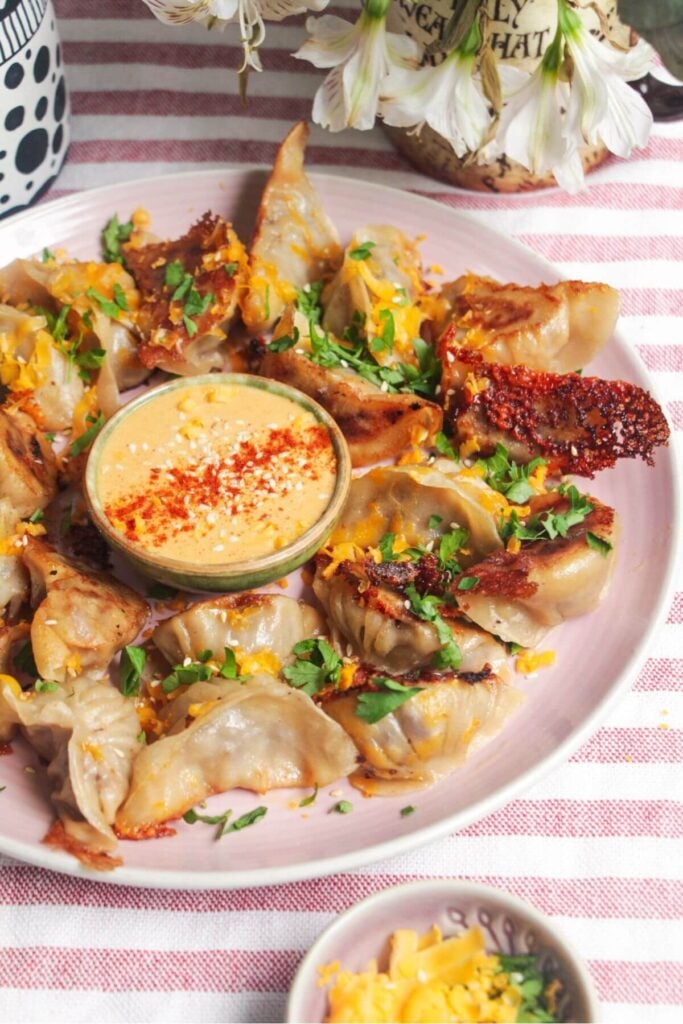
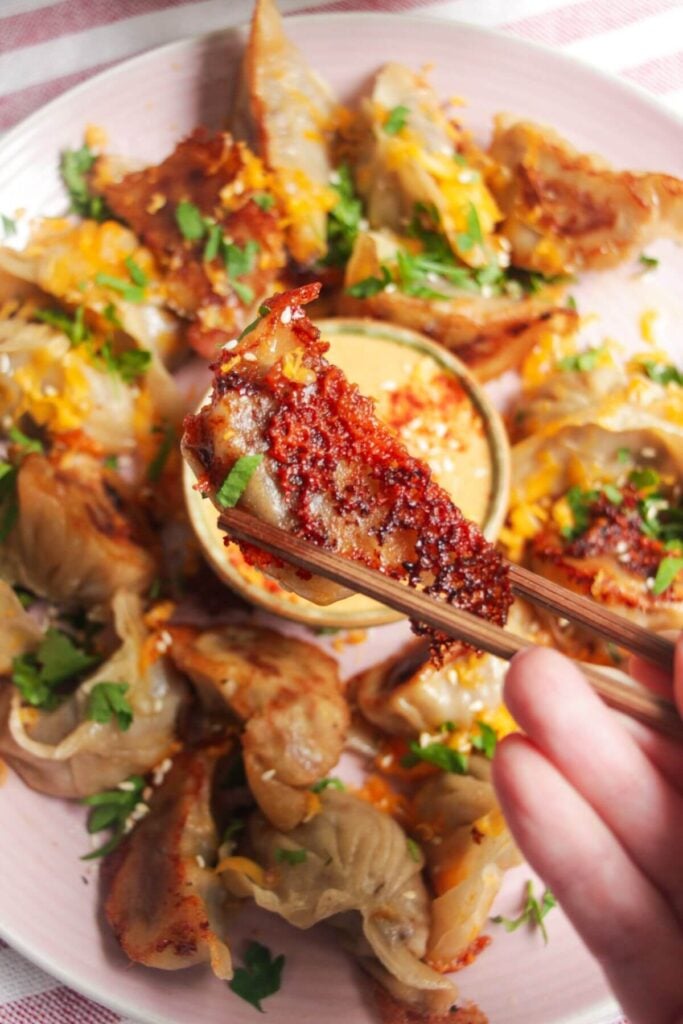
Serving them with a speedy copycat Big Mac burger sauce is highly recommended, and I’ll show you how to give them a crispy, cheesy ‘skirt’ too. The only negative about these beauties is that they’re WAY too easy to eat.
Now I know that folding dumplings can seem a little tricky, but I promise it’s just a matter of practice (and honestly, even if they’re a bit messy, it really doesn’t matter!) I have a whole post that breaks down three easy ways to fold dumplings that I recommend taking a look at before starting.
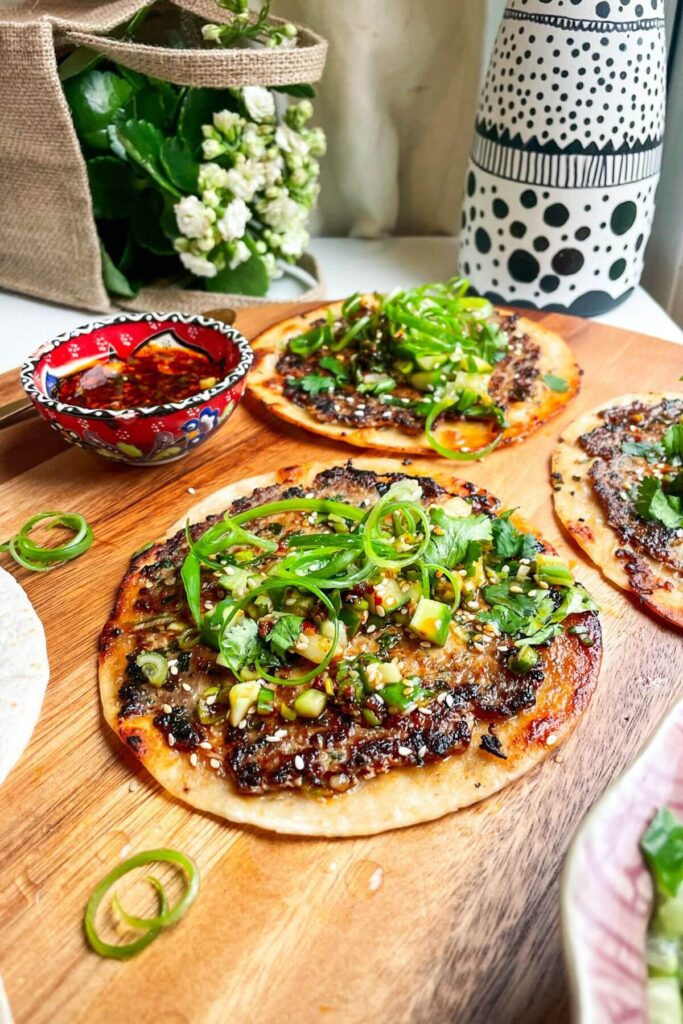
And if you’re as big of a fan of dumplings as I am, try these one pan satay baked dumplings, chicken and mushroom potstickers, dumpling stuffed flatbreads, smash dumpling tacos or juicy pork dumplings next.
Ingredients
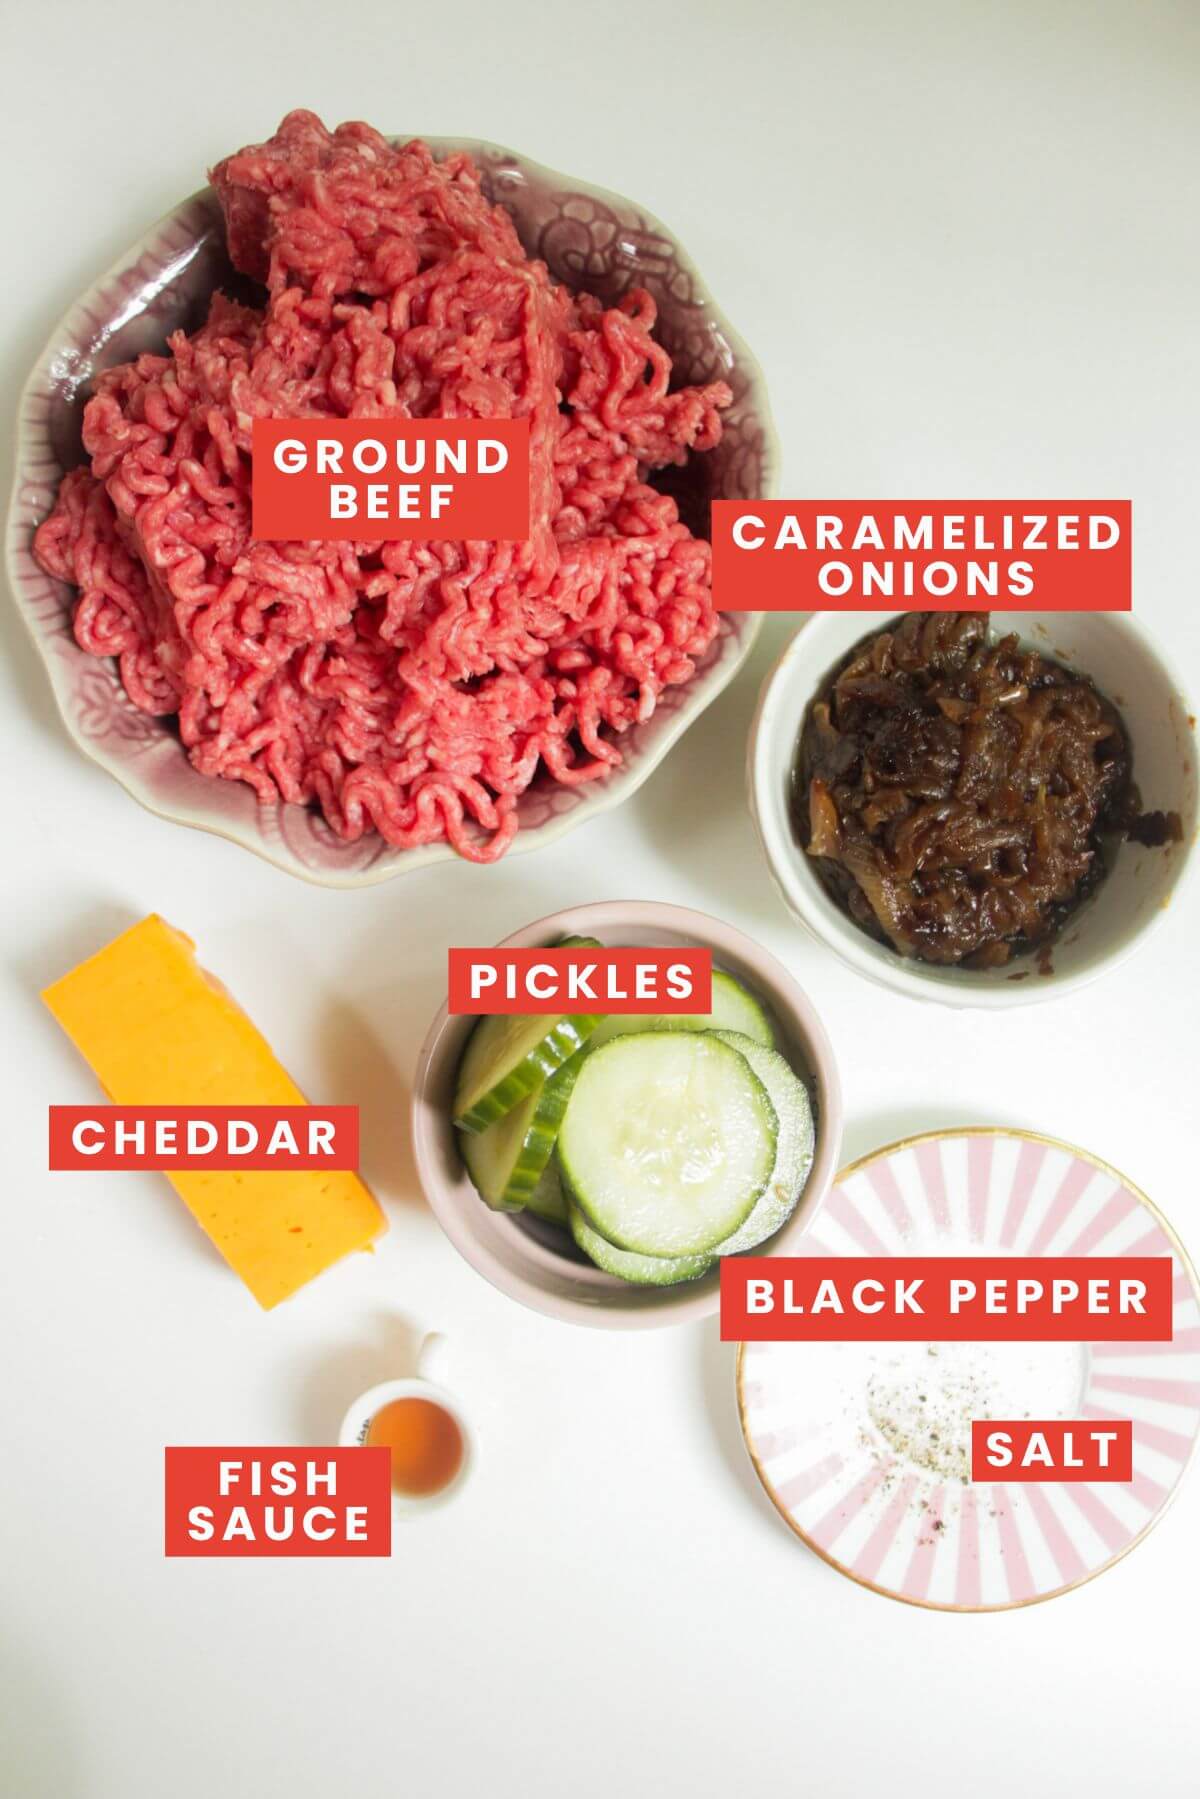
- Ground beef. I like to use ground beef with a good percentage of fat, just so the dumplings stay nice and juicy. You can absolutely use lean beef if you prefer though.
- Caramelized onions. Sticky, naturally sweet caramelized onions provide WONDERFUL flavor to the cheeseburger filling. I like to make a big batch and store it in the fridge (or freezer) to throw into recipes, but for ease, you can use caramelized onion relish or jam.
- Pickles. Any sharp dill pickle will do here – choose your favorite.
- Cheese. I recommend a good, sharp cheddar. You can either grate or finely dice the cheese.
- Fish sauce. It may seem like a strange addition, but fish sauce is one of my most used ingredients and works so well here. It provides a lovely savory depth of flavor you can’t get from salt alone, so I recommend giving it a go. I promise it doesn’t make the filling taste at all fishy.
- Mustard. It’s not pictured, but using a little Dijon or American mustard in the filling will give it further depth of that classic burger flavor.
You’ll also need dumpling wrappers. You’ll find them in the freezer (or fridge if you’re lucky) section of large grocery stores, or Asian grocery stores if you’re lucky enough to have one nearby. Or, make your own dumpling wrappers. All you need is flour, water and a little salt!
How to Make Cheeseburger Dumplings
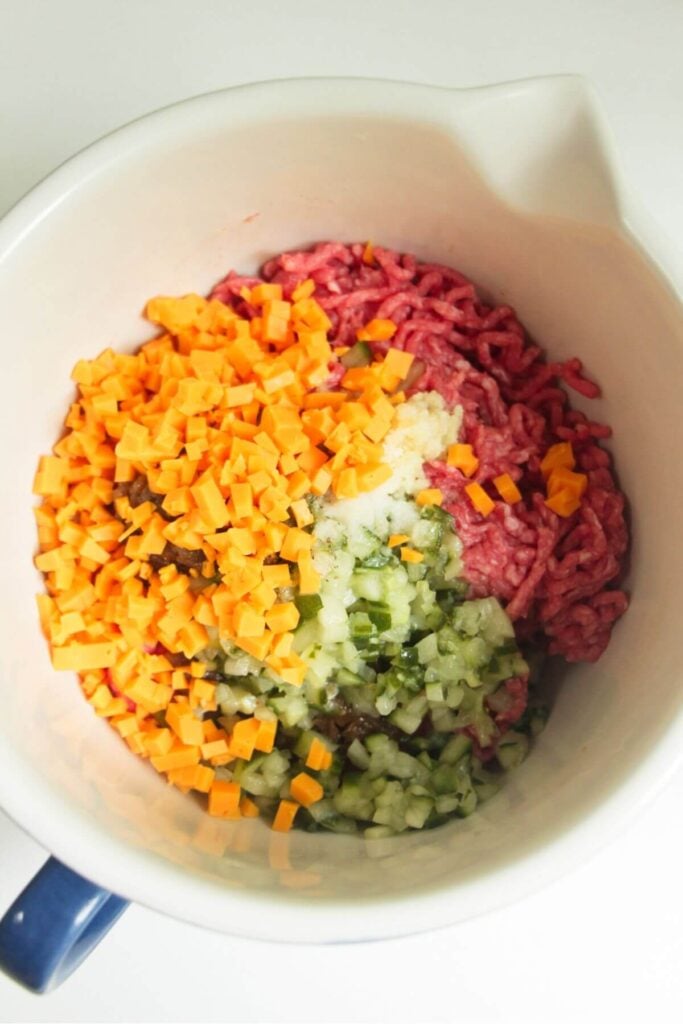
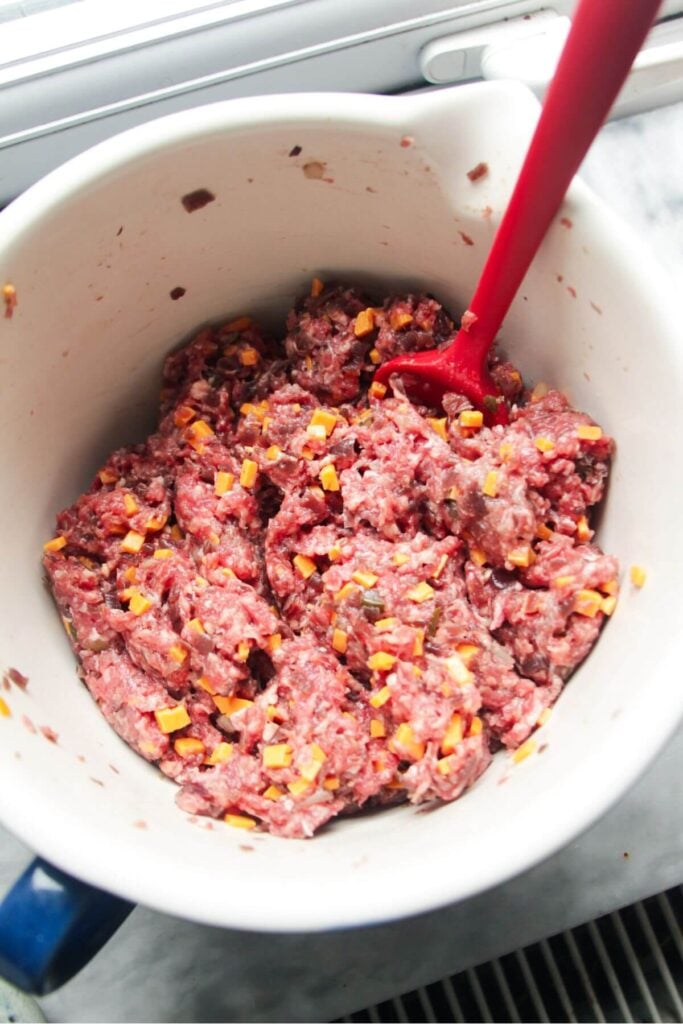
Add the ground beef, cheese, pickles, garlic, caramelized onion, mustard, fish sauce, salt and pepper to a bowl and mix to combine well. You want to make sure the seasoning is dispersed evenly throughout the beef.
PRO TIP: Always pan-fry a little piece of the filling so you can check it for seasoning – make sure there’s enough salt for your liking.
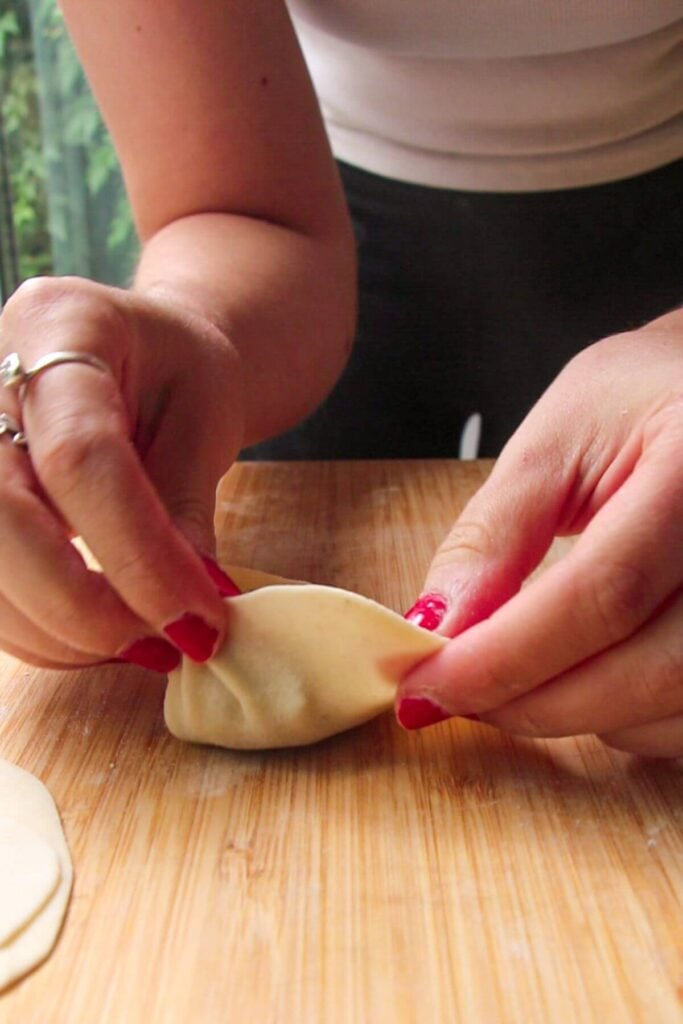
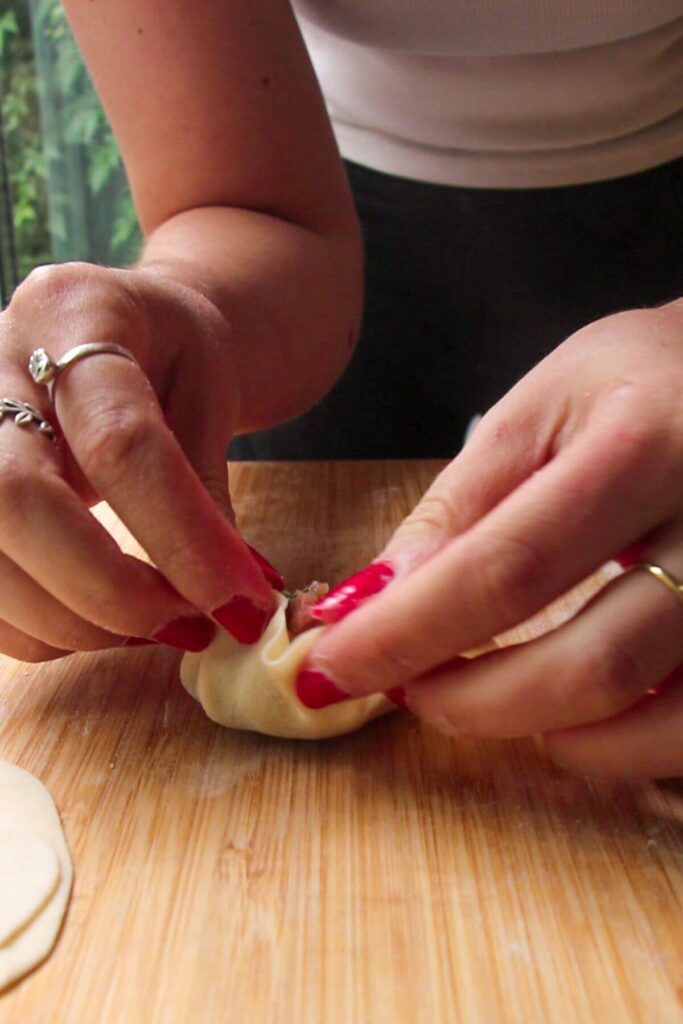
There are multiple ways to fold your dumplings (I have a whole post that breaks down three easy ways to fold dumplings that I recommend taking a quick look at if you’re new to dumpling making). Here, I’m making little pleated half-moons, but it’s simplest to make them without the pleat to start with.
If you’re using store-bought wrappers, dip your finger in water and brush it around the edges (you’ll need the water to help the wrapper stick to itself – store-bought wrappers are coated in cornstarch to prevent sticking). Spoon roughly a tablespoon of your filling into the middle of your wrapper, then (to make a half-moon), bring the edges together to create a semicircle. Press the edges together to seal, removing excess air around the filling. Set aside on a lined tray or plate, then repeat with the rest of the filling.
PRO TIP: At this point, you can freeze the dumplings and then easily cook them from frozen at a later date. Just freeze the dumplings on their lined tray until solid, then transfer them to ziplock bags.

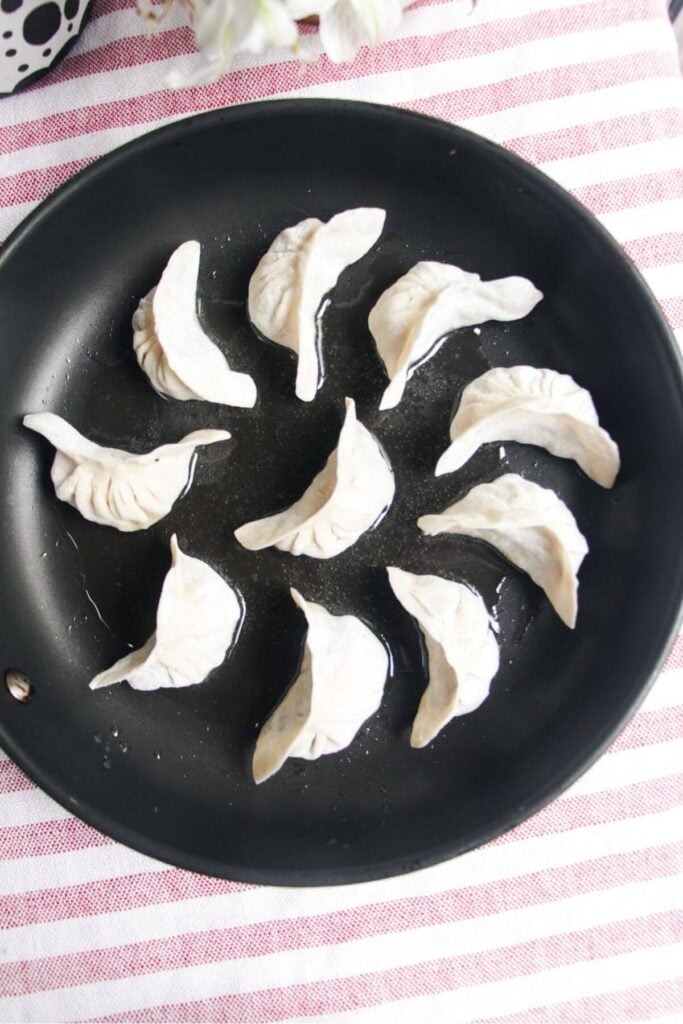
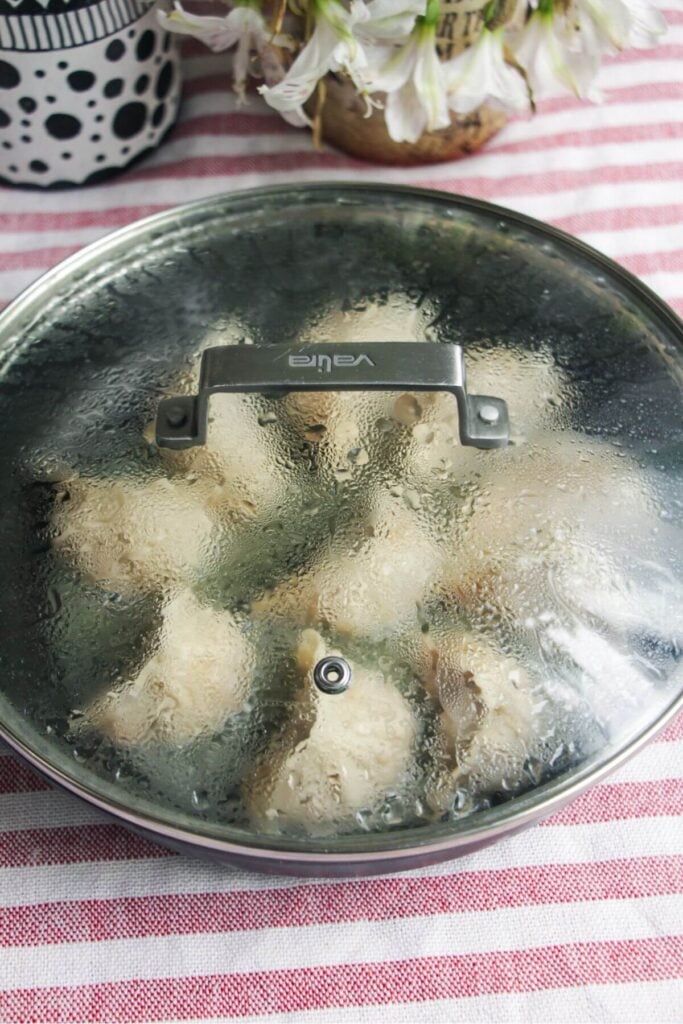
Drizzle a little oil in a non-stick pan that you have a lid for, then arrange your dumplings in the pan. Cook until the bottoms are lightly golden, then pour in enough water so it comes roughly a third of the way up the dumplings, cover, then steam until plump.
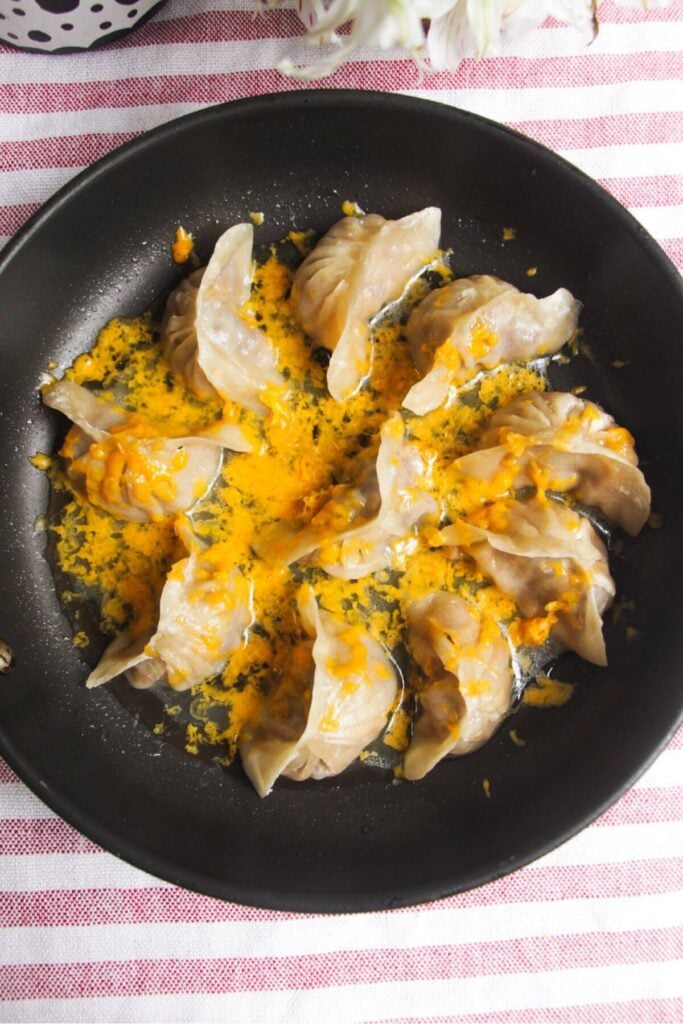
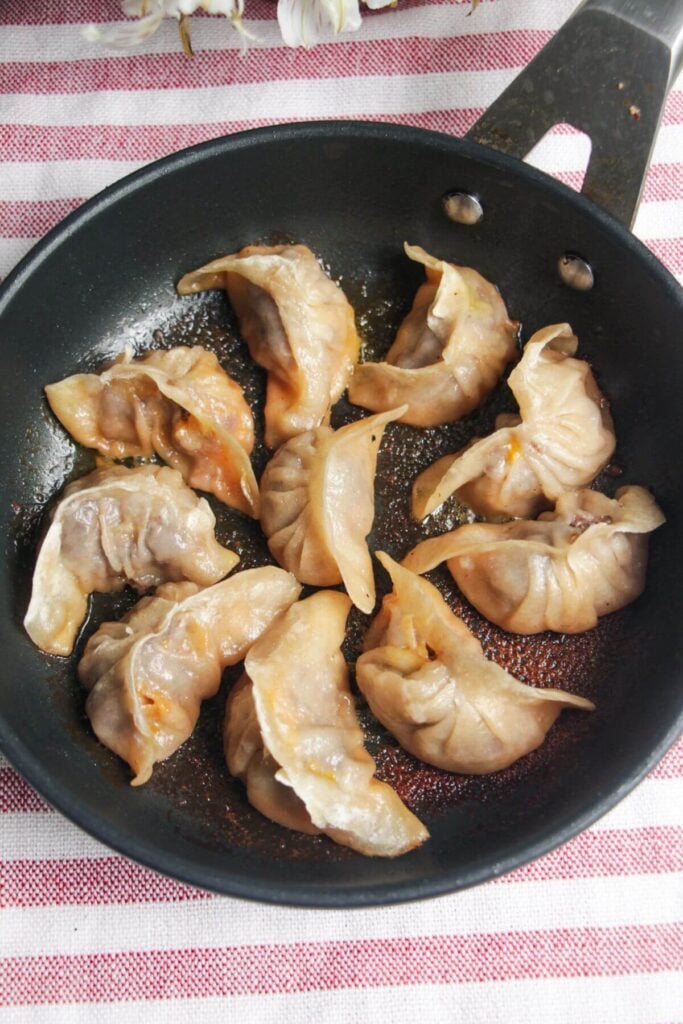
Remove the lid and let the bottoms crisp up further as the remaining water evaporates. PRO TIP: You can add grated cheese as you take the lid off to make a crispy cheesy skirt, but depending on the cheese you use, this can get a little oily and messy, so just be aware of that!
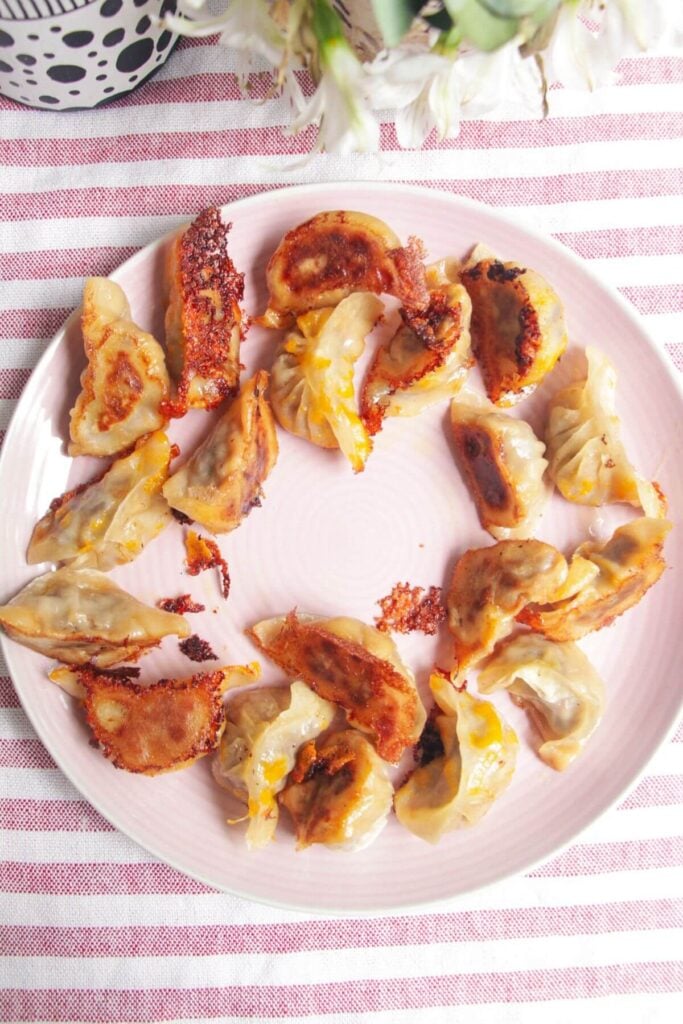
Serve the crispy dumplings while hot with your burger sauce on the side for dipping. I like to scatter over something green, like chives or flat-leaf parsley and more grated cheese as a little garnish too.
Watch How to Make Cheeseburger Dumplings
Cheeseburger Dumplings FAQs
Yes! If you’d prefer to steam these, you can use a bamboo steamer (or regular steamer). Line the base of your steamer with a piece of parchment paper. Make about six slices through the paper with a knife, to help with the steaming. Arrange the dumplings in your steamer, leaving about an inch between each.
Bring a pot of water to a boil, then place the steamer on top (or in the water – but if you do this make sure the water isn’t touching the layer of the steamer where your dumplings sit). Pop the lid on, then steam for 12 minutes.
Yes! Most of the time when I make dumplings I like to make a big batch, then freeze them. Freezing is the best way to keep uncooked dumplings as you can cook them straight from frozen. Avoid keeping uncooked dumplings in the fridge (they’ll be fine for a couple of hours but any longer and you risk the wrapper becoming soggy at the bottom). Freeze the dumplings on lined trays until solid, then transfer them to ziplock bags to store. Add a couple of minutes to the cooking time when you cook them from frozen.
Like this recipe? Try these ideas next
If you make this recipe, I’d love to hear from you! You can leave a recipe rating and a comment below. And remember to tag @DishedByKate on Instagram, Facebook and TikTok if you’ve made one of my recipes. Seeing your recreations really makes my day 😊.
Print
Crispy Cheeseburger Dumplings
- Total Time: 45 minutes
- Yield: 36 dumplings 1x
Description
If you love cheeseburgers and you love dumplings, you’ll LOVE these super juicy cheeseburger dumplings. They’re everything you love about a cheeseburger, in a very fun little parcel. Perfect for a crowd-pleasing party bite, or a fun weekend project.
Plus, they freeze beautifully and you can cook them straight from frozen, so they’re brilliant for prepping ahead of time.
Ingredients
For the cheeseburger dumplings –
- 1lb/500g ground beef
- 1/2 cup caramelized onions, finely chopped (or use caramelized onion relish)
- 1/2 cup pickles, finely chopped
- 1 cup cheddar cheese, finely diced or grated
- 1 tablespoon Dijon mustard
- 1 teaspoon fish sauce
- 1 teaspoon salt
- Black pepper
- Dumpling wrappers
- Flour, for dusting
For the burger dipping sauce –
- 1/2 cup garlic aioli (or regular mayo)
- 1 tablespoon Dijon or American mustard
- 1 tablespoon tomato ketchup
- 1 garlic clove, crushed (or 1 teaspoon garlic powder)
- 3 pickle slices, finely chopped
- 1 teaspoon pickle juice (or white wine vinegar or apple cider vinegar)
- 2 teaspoons smoked paprika
To serve –
- 1/3 cup cheddar cheese, grated
- Handful of chives, finely chopped
- 1 tablespoon toasted sesame seeds
Instructions
- Make your filling. Add your ground beef, 1/2 cup of chopped caramelized onions (or relish), 1/2 cup of chopped pickles, 1 cup of diced or grated cheese, 1 tablespoon of Dijon mustard, 1 teaspoon fish sauce, 1 teaspoon of salt and a very good grind of black pepper to a large bowl. Mix to combine well – you want to ensure the seasoning is evenly distributed throughout the beef. PRO TIP: I always pan-fry a little bit of the filling to test it for seasoning – that way you can add a little more salt or mustard if you like.
- Prepare your dumplings. Lightly flour a clean, flat surface. Keep your dumpling wrappers covered with a slightly damp dish towel to prevent them from drying out while you fill all the dumplings. Spoon roughly a tablespoon of the filling into the middle of your wrapper. If you’re using store-bought wrappers, use your finger to brush a little water around the edges, to help it stick together when you shape it (store-bought wrappers are dusted with cornstarch to stop them from sticking together in the packet).
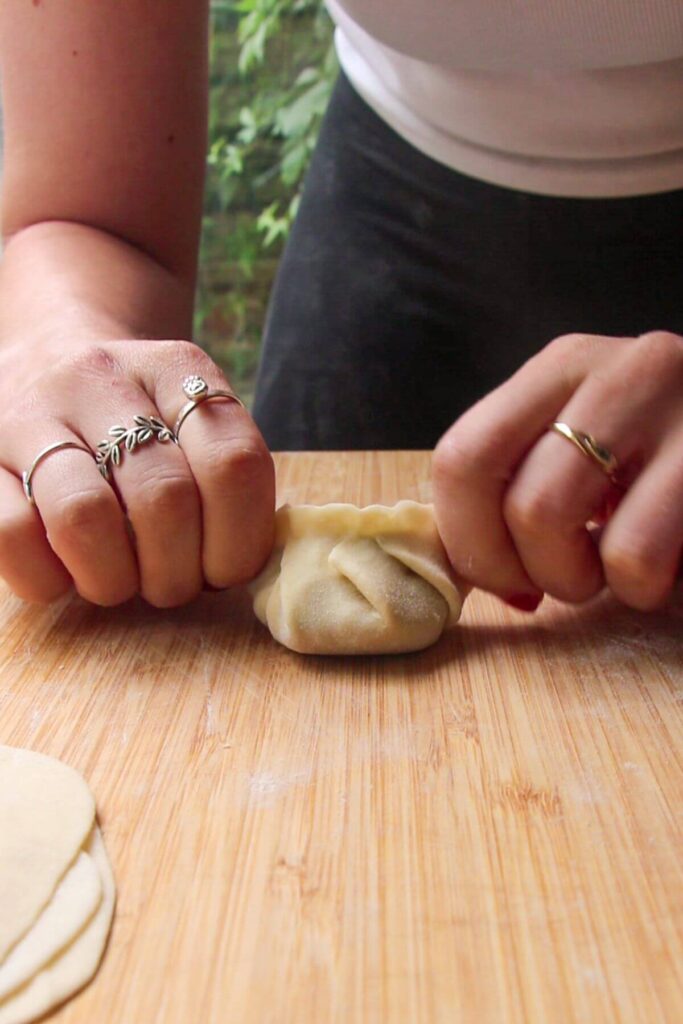
- Fold your dumplings. There are multiple ways you can do this. The simplest way is to bring the edges together and form the dumpling into a half-moon shape. You can scrunch the top a little if you like, to create little pleats. I have a whole guide that shares three easy ways you can shape dumplings which I recommend having a quick look at – the photos will help and you can also see photos further up this page that share how I fold these dumplings. Set the formed dumplings aside on a lined tray or plate, then continue with the rest of your filling.
- Make your burger dipping sauce. In a small bowl, mix 1/2 cup aioli or mayo with 1 tablespoon of mustard, 1 tablespoon of tomato ketchup, the chopped pickles, crushed garlic, 2 teaspoons of smoked paprika and 1 teaspoon of pickle juice until combined into a light orange, creamy sauce.
- Cook the dumplings. Set a non-stick frying pan or skillet you have a lid for over medium heat, then drizzle with the olive oil. Arrange the dumplings in the pan, leaving an inch or so in between each. Pan fry for about 3 minutes, until the bottoms are very lightly golden (you can pick one up to check). Then pour in enough water so that it comes roughly one-third of the way up the dumplings, and pop the lid on. Lower the heat, then leave to steam for 10 minutes.
- Crisp up the dumplings. After 10 minutes, remove the lid from the pan and continue to cook the dumplings until all the water has evaporated. OPTIONAL: When you remove the lid, you can scatter over about 1/2 cup of grated cheese to form a crispy cheese crust on the dumplings, but depending on your cheese, this can get a little messy and oily. It’s worth it for the taste but just be careful of any oil splatters if you try this!
- Garnish and serve. Carefully remove the dumplings from the pan, then arrange on a serving plate. Scatter over the grated cheese, chives and sesame seeds, then serve with the burger sauce for dipping.
Notes
HOW TO STEAM THE DUMPLINGS: Instead of pan-frying these dumplings, you can use a bamboo steamer (or regular steamer) to steam them. To do this, line the base of your steamer with a piece of parchment paper. Make about six slices through the paper with a knife, to help with the steaming. Arrange the dumplings in your steamer, leaving about an inch between each. Bring a pot of water to a boil, then place the steamer on top (or in the water – but if you do this make sure the water isn’t touching the layer of the steamer where your dumplings sit). Pop the lid on, then steam for 12 minutes.
HOW TO CARAMELIZE ONIONS: I highly recommend making a big batch of caramelized onions to have on hand in the fridge (and they freeze well too!) They take time, but it’s worth it. Add a couple of tablespoons of olive oil in a large frying pan over medium heat, then add thinly sliced onions (I like to do about six at a time – it will look like a lot at first but they’ll reduce massively as they cook). Cook for a few minutes until they start to soften, then add a little salt and (optional) 1 tablespoon or so of balsamic vinegar. Stir through the onions then reduce the heat right down and cook for about an hour, stirring every couple of minutes so the onions don’t stick to the pan, until they’re deeply golden brown and sticky. If they’re really sticking, add a splash of water which should release them from the bottom of the pan.
FREEZING INSTRUCTIONS: The best way to prep the dumplings ahead of time is to shape them, and then freeze them. Freeze the shaped dumplings on a baking paper lined tray or plate until solid, then transfer to ziplock bags to store. You can cook them straight from frozen.
NOTE ON QUANTITY: The amount of dumplings you get out of this mixture will vary slightly, depending on how large or small you make them, and how you fold them. You should get enough for at least six servings from this mixture (around 36 dumplings) but it’s definitely not an exact science.
- Prep Time: 30
- Cook Time: 15
- Category: fakeaways
- Method: stove top
- Cuisine: american
Nutrition
- Serving Size: 6 dumplings
- Calories: 414
- Sugar: 6.4g
- Sodium: 694.9mg
- Fat: 16.9g
- Saturated Fat: 6.5g
- Unsaturated Fat: 3.7g
- Trans Fat: 0g
- Carbohydrates: 36.1g
- Fiber: 1.9g
- Protein: 27.6g
- Cholesterol: 78.8mg


Although a bit reluctant to start with as it’s very different & a bit fiddly absolutely loved this recipe even more than a normal cheeseburger so thank you, thank you Kate keep bringing these amazing different recipes 🥰
Ahhh you’re so welcome Karen! Love that you made them even though you were a little dubious – they are a bit fiddly but so worth it isn’t it xx