Say hello to easy, creamy SUPER smooth, oil-free hummus that is so much more delicious than anything you can pick up at the store. It uses just FIVE ingredients, is packed with protein and it’s vegan.
I used to make hummus just by throwing everything in the food processor and hitting go, and while it was good, it was always a little gritty. After MANY years of testing different processes and methods, I’m of the humble opinion that this is the best hummus around.
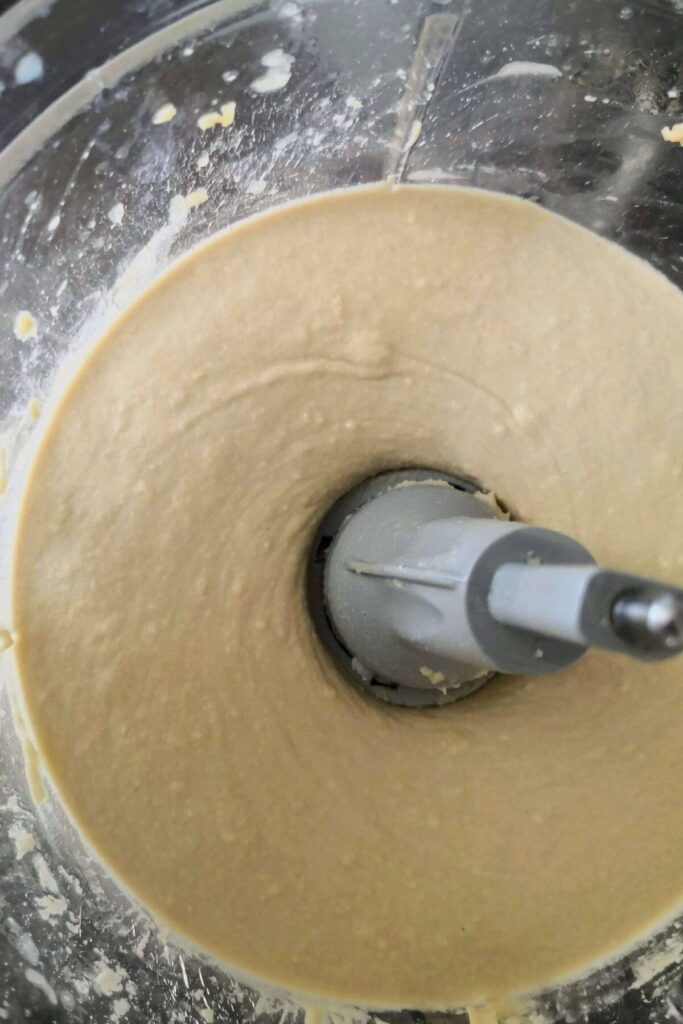
I’m talking about the smoothest, most creamy, perfectly seasoned plate of deliciousness. It uses no oil, is totally vegan, and is so smooth you’ll never go back to buying the tubs from the store. You’ll find grocery store hummus is loaded with different oils, but you don’t need it for a super creamy hummus. All you need is chickpeas, tahini, lemon juice, garlic, salt and ice (trust me on the ice!) That’s your base.
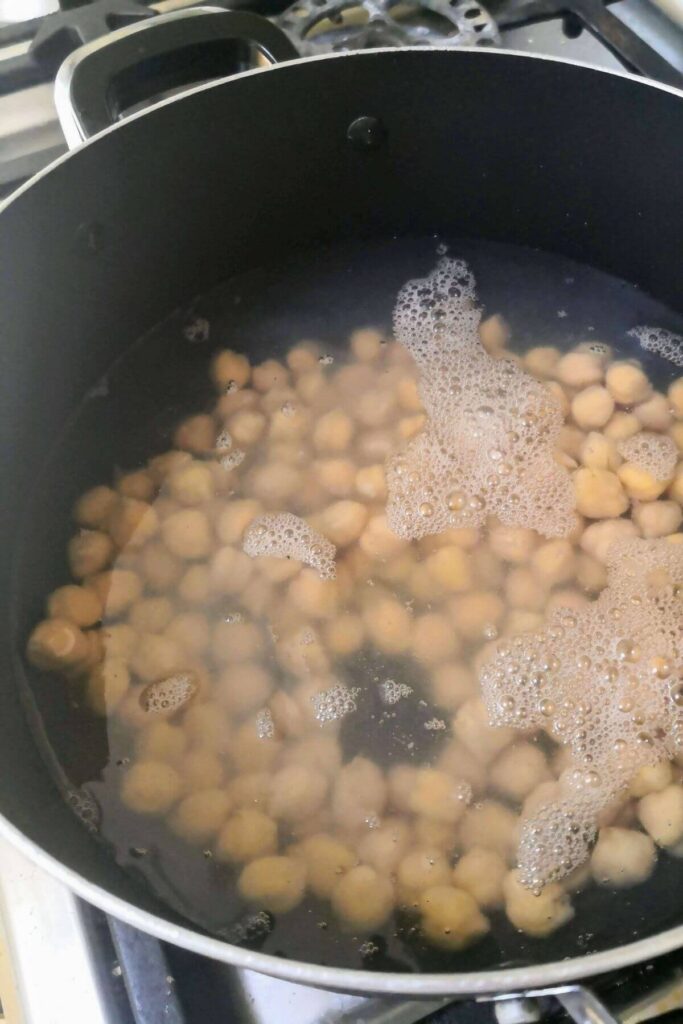
The secret? Simmering the chickpeas for about 20 minutes before you blitz your hummus, to break them down and make them super soft before blending into an unbelievably creamy dip. You don’t have to boil them if you want to save time – you’ll still get amazing hummus and it’ll still be much better than store-bought, it just won’t be quite as smooth and creamy.
Ingredients
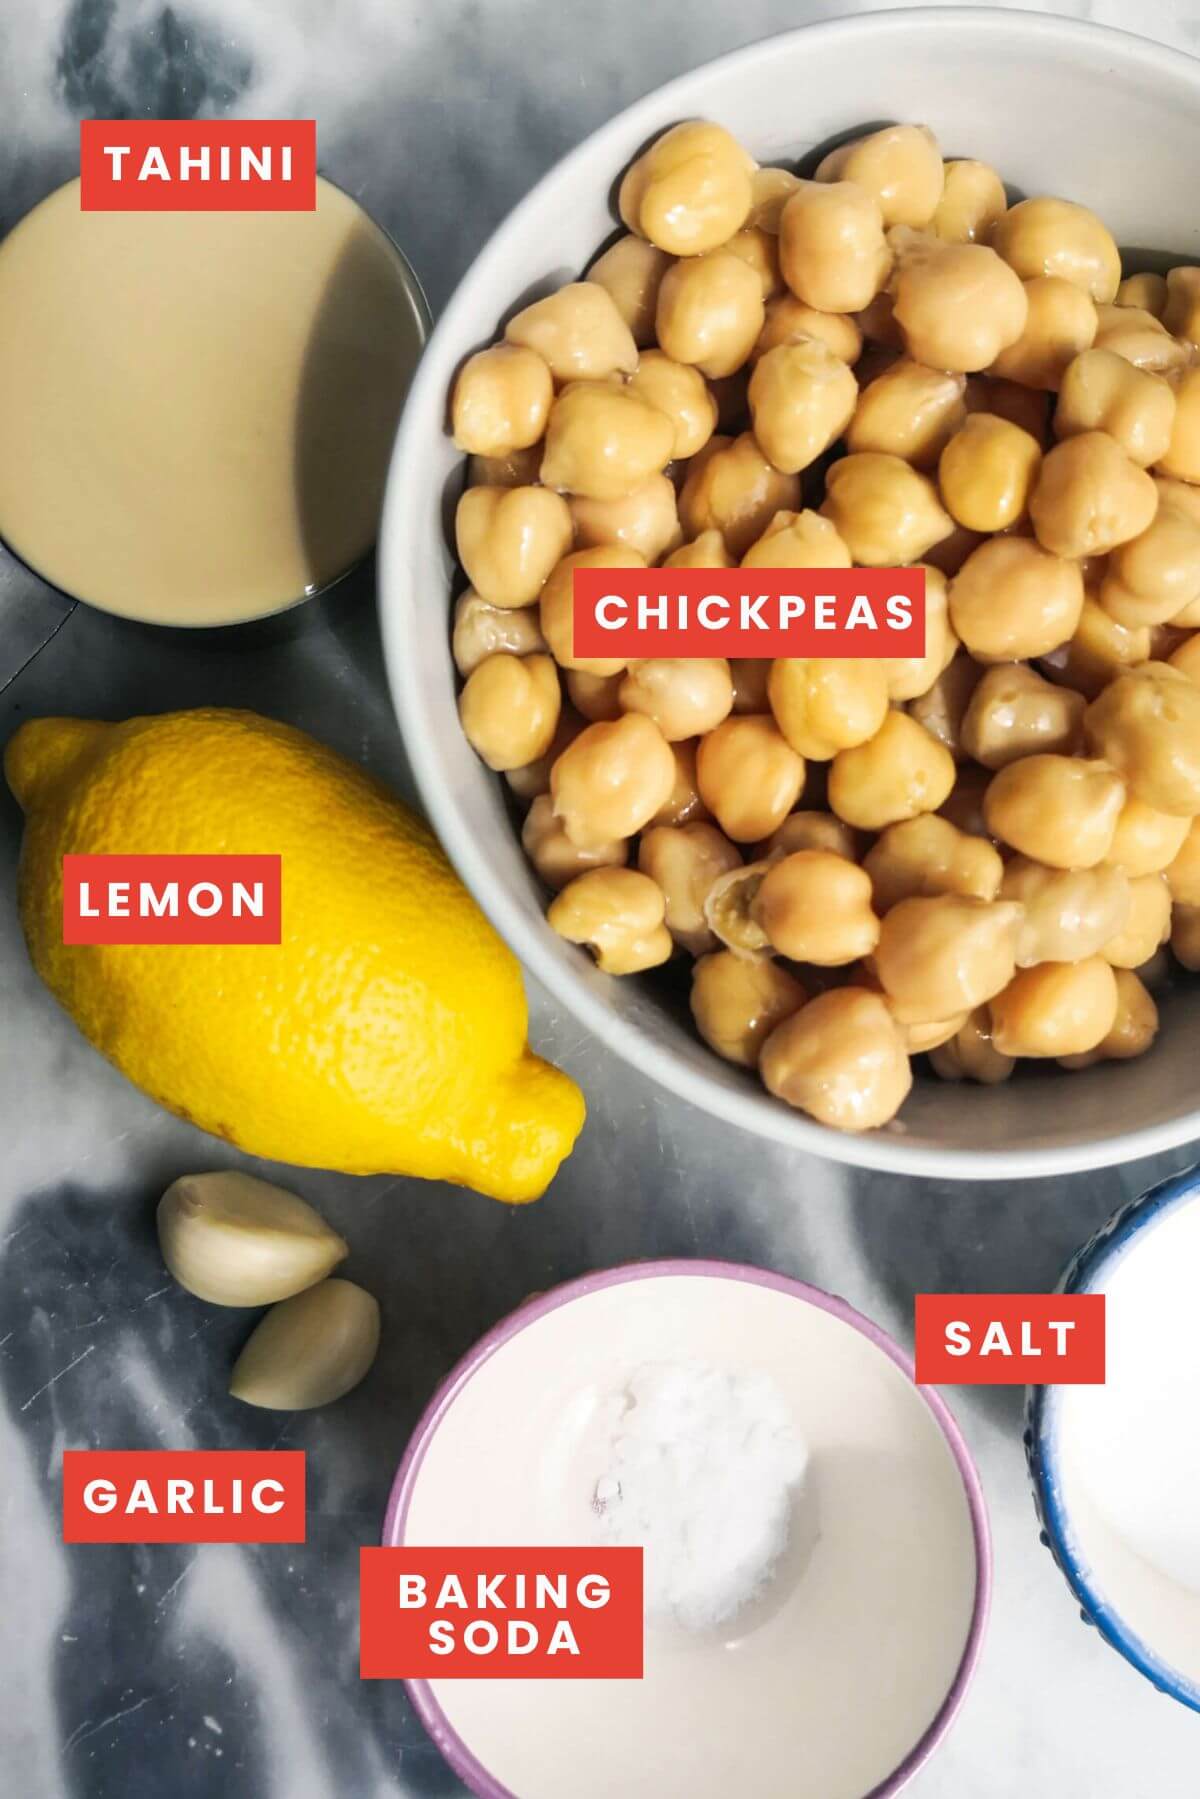
- Use fresh lemon juice if you can – the hummus needs the fresh and zingy lift you get from the real stuff.
- Baking soda helps to break down the chickpea skins to give you a smooth, creamy result.
- Tahini. No two tahini brands are alike. Tahini is a creamy and nutty sesame seed paste, crucial for making creamy hummus. I’ve had a couple of people ask about the best tahini to use and this is super important because it does make a difference to your finished hummus. A gritty and bitter, low-quality tahini can ruin it which is very disappointing. Look for the country of production or origin to be Lebanon or Palestine and you’ll be onto something good. I like using Belazu or Al Yaman.
You’ll also need ice cubes (or use very cold water) to help make your smooth hummus.
How to make it
Start by boiling your chickpeas with the baking soda in a large pot of water – this is going to make their skins break down and give you that creamy dreamy hummus you’re after. Get it simmering for 20 minutes. While the chickpeas are simmering, add the tahini and lemon juice to your food processor. Chop your garlic roughly, then add that too. Blitz until the tahini changes texture and becomes thick, then let it sit.
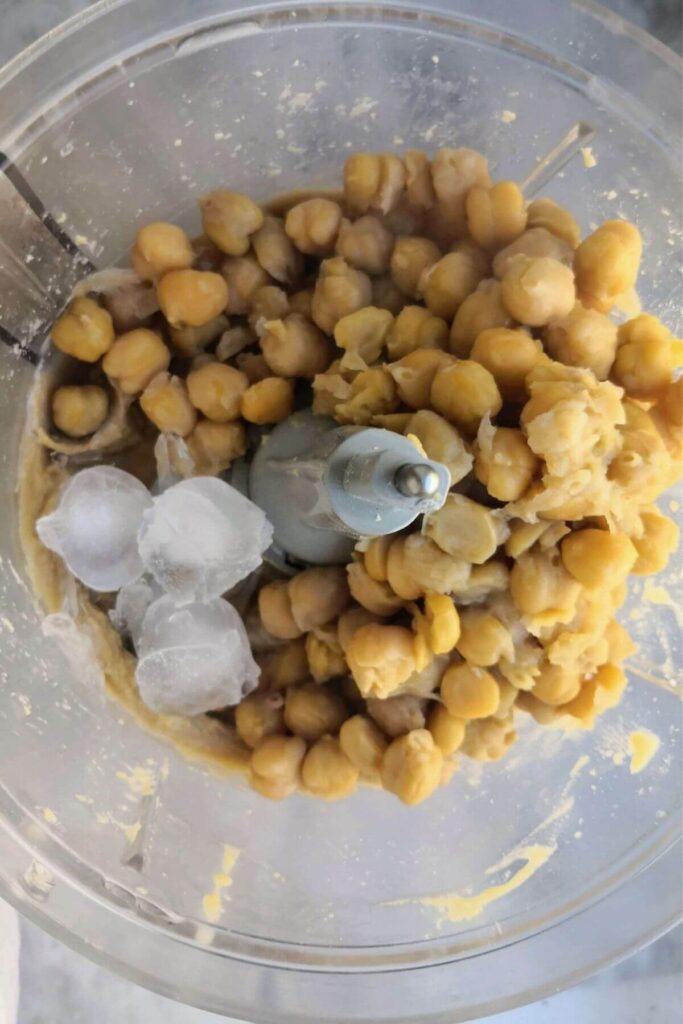
Once the 20 minutes are up and the chickpeas are super mushy (they should easily squash when you press against them with a spoon – if they don’t, cook them for another five minutes and test again). To make things simple, I like to directly transfer the chickpeas from the water into my food processor using a slotted spoon. Don’t worry if some of the cooking liquid goes into the food processor. Then all you’re going to do is add your ice cubes (if you’re using ice water, drizzle that in when the motor is running) and 2 tablespoons of chickpea cooking water and blitz until lovely and smooth, about 1 minute.
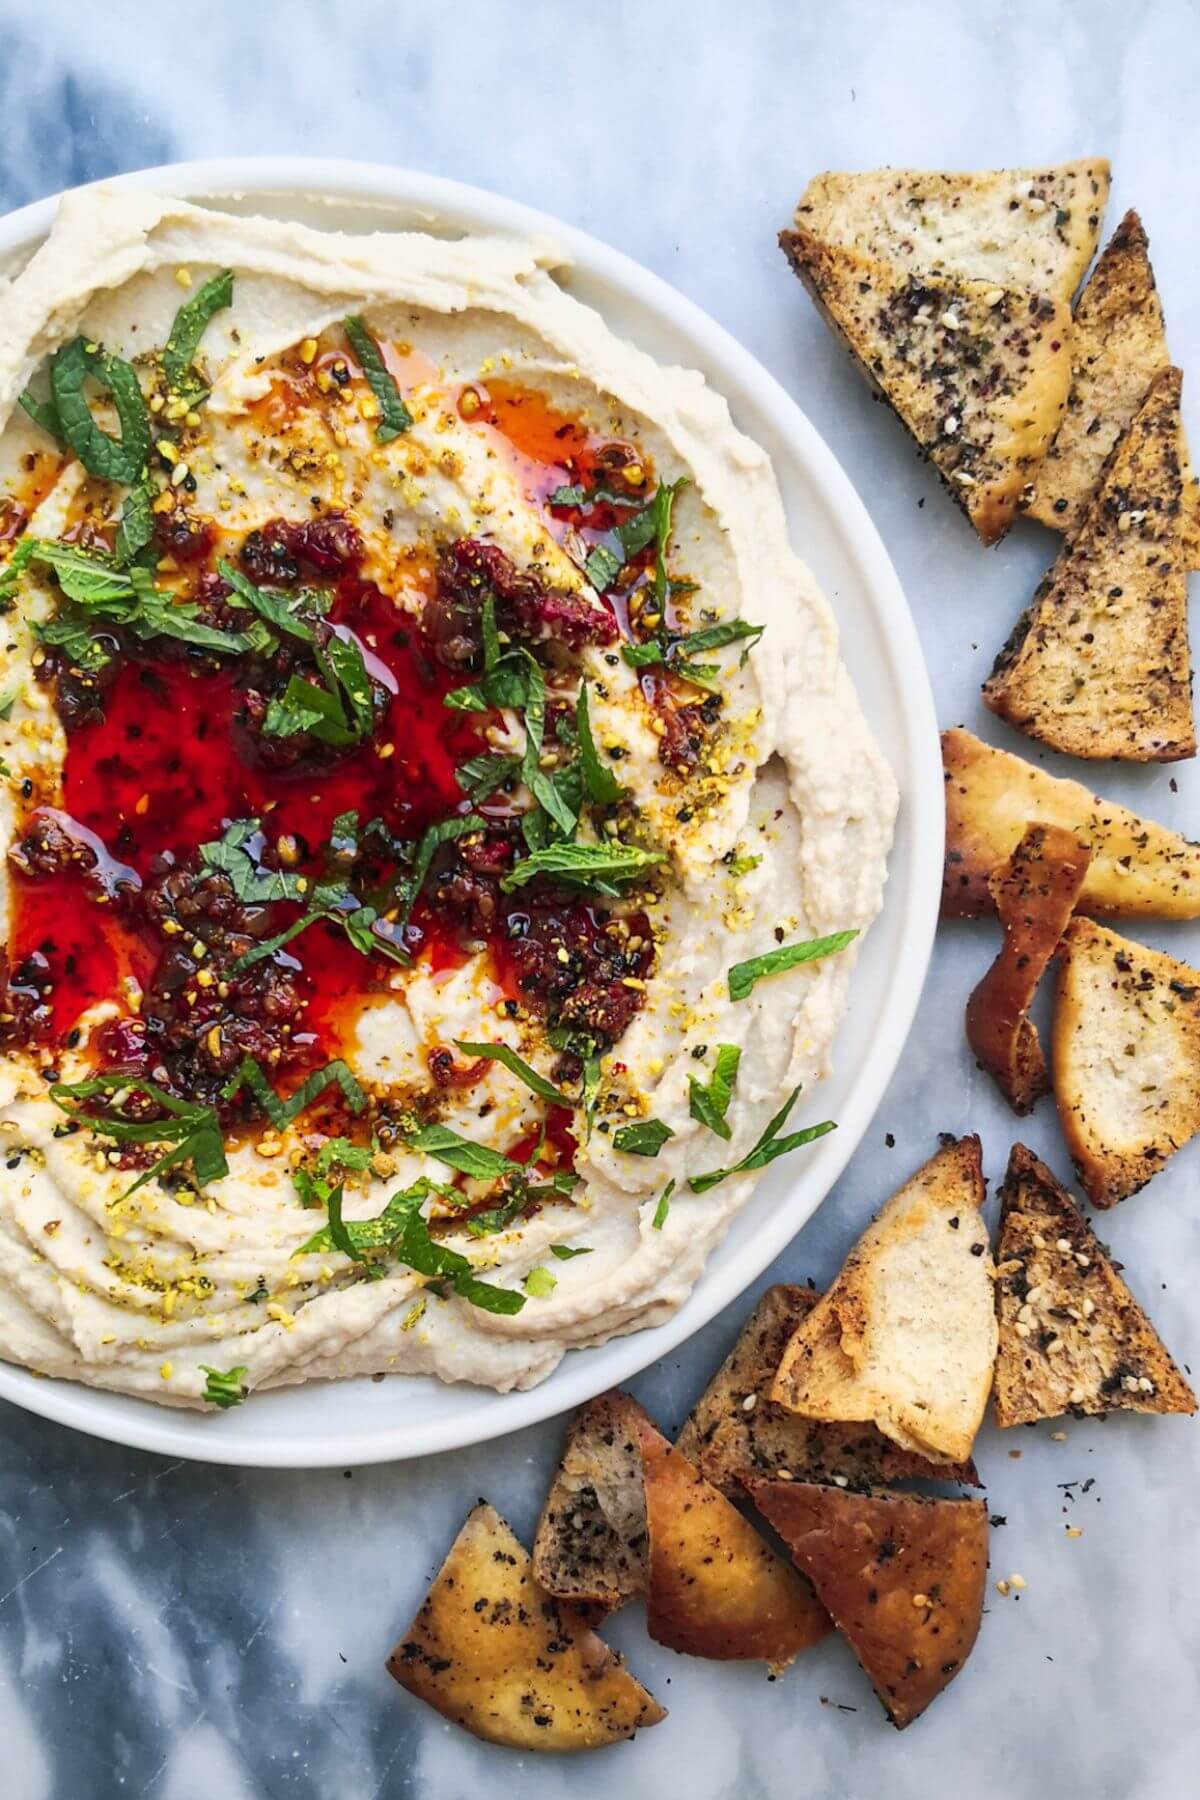
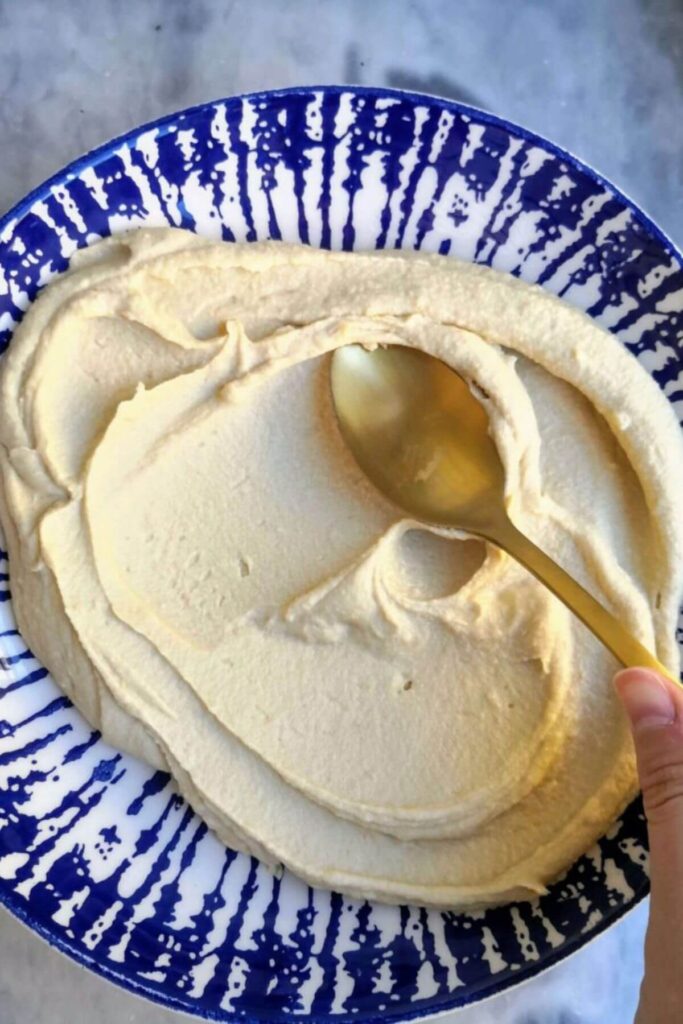
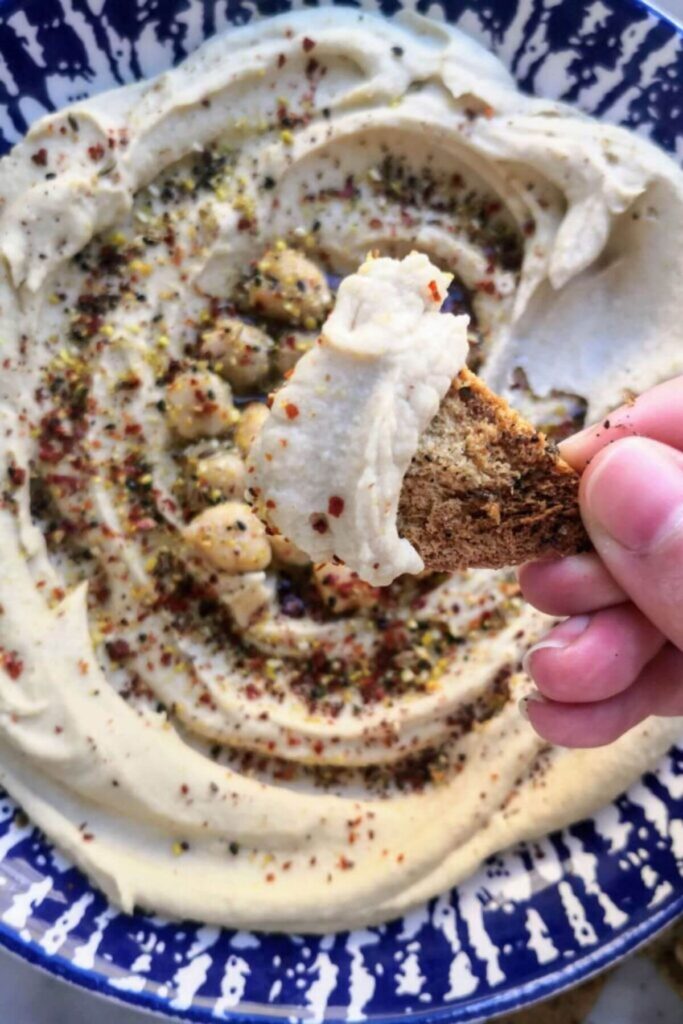
And you’re done! All that’s left is to top the hummus with whatever you like – I love drizzling it with chilli oil and fresh mint, or dukkah, olive oil and sumac. Serve with homemade pita chips for the best snack!
My four best hummus tips and tricks
There are a couple of tricks that make this hummus super creamy and delicious:
- Soft and mushy chickpeas make for the smoothest result. If you try and blend your chickpeas directly from a tin or jar, no matter how long you blend for you’re not going to get the smooth creamy result you’re after. Instead, boil your chickpeas on the stovetop with a little baking soda. The baking soda helps to break down their skins (the skins make the hummus gritty). Doing this is fab for two reasons – you’ll end up with soft chickpeas AND you’ll have broken the skins down. The alternative is to peel all the skins off your chickpeas manually and honestly, who has time for that??
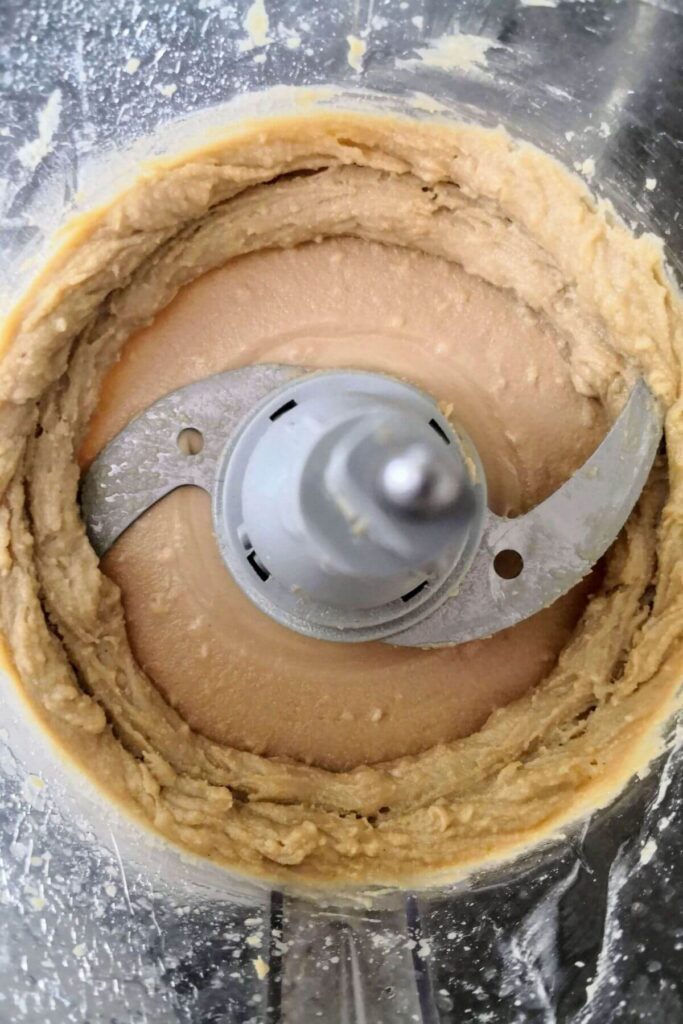
- Blend your tahini, lemon juice and garlic first. This will help you achieve that coveted creamy result. You’re essentially whipping the tahini – creating lots of lovely air pockets that will make your finished hummus lovely and smooth.
- Add a couple of ice cubes to the food processor when you add your warm, cooked chickpeas. Like whipping the tahini, this helps the hummus become super airy and light. You can also drizzle in 2 tablespoons of ice water if you are out of ice!
- Use some of your chickpea cooking water in the hummus to thin it and help you achieve that lovely creamy texture. I picked up this tip from Noor at the Ottolenghi Test Kitchen and it gives the finished hummus an even more delicious flavor.
PRO TIP: SAVE YOUR AQUAFABA! This stuff is magic. It’s the viscous liquid the chickpeas sit in and you can use it instead of eggs for so many different recipes. I use it in my egg-free garlic aioli recipe and much prefer it to using eggs. You can also use it to make meringues.
Got a question?
I make my hummus in a basic food processor and I think this is the best option – you could use a blender but you will have to add a little more liquid to get it going. Start with 1 tablespoon of water at a time.
You sure can! I love making a big batch of hummus and using it over the week in different ways. It’ll keep for a week in an airtight container in the fridge. Whenever I’m prepping for a party or having people over (because hummus is always on the menu at my house!) I’ll always make my hummus at least a day in advance to get ahead.
The possibilities are endless with hummus. Use it as a dip with crudités or crunchy pita chips, load it up with salad, roasted veggies or grilled meat for a loaded hummus plate, use it as pasta sauce, add a dollop to a Buddha bowl, use in place of mayo, on toast or bruschetta or just eat it with a spoon.
Again, the possibilities are endless. I’ve topped this recipe with a sprinkling of nutty dukkah (a lovely mix of pistachios, almonds, coriander seeds, cumin seeds, fennel seeds, nigella seeds, chili flakes and salt), sumac (beautifully pink and tart) and some Aleppo pepper flakes (a lovely bright, mild chili). You can drizzle it with 30 minute chili oil, loaded bread dipping oil, more tahini, load it up with sun-dried tomatoes, roasted cherry tomatoes or just a drizzle of olive oil.
Either works well here. If I can, I like to use jarred because I find the chickpeas are better quality and you can tell in the finished hummus, but canned are fine too (and they are a lot cheaper).
If you want to try making hummus using dried chickpeas and you have an Instant Pot, I have an amazing hack you can use. Just pop your dried chickpeas in the bowl of your pressure cooker, cover them in water and add a little baking soda, then cook at high pressure for 1 hour. Then you’re ready to use them! This is SO much quicker than soaking them overnight, before simmering them until soft.
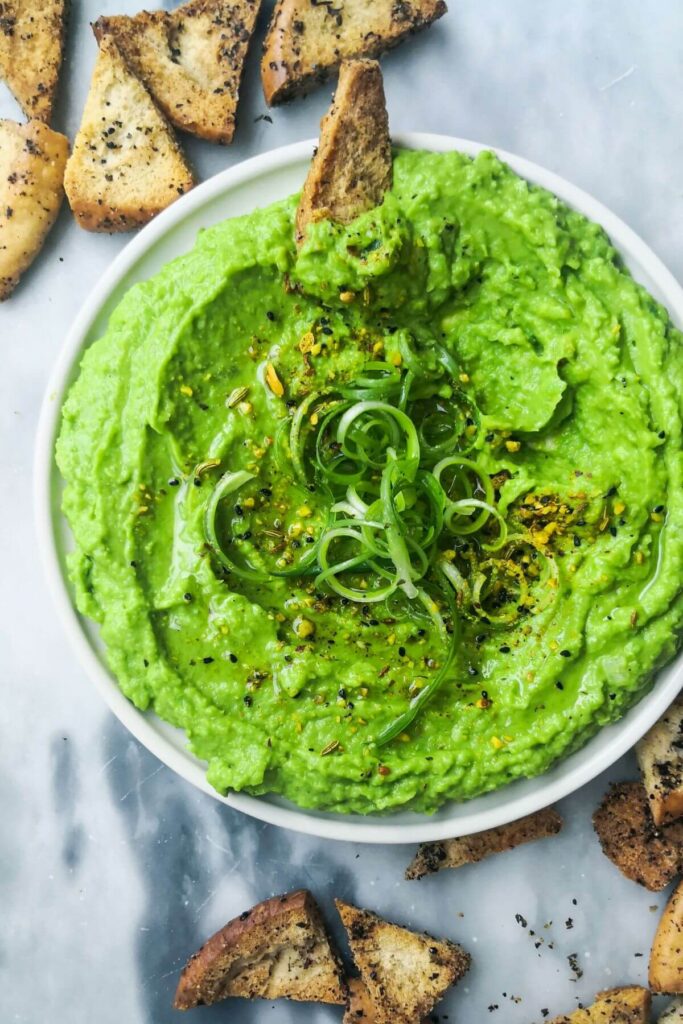
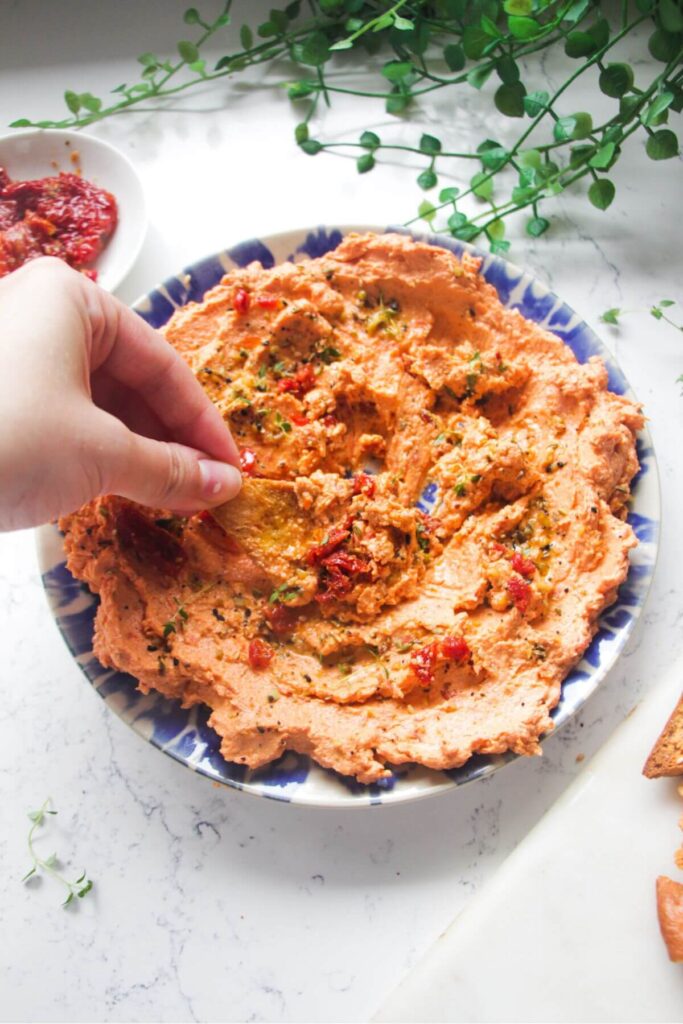
Ready for more dip inspiration? Here are some of my favourites


If you make this recipe, I’d love to hear from you! You can leave a recipe rating and a comment below. And remember to tag @DishedByKate on Instagram, Facebook and TikTok if you’ve made one of my recipes. Seeing your recreations really makes my day 😊.
Print
Creamy, Super Smooth Hummus (Oil Free)
- Total Time: 30 minutes
- Yield: 2 cups 1x
- Diet: Vegan
Description
Say hello to easy, creamy SUPER smooth, oil-free hummus that is so much more delicious than anything you can pick up at the store. It uses just FIVE ingredients and it’s vegan too.
Ingredients
For the hummus –
- 15oz/450g chickpeas (drained weight, from a can or jar)
- 1/2 teaspoon baking soda
- 2 teaspoons salt
- 1/2 cup tahini
- 2 garlic cloves
- 2 tablespoons fresh lemon juice
- 3 ice cubes OR 2 tablespoons ice water
- 2 tablespoons reserved chickpea cooking water
To serve –
- 1 tablespoon nutty dukkah
- 1 teaspoon chilli flakes
- 1 teaspoon sumac
- 1 tablespoon chili oil or loaded bread dipping oil
Instructions
- Boil your chickpeas. Start by getting your chickpeas into a large pot. Add 1 teaspoon of salt and 1/2 teaspoon of baking soda, then cover them in cold water. Put the pot over medium heat and bring to the boil. Once it’s boiling, turn the heat down and let it simmer for 20 minutes, or until the chickpeas are very soft and squash easily against your spoon.
- Blitz the garlic, lemon and tahini. Meanwhile, chop up your garlic cloves into large chunks, and get them into the bowl of a food processor, along with the 1/2 cup of tahini, 2 tablespoons of lemon juice and 1 teaspoon of salt. Blitz for 1 minute, until the tahini changes texture from smooth and light and becomes thicker and a little darker in color.
- Add the chickpeas and blitz. Once the chickpeas are super soft, transfer them directly from the pot into the bowl of your food processor using a slotted spoon. Add two tablespoons of the chickpea cooking water to the bowl too. If you’re using the ice cubes, add them now and then blitz for 2 minutes until the hummus is super smooth. If you’re using ice water, get the motor running then drizzle the water in and blitz for 2 minutes, until it’s super smooth. Taste, and add a little more salt and lemon juice if you think it needs it. Just be careful, it’s easy to over-salt.
- Garnish and serve. Transfer to a small bowl and create a little crevice in the middle to add your garnishes. Serve with pita chips, flatbreads, crackers, or smooth onto focaccia.
Notes
If you don’t have time, you can skip boiling your chickpeas – your hummus won’t be quite as smooth, but it’ll still taste delicious.
STORAGE INSTRUCTIONS: You can make the hummus in advance if you like – it will last a week in the fridge in an airtight container (but to be honest, I doubt you’ll need to store it for long!) It will thicken up a little as it sits and once it’s put in the fridge, just give it a little mix and add a tiny bit of water (a teaspoon at a time) if it needs it.
INGREDIENT NOTES: The quality of tahini vastly differs between brands – I like using Al Yaman or Belazu. Look for tahini manufactured in Palestine or Lebanon for the best quality. Switch up your garnishes to use whatever you have – fresh parsley, basil or thyme is lovely, as is za’atar and sesame seeds.
- Prep Time: 5
- Cook Time: 25
- Category: dips
- Method: food processor
- Cuisine: mediterranean
Nutrition
- Serving Size: 50g