This SUPER easy bacon and egg picnic slice is a twist on the classic New Zealand bacon and egg pie. It’s easier, quicker and has all the flavours of the original, with a few flavour-packed tweaks. Perfect for picnics, parties or meal prep. Top with a dollop of basil pesto for a fresh, zingy finish.

A bacon and egg pie is an undisputed New Zealand classic. Soft silky eggs, crispy savoury bacon and buttery pastry are a delicious mix, so it’s no wonder the pie consistently makes an appearance at picnics, potlucks and parties all over the country.
This version is based on something my mum used to make all the time when I was growing up. It’s a fun twist on the classic, and honestly? I think it’s even better. It’s quicker and easier than the original – just cook your bacon, lay out a sheet of store-bought pastry, top it and throw it in the oven. It’s part slice, part tart, part pie and totally delicious.
While the slice is fab served hot from the oven, it’s also great cold, which is why it’s the perfect picnic or party food. I think you can also get away with serving this for a lovely brunch! Bacon and eggs are the primary ingredients, after all.
Why you’ll love this slice
- The original bacon and egg pie tends to use whole unwhisked eggs. I personally have never liked the texture of the eggs when it’s made that way. I find the eggs go rubbery and hard, rather than being soft and silky. So in this version, I’m whisking the eggs before adding them to the pastry, which creates a more quiche-like filling.
- I’m also jazzing things up by adding a few more flavours into the mix – a good sprinkling of strong cheddar cheese goes onto the base of the pastry, garlic (as well as onions) gets cooked along with the bacon, fresh tomatoes are placed on top of the slice, and we’ll add a good dollop of basil pesto after baking.
Ingredients
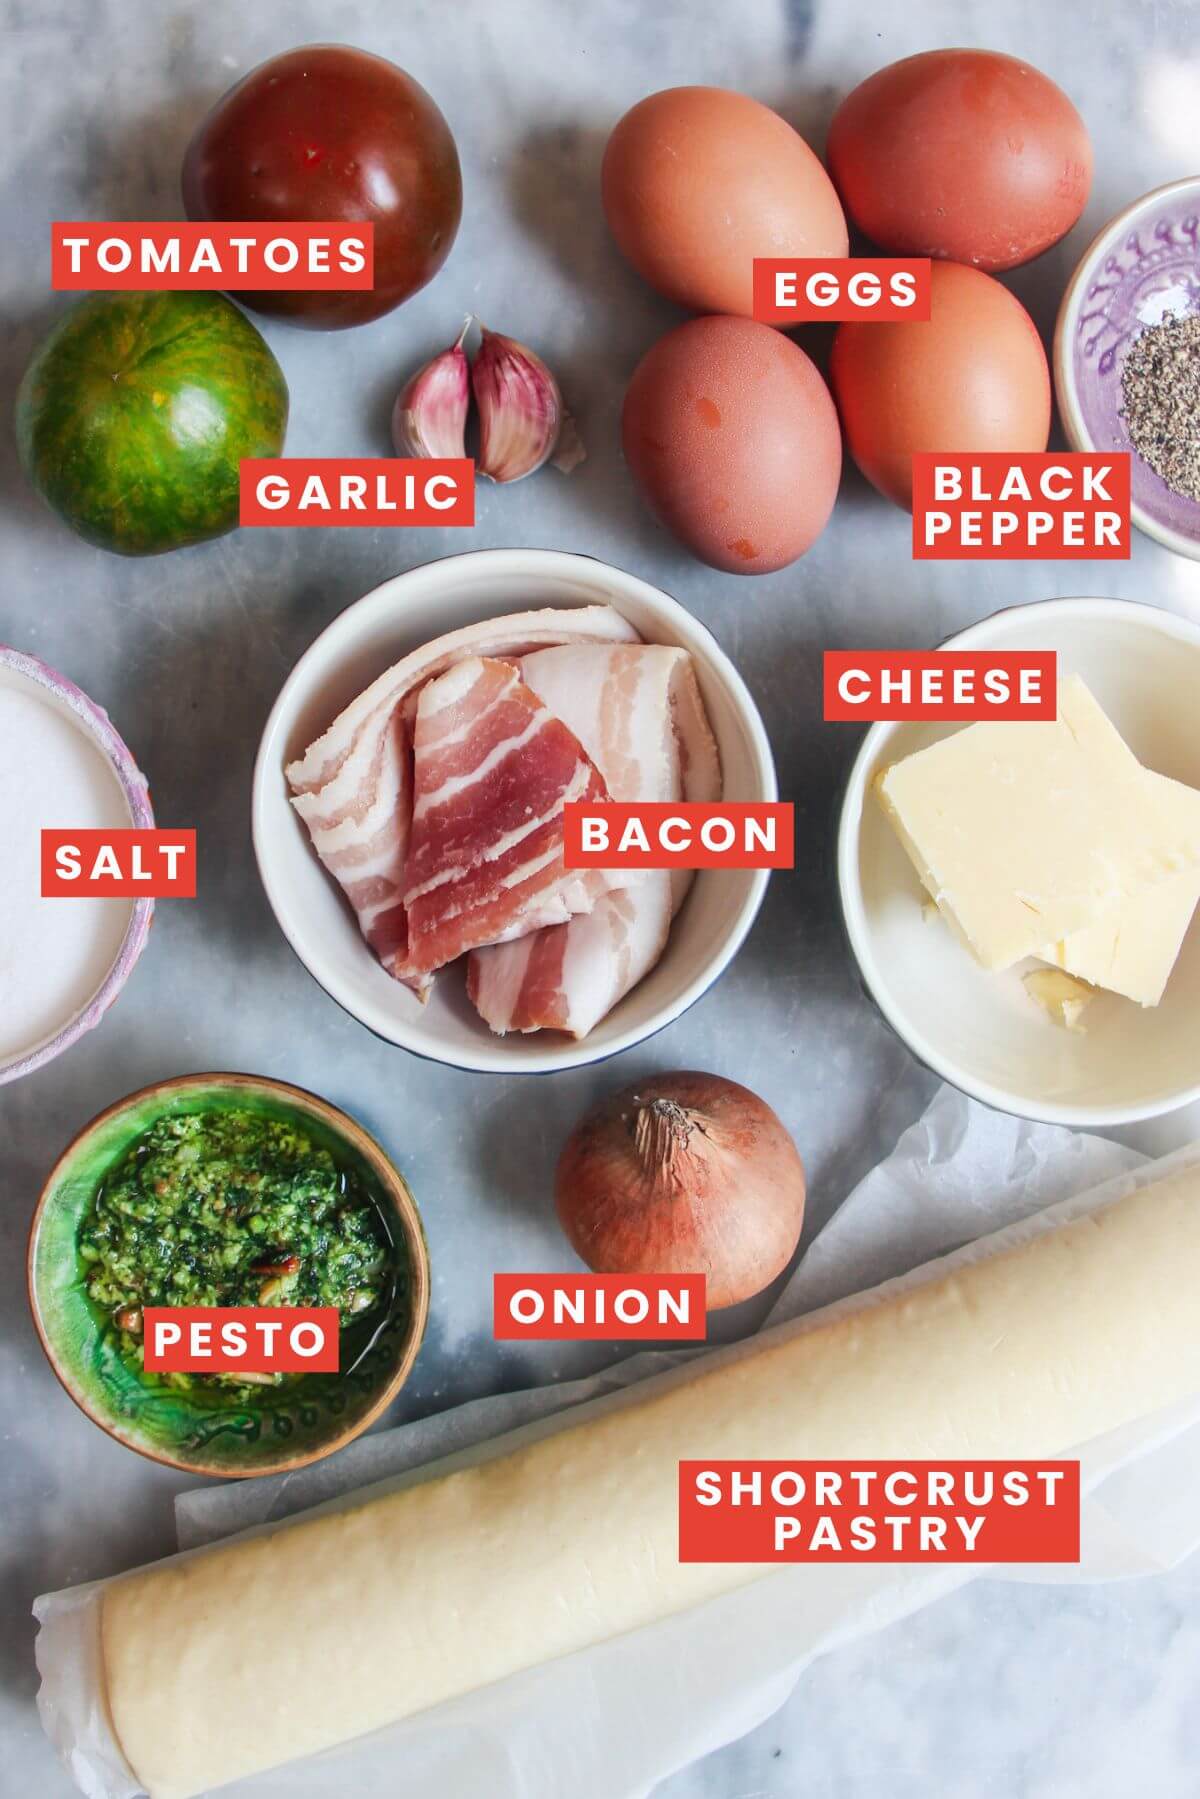
- Pastry. Use storebought for ease – I’m using shortcrust, but you could use puff pastry if you like.
- Bacon. Always use free-range for the best quality. I’m using smoked streaky bacon, but you could use back bacon too, or even ham (this is a great way to use up any Christmas ham leftovers).
- Tomatoes. You don’t have to add tomatoes, but it looks lovely and adds another level of flavour. It’s also fun when it comes to slicing and serving, as every slice can have a piece of tomato on it.
- Cheese. There’s not a lot cheese doesn’t improve, and it serves two purposes here. Scattering the base of the pastry with a layer of grated cheese forms a barrier between the pastry and the eggs, helping the pastry stay crispy. And of course, it adds a delicious, cheesy flavour that works perfectly with the bacon and eggs. I like to use strong cheddar, but you could use anything with a strong flavour like blue cheese, gruyere, feta or goat’s cheese. You can use pre-grated cheese if you like.
How to make it
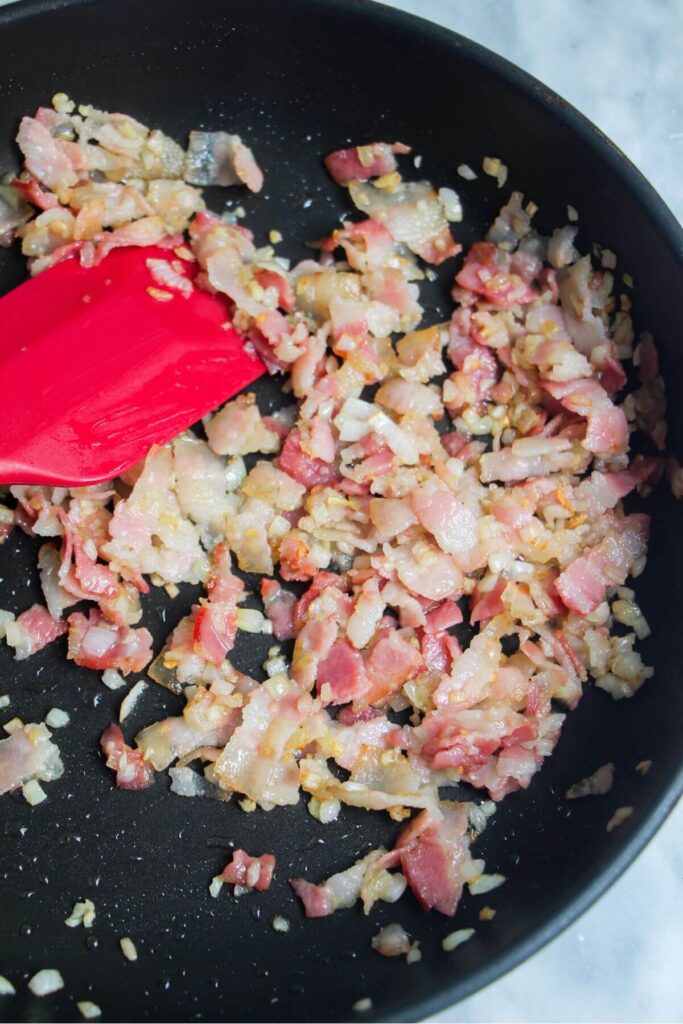
Cook your bacon, diced onion and garlic in a little olive oil until the onion and garlic start to soften and the bacon is nice and crispy.
Whisk your eggs, salt and pepper, then get ready to assemble.

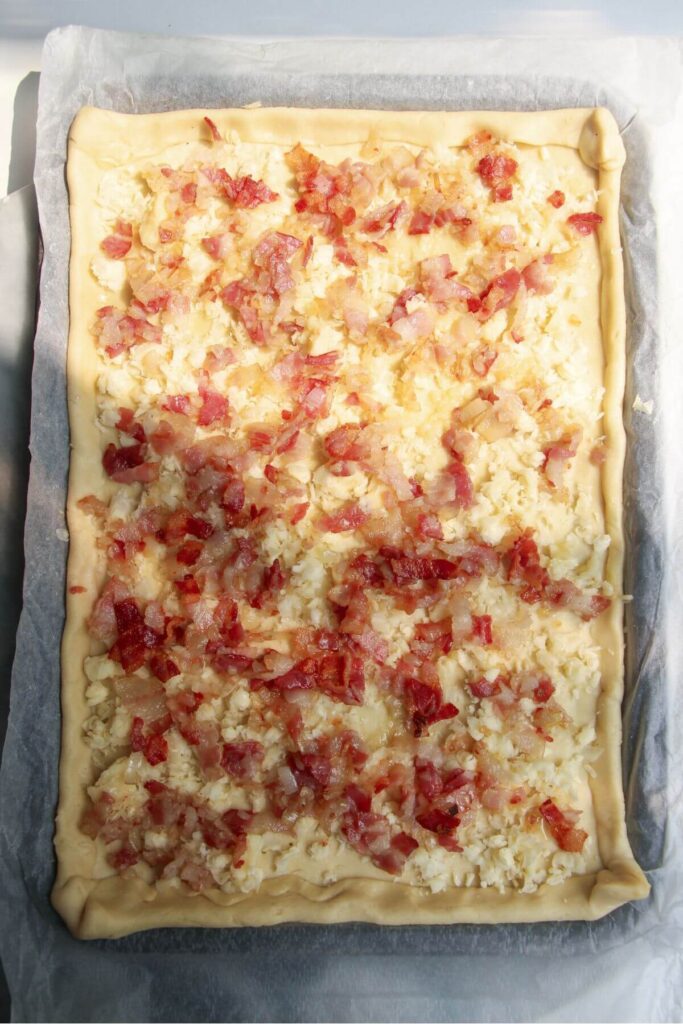
Store-bought pastry generally comes wrapped in a piece of baking paper, so I like to use this to line an oven tray, for ease. Fold in the edges of your pastry to make a small crust, then pierce the base of the pastry all over with a fork. Scatter your grated cheese all over the base, top with the bacon, onion and garlic mix and spread it out so it’s covering the pastry evenly.
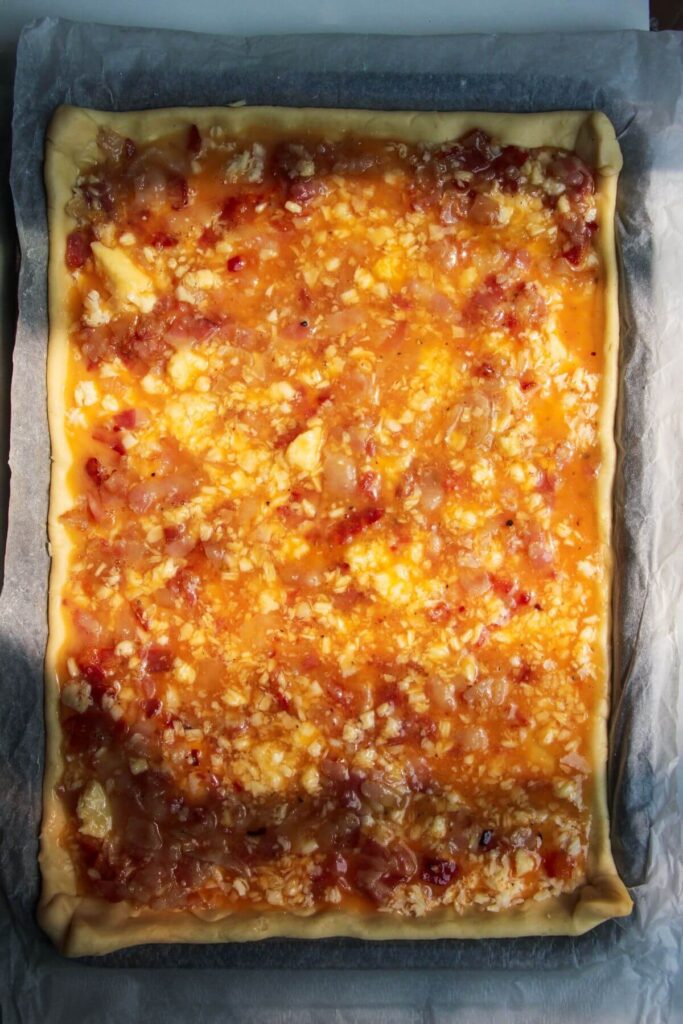
Pour the whisked eggs all over, again using a fork to move it around so that it’s evenly spread over the pastry. Top with your sliced tomatoes, then bake for 20 minutes at 180C/360F fan.


The pastry should be looking lovely and golden, the egg should be set and there should be charred spots around the edges. Dollop over some fresh pesto, then slice and serve.


Got a question?
You sure can! Once cooked, the slice will last for 3 to 4 days in the fridge. You can eat it cold, or reheat it in the microwave at 30-second intervals, or you can reheat it in the oven, covered in aluminium foil (so the top doesn’t burn and dry out). Heat it for 10 minutes at 160C/320F fan.
There are endless variations and additions you can make to this recipe! Here are some ideas to get you started:
– add caramelised onions and feta
– add peas, spinach and mint for a springtime version (similar flavours to the Coronation Quiche)
– swap bacon for ham, sausage meat, chorizo or ‘nduja
– replace the bacon with sliced zucchini and asparagus for a vegetarian version
– keep the eggs whole if you prefer
– dollop over cream cheese or boursin instead of tomatoes
– top with a drizzle of sweet chilli jam or chilli oil.
You can! Wrap the whole thing in clingfilm, or pop slices into ziplock bags, then defrost overnight in the fridge and reheat in the oven at 160C/320F fan for 10 minutes.
Watch how to make them
Like this recipe? Here are more quick party food ideas


If you make this recipe, I’d love to hear from you! You can leave me a comment below.
Print
Easy Bacon and Egg Picnic Slice
- Total Time: 35 minutes
- Yield: 8 servings 1x
Description
This SUPER easy bacon and egg picnic slice is a twist on the classic New Zealand bacon and egg pie. It’s easier, quicker and has all the flavours of the original, with a few flavour-packed tweaks. Perfect for picnics, parties or meal prep. Top with a dollop of basil pesto for a fresh, zingy finish.
Ingredients
- 1 tablespoon olive oil
- 6 slices streaky free-range bacon, chopped
- 1 onion, finely diced
- 4 garlic cloves, crushed
- 1 sheet of shortcrust pastry
- 5 free-range eggs
- 1/2 teaspoon salt
- Black pepper
- 1/2 cup grated cheddar cheese
- 2 large tomatoes, sliced
- 2 tablespoons basil pesto
Instructions
- Cook your bacon, onion and garlic. Start by heating your oven to 180C/360F fan and get a large, shallow oven tray ready (approximately 35cm/14″ x 30cm/12″). Set a small frying pan over medium heat, then add 1 tablespoon of olive oil, the chopped bacon, onion and crushed garlic cloves. Cook, stirring, for about 5 minutes until the bacon is nice and crispy and the onion and garlic have softened. Remove the pan from the heat.
- Prepare your pastry. Unwrap your shortcrust pastry, then use the baking paper it’s been wrapped in to line your oven tray. Place the pastry sheet on top. Fold over the edges to create a small crust. PRO TIP: If your pastry doesn’t come in baking paper, you’ll need to line your oven tray with a sheet of baking paper first.
- Assemble the slice. Whisk your eggs in a small bowl with ½ teaspoon of salt and a good grind of pepper. Set aside. Pierce the bottom of your pastry with a fork a few times, then scatter 1/2 a cup of grated cheese all over the base. Top with the bacon, onion and garlic mix, then use a fork to spread it out evenly over the pastry. Pour the whisked eggs on top, and again use a fork to spread it gently all over the pastry, filling out the edges. Lay the tomato slices out on top of the egg (you can probably do about 4 rows of 3 tomato slices), and finish with a good grind of black pepper.
- Bake the slice. Transfer the slice to the oven and bake for 20 minutes, until the pastry is looking lovely and golden, the egg has set and you have lovely little charred spots all over. Dollop two tablespoons of basil pesto on top, then slice and serve.
Notes
STORAGE INSTRUCTIONS: Once baked, the slice will keep well for 4 days, stored in the fridge. You can enjoy it cold, but if you’d like to reheat it, you can do it in the microwave at 30-second intervals, or in the oven. Cover the slice with aluminium foil, then pop it into the oven for about 10 minutes at 160C/320F fan until heated through.
INGREDIENT NOTES: There are lots of different variations or additions you can make to this recipe. Swap the cheddar for blue cheese, feta, boursin, goat’s cheese or gruyere, skip the tomatoes if they’re not in season, add in some caramelised onions or marinated olives, and swap the bacon for ham (great for using up Christmas leftovers), sausage meat, ‘nduja or chorizo or use veggies like zucchini, spinach, peas or asparagus for a vegetarian version.
SERVING SUGGESTIONS: A classic New Zealand bacon and egg pie would be served with tomato sauce (ketchup), and while that’s GREAT, you could serve this slice with sweet chilli jam, a drizzle of chilli oil or even a relish or chutney (like this fig and tamarind chutney). This is fabulous party or picnic food and works well with a spread of salads – try it with a green goddess salad, peach and halloumi salad, grilled broccoli crunch salad, crunchy Asian slaw, tomato and burrata salad, parmesan roasted cauliflower salad or coronation potato salad.
- Prep Time: 10
- Cook Time: 25
- Category: bak
- Method: oven
- Cuisine: new zealand
Nutrition
- Serving Size: 1 slice
- Calories: 431
- Sugar: 1.5g
- Sodium: 512.4mg
- Fat: 33g
- Saturated Fat: 9.6g
- Unsaturated Fat: 21.3g
- Trans Fat: 0g
- Carbohydrates: 21.7g
- Fiber: 1.1g
- Protein: 11.8g
- Cholesterol: 137.1mg
Keywords: bacon egg pie


0 Comments