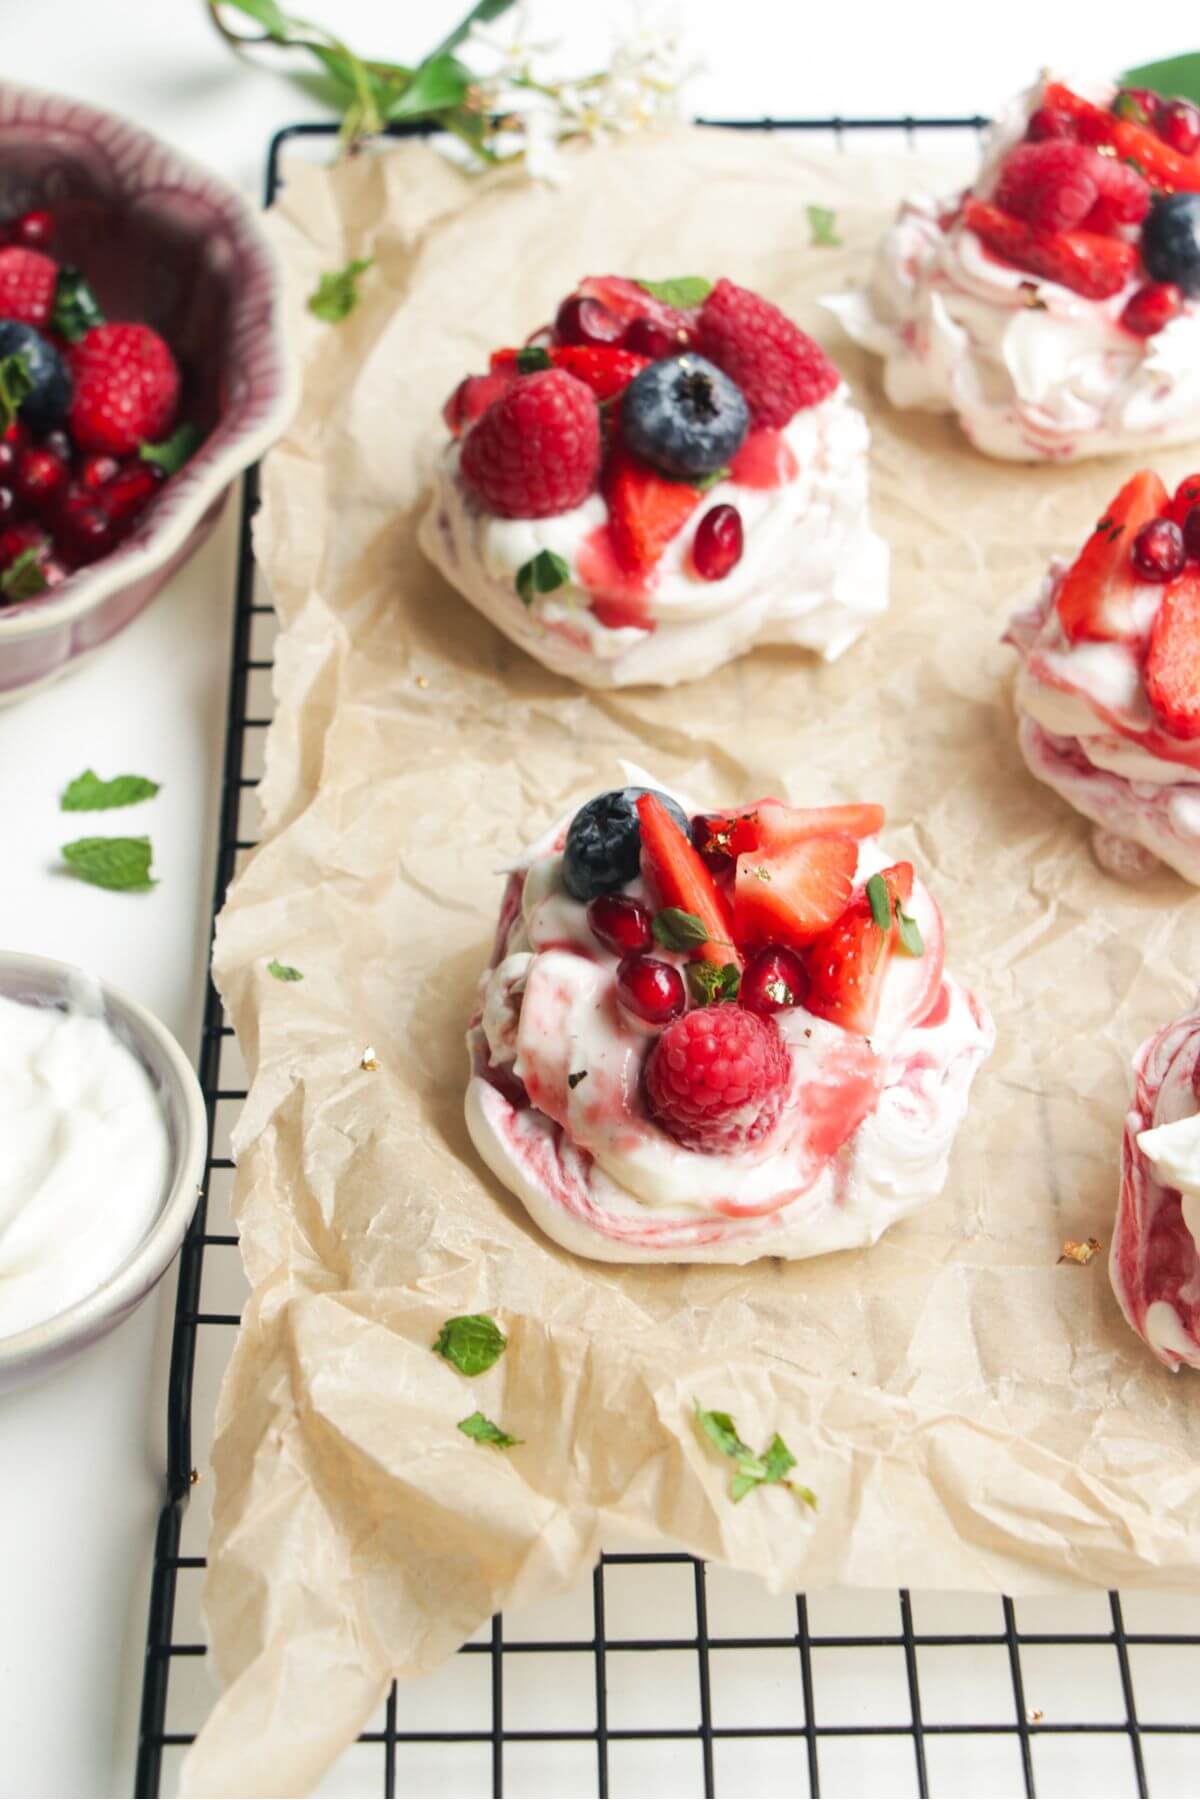
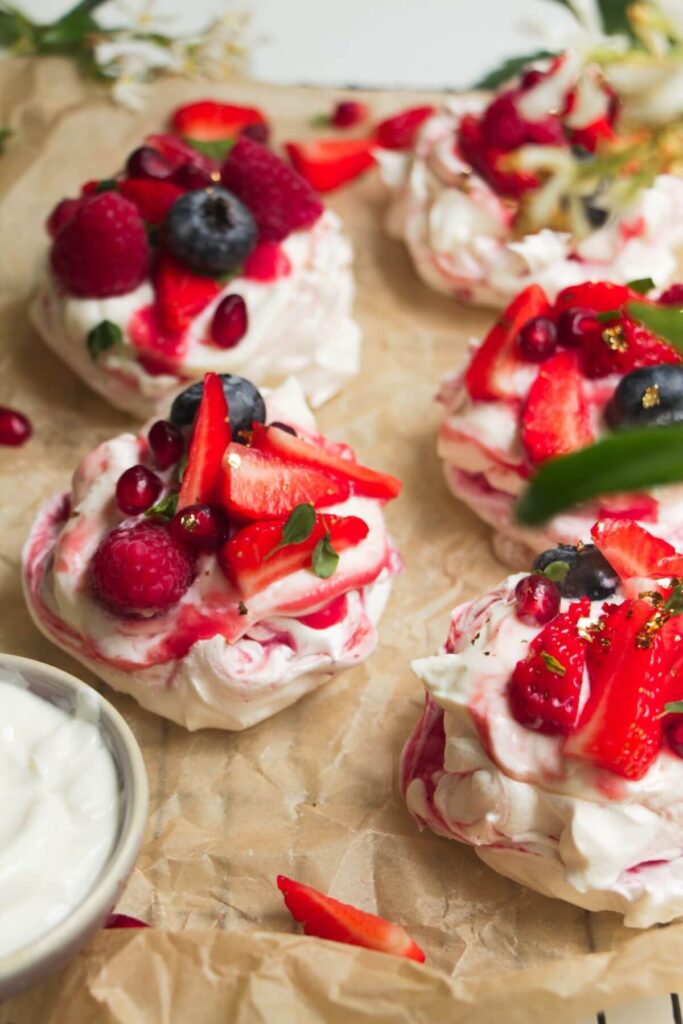
Mini pavlovas are a beautiful dessert option for any celebration. These cute mini versions of the classic are swirled with berry puree before baking, then dolloped with a velvety cheesecake topping for an elevated twist on regular whipped cream. Top with your favourite mixed berries for the ultimate crowd-pleasing dessert that’s easier to make than you’d think.
If there’s a dessert that’s synonymous with New Zealand (and Australia), it has to be pavlova. A staple on the Christmas table, it’s the perfect dessert for any kind of celebration. It looks spectacular, uses simple ingredients, there are endless ways you can top it to switch up the flavour, and has that gorgeous, rustic, ‘just whipped this up’ feel perfect for a relaxed finish to a meal.
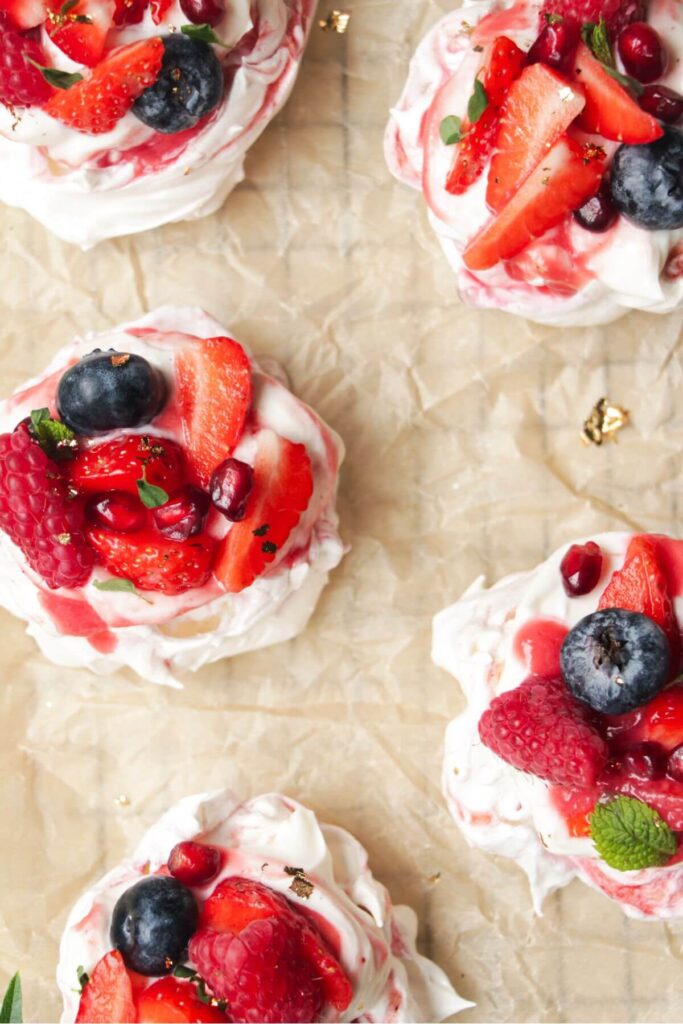
These ones are made even more special with a gorgeous raspberry ripple swirled through the crispy shell. They make for a wonderful dinner party dessert because everyone can have their portion, and they look AMAZING all lined up. They’re also quicker and easier to manage than a traditional large pavlova so it’s a win-win in my book!
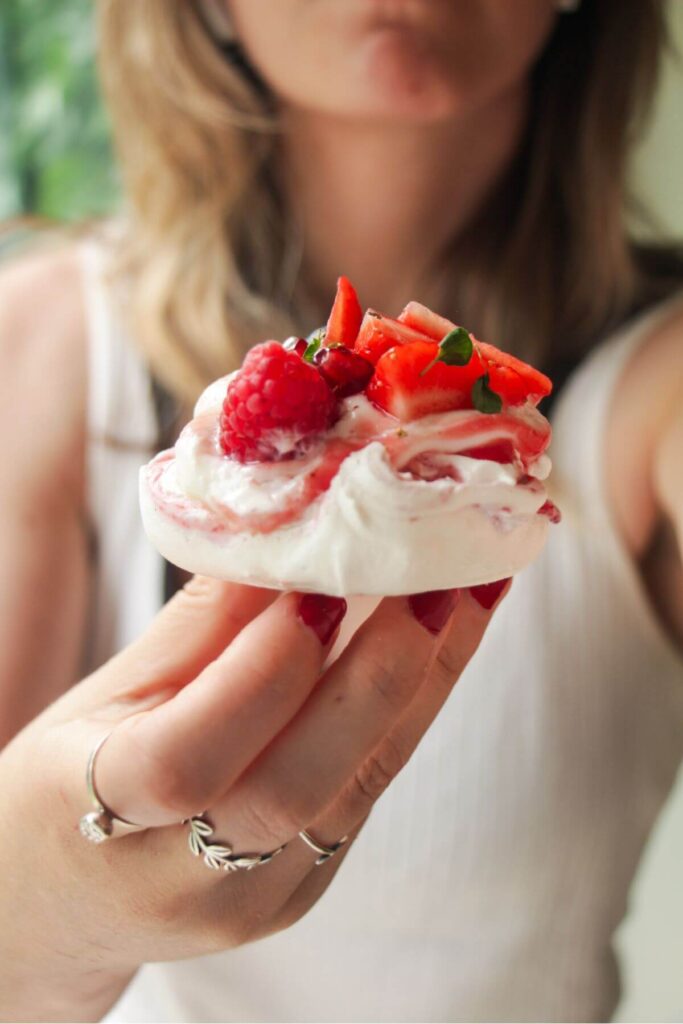
Whipped cream is the traditional topping for pavlova, but I have never liked cream so I’m switching it up here and I think you’re going to love it. Instead of cream, we’ll make a zingy, tart, creamy cheesecake topping by combining cream cheese with thick Greek yogurt (or labneh), sugar and a little vanilla. So you’ve got the crispy shell, fluffy marshmallow inside, cheesecake topping and a pile of fresh mixed berries. It’s truly a beautiful combination.
Difference between meringue and pavlova
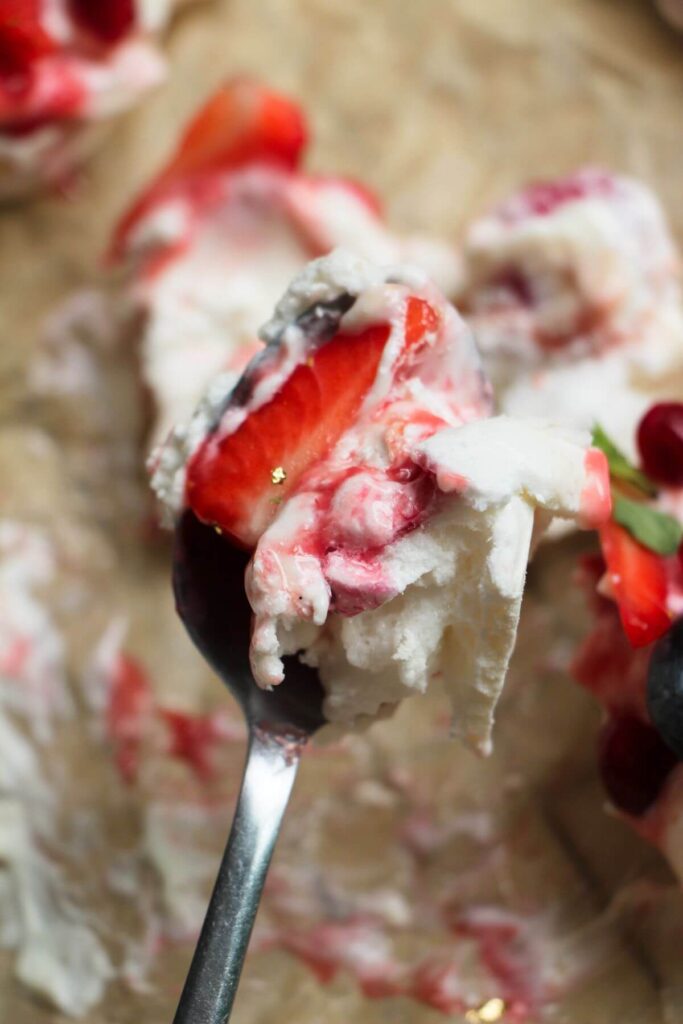
While meringue and pavlova may look very similar, they’re quite different, even though they’re made from the same ingredients. The difference is the cook time, and therefore the texture of the finished product. Meringue is cooked for longer and is crispy all the way through, whereas pavlova has a crispy exterior, but a soft, fluffy, marshmallow-like inside.
Ingredients
The pavlovas themselves are made up of just four store cupboard ingredients, and then you can really play around with your toppings.
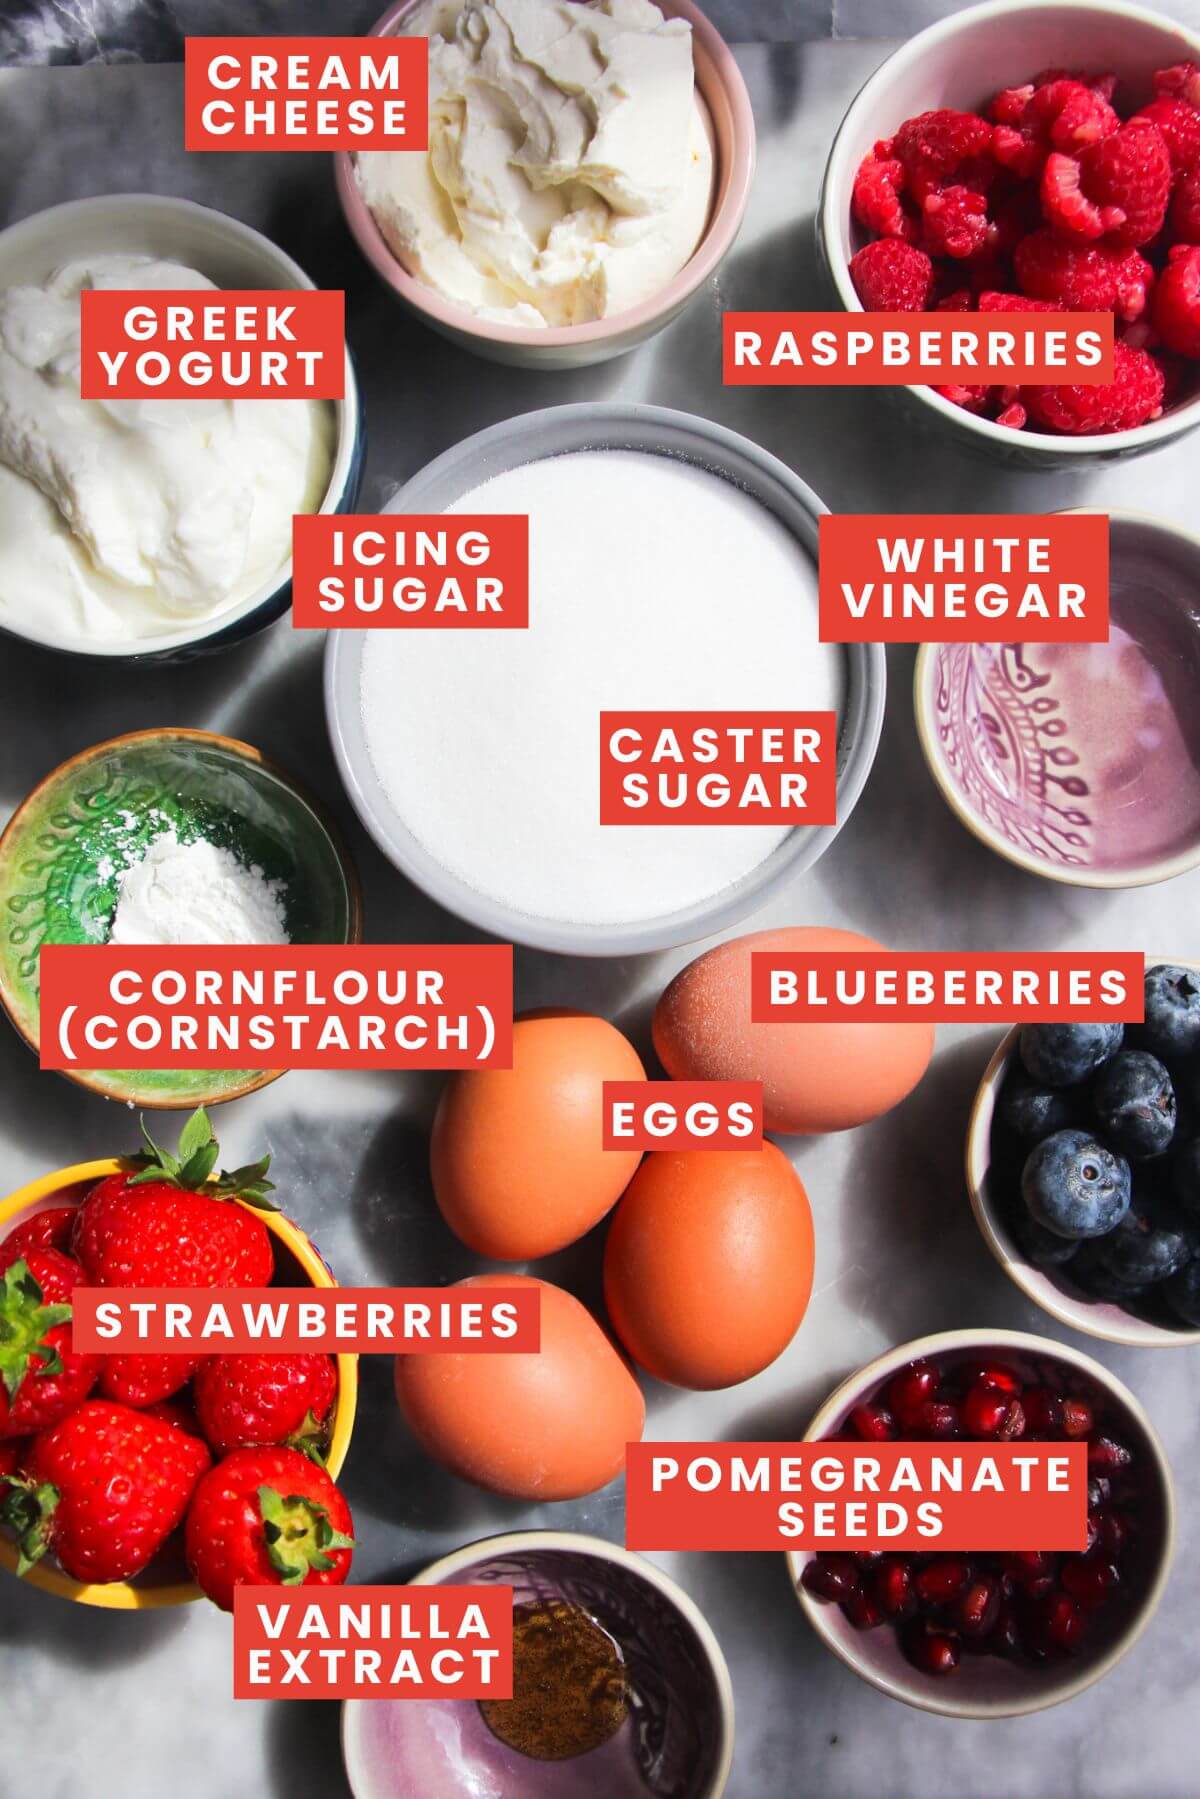
- Eggs. You need the egg whites – make sure they’re at room temperature for this recipe, they’ll whip up better. To separate the egg whites, I like to crack the eggs and then pass the yolk back and forth between the shells, letting the whites drip out into a bowl below. I don’t do this directly into the mixing bowl in case a little bit of yolk goes in – you want to avoid any yolk getting in the bowl as it will impact how well your meringue whips up.
- Cornflour and vinegar. These two ingredients help to stabilise the pavlovas, which are so prone to collapsing. I’m using white vinegar, but apple cider vinegar or lemon juice also works. Cream of tartar is also often used – you can use it here, but reduce the quantity to 1/2 teaspoon.
- Caster sugar. Aka, superfine sugar. Fine sugar is key for non-grainy pavlova, so you need this for the best result. If you only have regular granulated sugar, blitz it in a food processor for a minute. Sugar also helps to stabilise the pavlova (it supports the structure of the egg whites) and it gives you that gorgeously crispy exterior.
- Cream cheese. This is a lot easier to mix when it’s at room temperature. Regular or low-fat cream cheese both work well.
- Greek yogurt. Use a proper, thick Greek yogurt (or use labneh) for the best consistency. You want the topping to be thick enough to just about hold its shape and not run off the top of the pavlova.
- Berries. I’m using raspberries for the puree that you’ll use for the ripple through the pavlovas, and then more raspberries, strawberries, blueberries and pomegranate seeds to decorate after baking. You can play around with this – use just one, or switch things up and use stone fruits if they’re in season. Or, use defrosted frozen berries (they’ll become a kind of chunky compote which works really well with the cheesecake topping).
You really need either a stand mixer (this is what I use as it’s the easiest) or a hand-held electric mixer for this recipe – you won’t be able to achieve the right consistency and texture whisking by hand.
How to make them
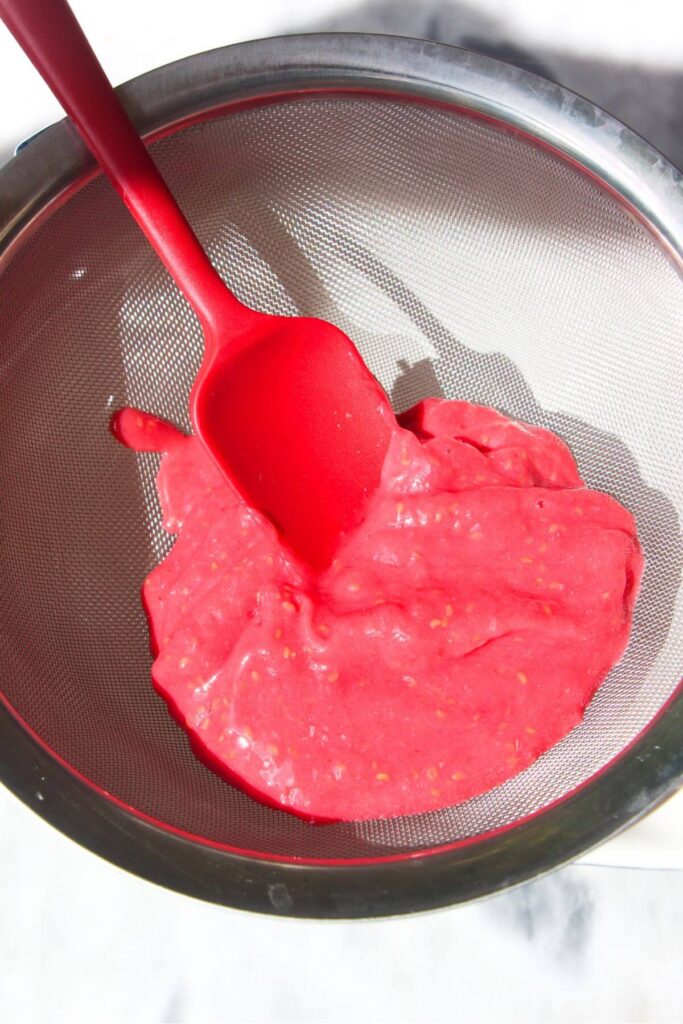
Start with the raspberry puree – blitz your frozen or fresh raspberries in a food processor or chopper, then pass through a sieve to get the seeds out. Set aside while you make the meringue.
Add your egg whites to the VERY clean bowl of your stand mixer and attach the whisk attachment. Whisk on medium speed until soft peaks form (this is when the egg whites have whipped up into a thick, white, frothy mixture, but not thick enough for it to stand upright on top of your whisk if you remove it and hold it upside down).
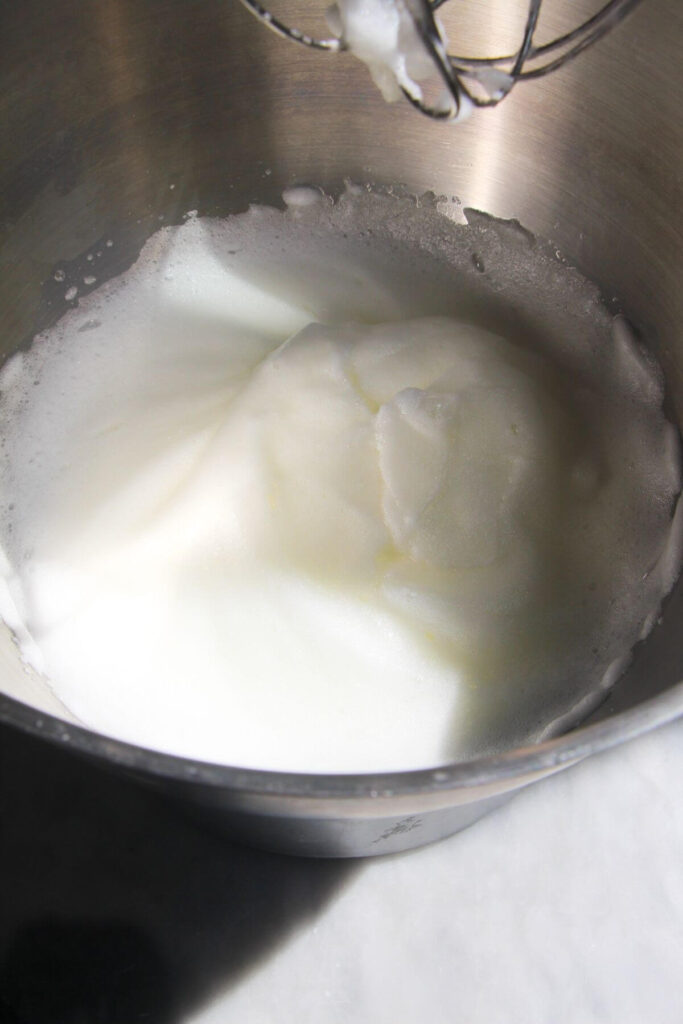
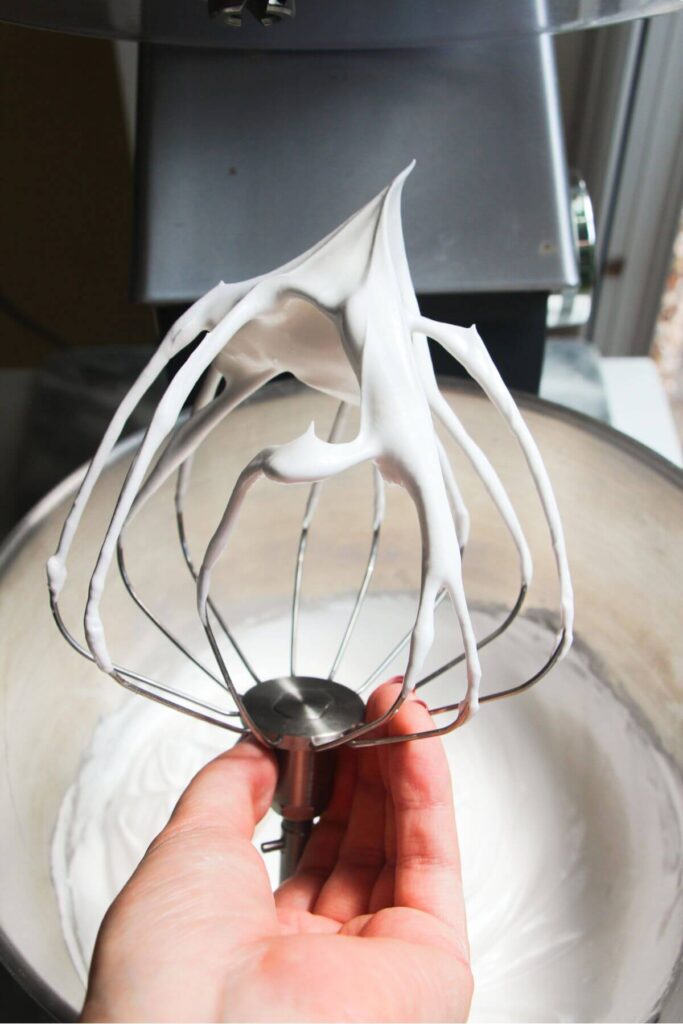
At this point, start to add your sugar, roughly 1 tablespoon at a time. Once your sugar has been added, turn the mixer up to high and continue to whisk the meringue, until it’s looking SUPER thick and glossy, and hits the stiff peak stage. That just means that the meringue is strong enough to support itself, so if you hold the whisk attachment upside down, it will keep its shape (like in the photo below). You also shouldn’t feel any sugar grains if you rub a little of the mixture between your fingers.
Add your cornflour (cornstarch) and vinegar, whisk again for another 30 seconds, then stop your mixer.

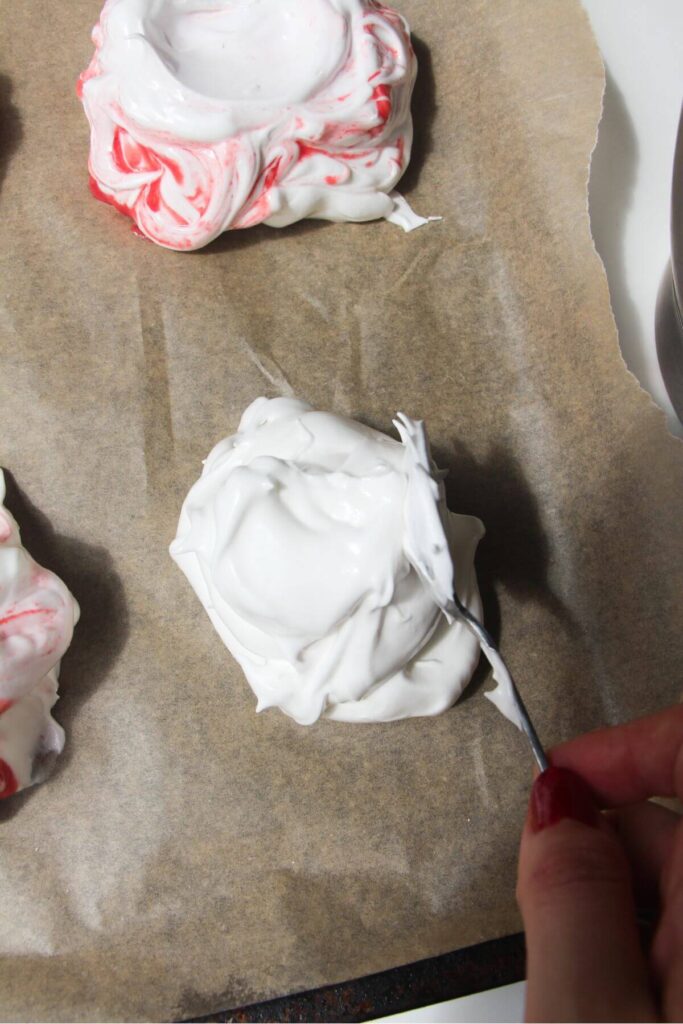
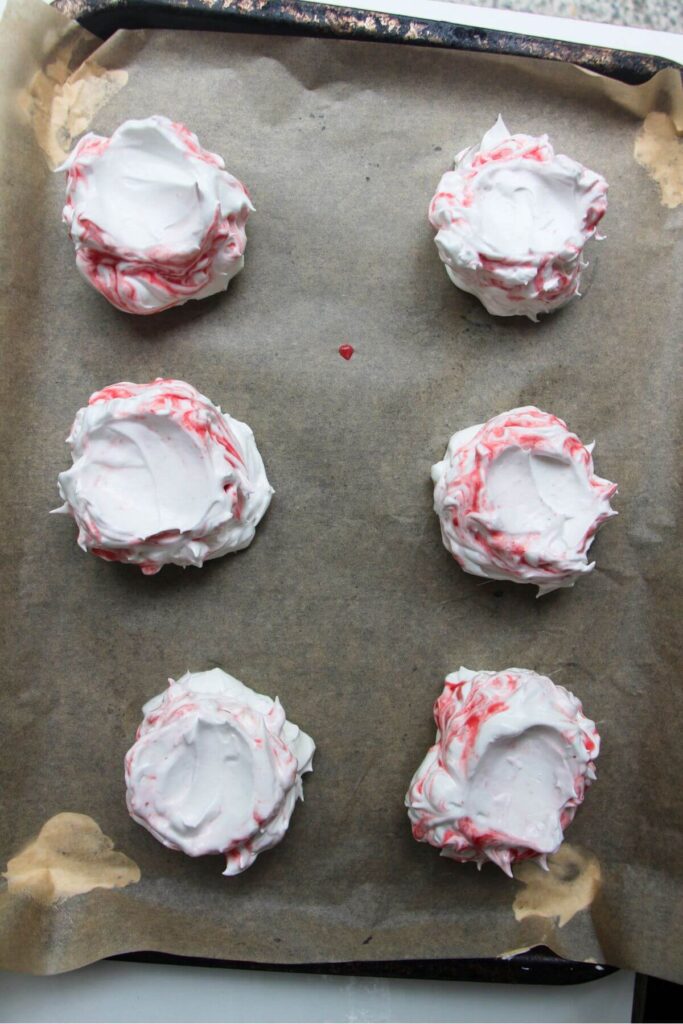
Spoon your meringue mixture onto prepared, lined baking trays (this recipe makes 10 mini pavlovas, roughly 6.5cm/2.5″ in diameter). You can draw a little outline on your baking paper to help guide you, or just freestyle. You could also pipe the meringue onto the tray, but I find this an extra, messy step and the beauty of a pavlova is that it doesn’t have to look perfect, so I personally skip this.
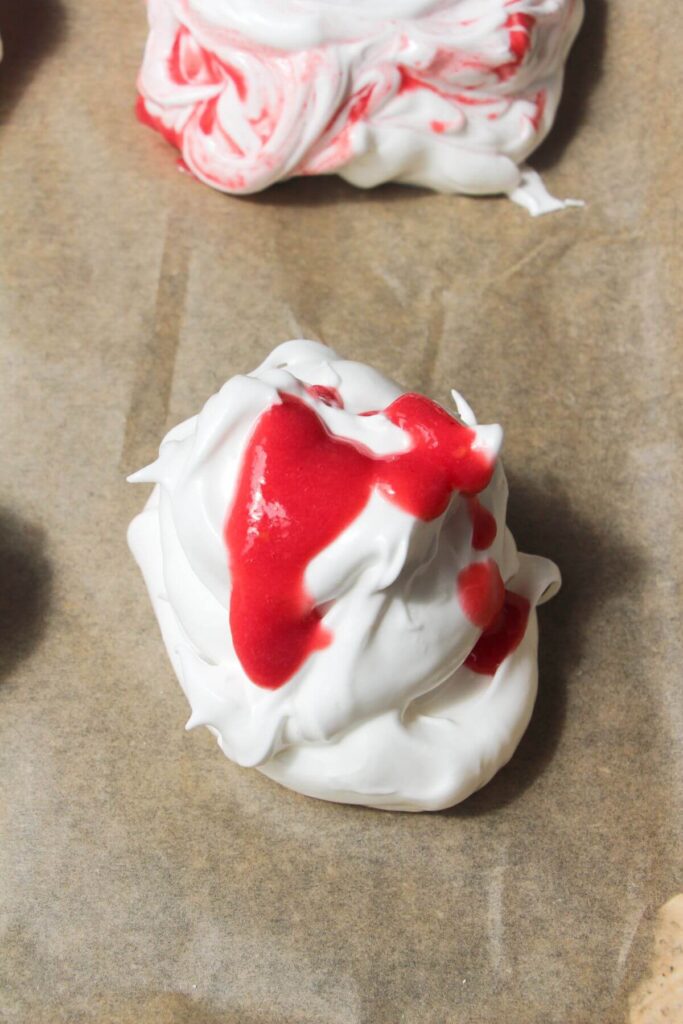
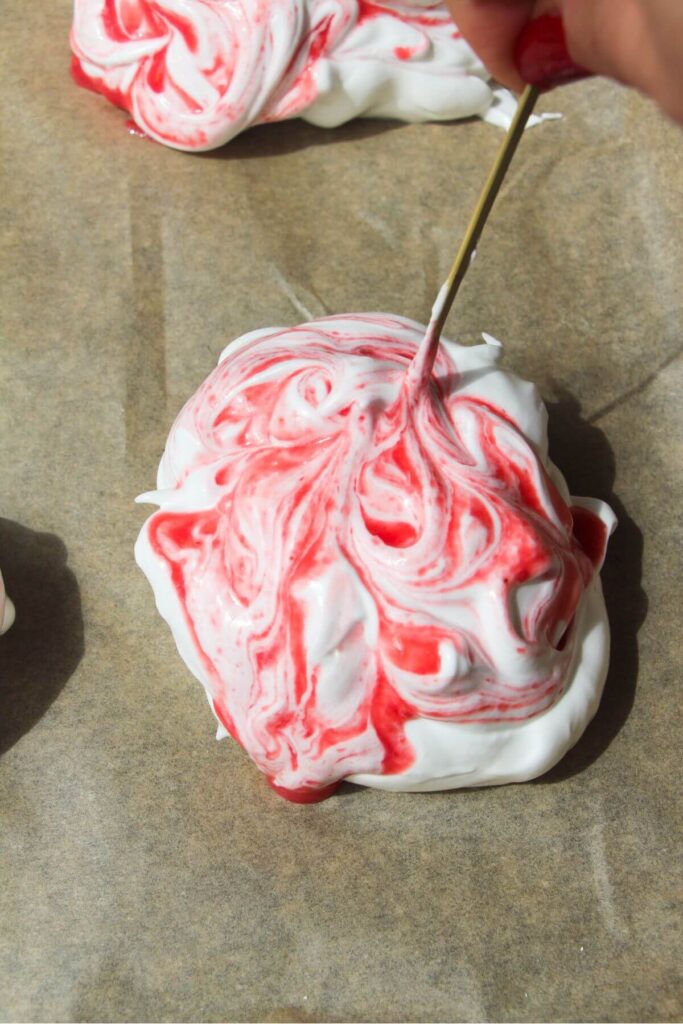
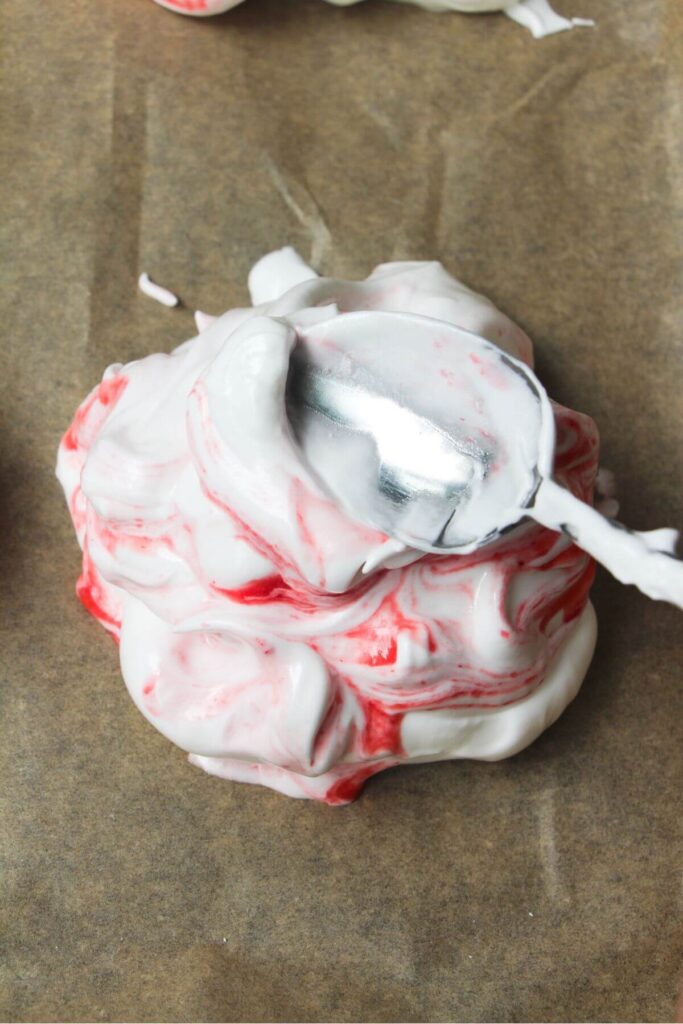
Drizzle about 1 teaspoon of raspberry puree around the top of the meringues, then use a skewer or toothpick to make little swirls around the top and sides. Don’t mix it TOO much with the meringue as it will cause it to collapse in the oven. Use the back of a spoon to make a little shallow crater on top of your pavlovas – this will be where your cheesecake filling will go.
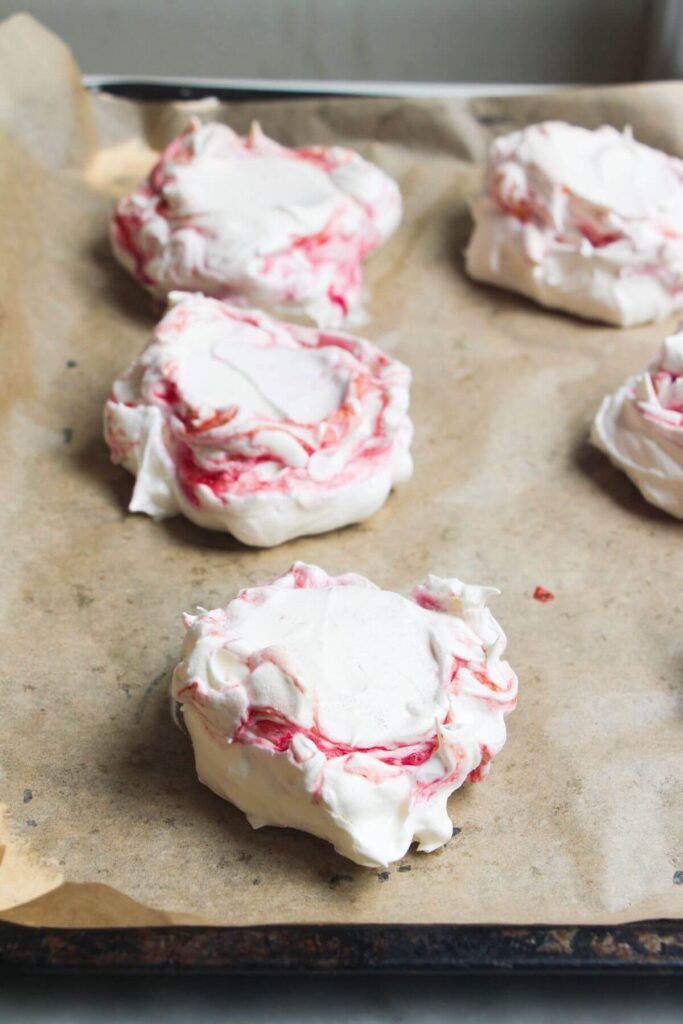
Transfer the trays into the oven, and bake at 90C/195F for 45 minutes to 1 hour, until they’re dry to the touch. This is where pavlova gets a little tricky – baking time hugely depends on the strength of your oven. You’ll actually start by heating the oven to 150C/300F and then turning it DOWN to 90/195F – this technique helps the exterior crisp up quickly and helps to reduce any spreading. Pavlova needs a low heat – you’re essentially drying them out and you don’t want them to brown at all. If you know your oven runs hot (or cold), you’ll need to adjust the cooking time accordingly. Check them after 45 minutes and if they’re still sticky, keep them in there and check them at 10-minute intervals.
Once they’re dry to the touch, turn the oven off, but keep the pavlovas inside. This way they’ll gradually cool, which will reduce the risk of them cracking (which can so often happen with meringues). But if they DO crack, don’t worry. Pavlova is a rustic dessert and you can hide any cracks pretty easily when you top them.
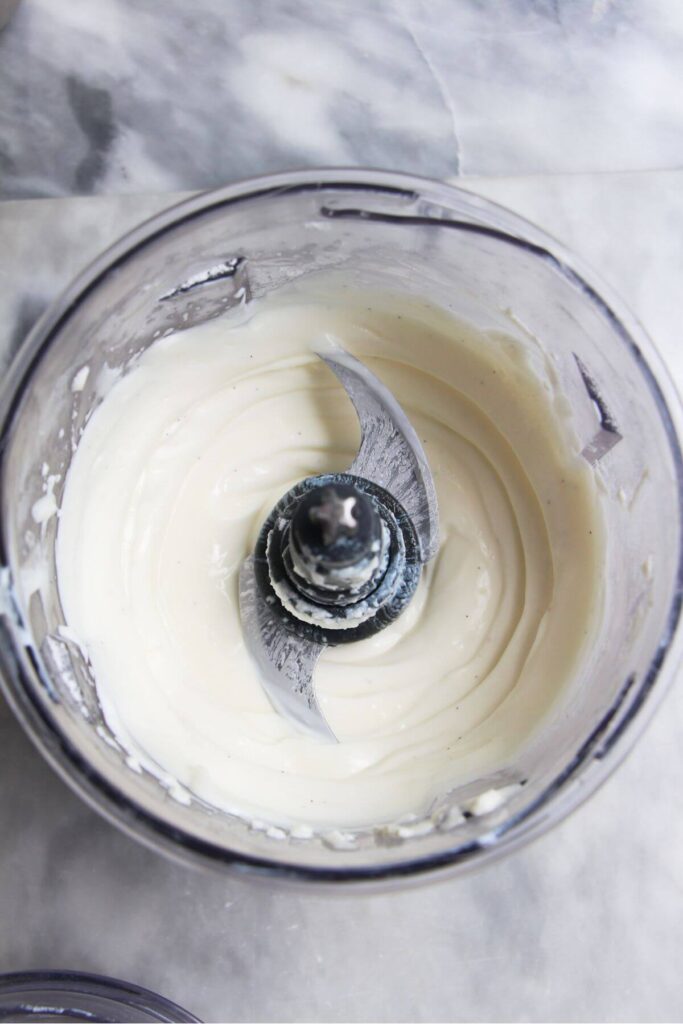
While the pavlovas are baking, make the cheesecake topping, either in a small food processor or mix it by hand.

Only top the pavlovas when you’re ready to serve them, as they’ll start to soften under the liquid toppings.
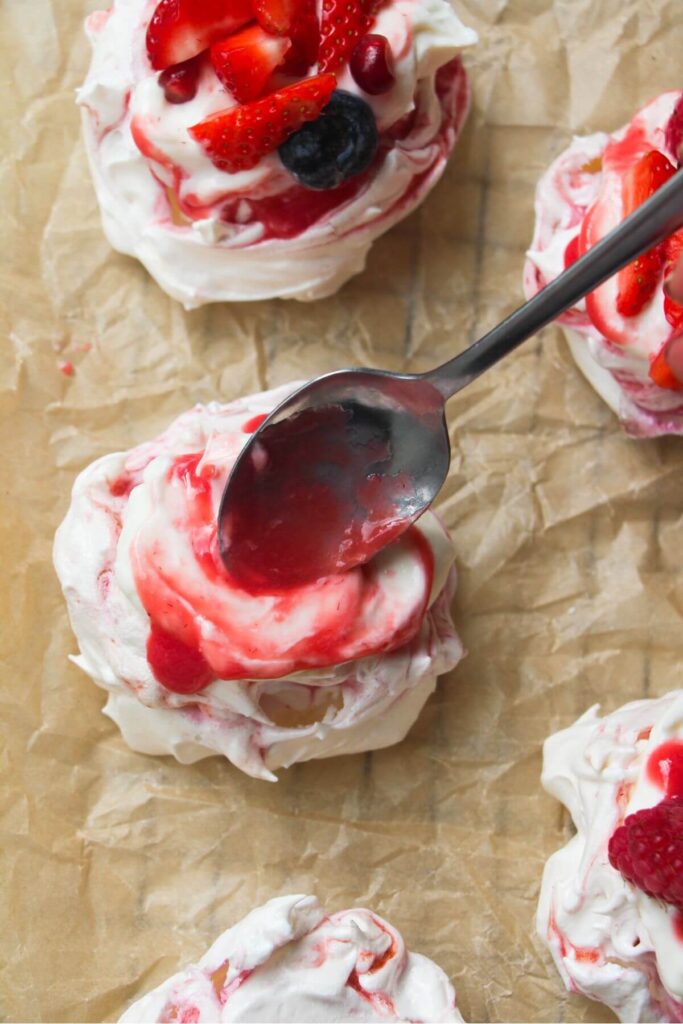
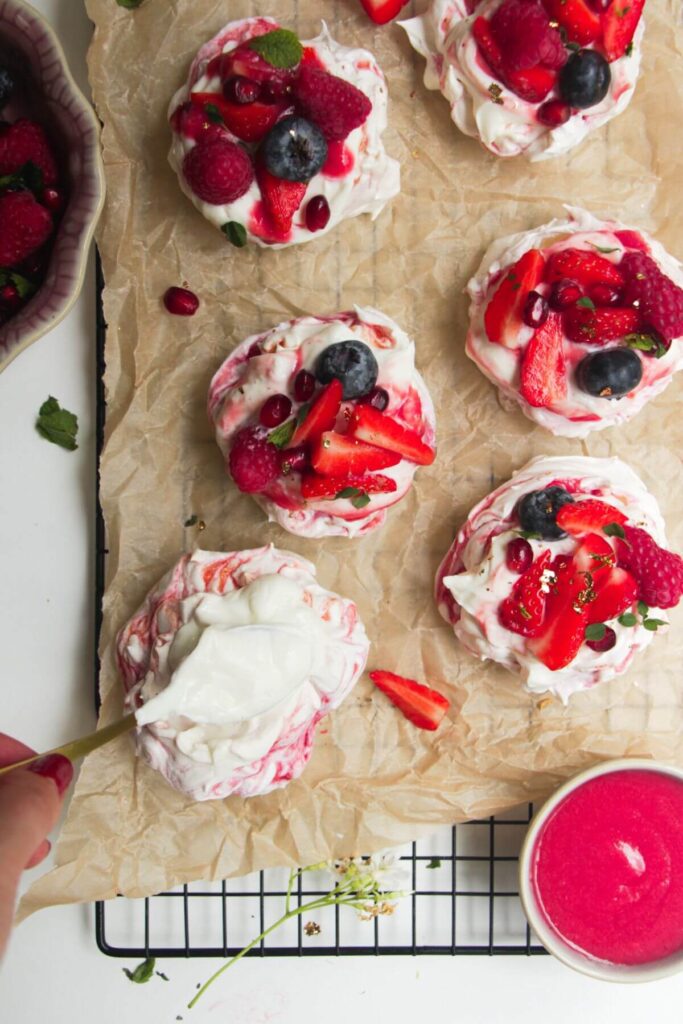
Dollop a heaped tablespoon of the cheesecake mixture into the little crater you made, then drizzle over another teaspoon of the leftover raspberry puree, swirling it through the cheesecake topping with your spoon. Scatter over your mixed berries, then serve. For a pop of green, you could add sliced mint or basil leaves too.
Three common pavlova problems and how to solve them
While simple in a lot of ways, pavlova is a dessert which can be a little tricky. Because it’s so delicate, small things you might not even think of being a problem can impact your finished pavlova.
- Weeping sugar/liquid at the bottom of the pavlovas. This can happen for a couple of reasons. The first is that the sugar wasn’t fully dissolved in the meringue mixture before you baked them. If it’s not properly incorporated, it won’t melt with the egg white mixture and can start weeping out while cooking or cooling. It could also be because you’re in a high-humidity environment. High humidity means your sugar will absorb the water in the air, and the meringue won’t be able to hold it, so it weeps out. The best way to counteract this if you do live somewhere with high humidity is to bake your pavlovas in the evening (then you can let them cool in the oven overnight for ease). It could also be because the egg whites were overwhipped and are struggling to keep their structure. So just follow the steps and once you hit stiff peaks, stop mixing.
- Cracks or collapsed pavlovas. Again, there are a couple of reasons for this. One is that the pavlovas were baked at too high a temperature – it’s crucial pavlova is baked low and slow – if the oven is too hot the outer shell will expand too quickly, shrinking away from the marshmallow inside and it will collapse on itself. This can also happen if the pavlovas aren’t cooled slowly – the temperature shock from the oven to room temperature can cause the same reaction as an oven that’s too hot, so leave them in the turned-off oven to cool gradually. It could also be again because the egg whites were overwhipped. In the case of this recipe in particular, collapsing can happen if the raspberry puree is mixed too much into the meringues. You just want to do a gentle swirl to prevent this.
- Browned pavlova. This means your oven is too hot. Reduce the temperature and keep an eye on them – it’s a good idea to pick up an oven thermometer to make sure you’re properly aware of how hot your oven is (you might be surprised how off they can be!)
I know this might sound intimidating but I promise it’s not! There are easy solutions to these problems and to be honest, even if your pavlova does weep, crack, collapse a bit or go a little toasty brown in the oven, it’s still going to taste delicious. If all else fails, crush it up and turn it into individual deconstructed pavlova desserts.
Watch how to make them
Five topping ideas for mini pavlovas
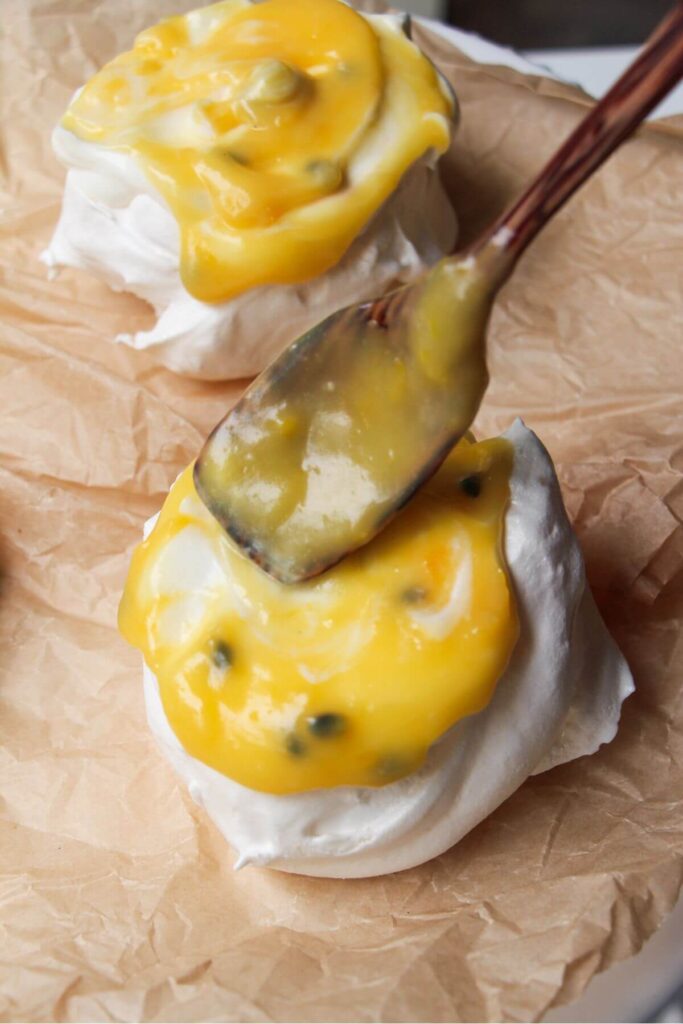
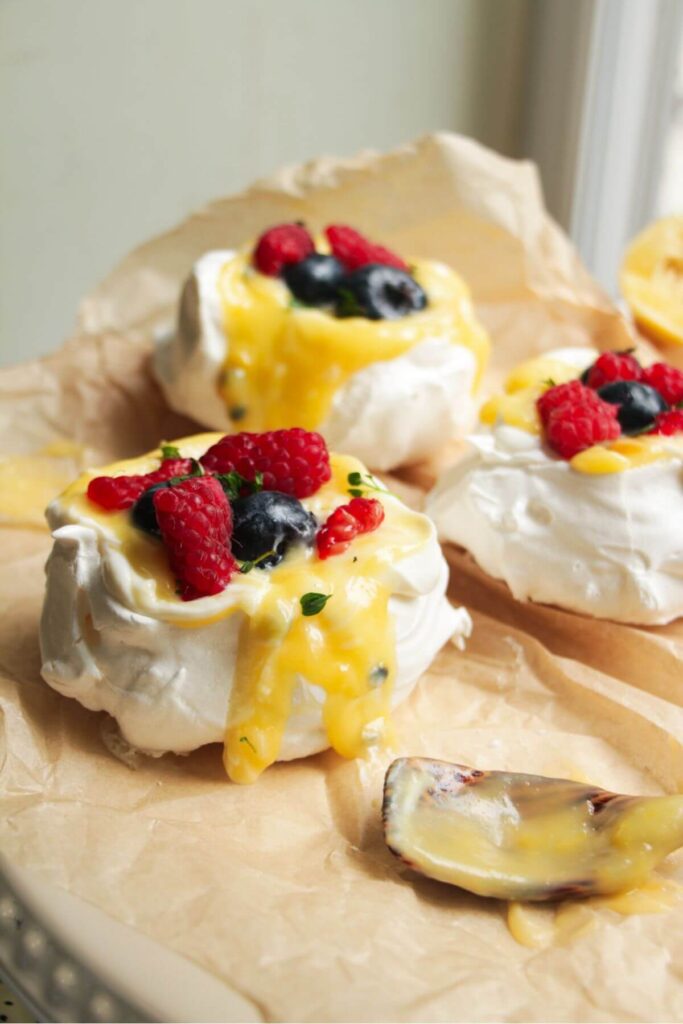
- Lemon and passionfruit curd. Use the same cheesecake yogurt mixture as in this recipe, or thick labneh, then dollop zingy lemon or passionfruit curd on top.
- Dark chocolate and hazelnut. Give them a Nutella-esque makeover by swirling a good dollop of Nutella through whipped cream, then scatter chopped dark chocolate and roasted hazelnuts on top.
- Pistachio, raspberry and rose. These Middle-Eastern flavours pair beautifully with pavlova – use crystallised rose petals and a tiny drizzle of rosewater to really amp up the flavour.
- Black forest. Top with Morello cherries, chocolate-swirled whipped cream and chocolate shavings for a gorgeous twist on a classic flavour combination.
- Whipped cream and seasonal fruit. This is the classic and it’ll always be popular. It looks spectacular and is a lovely way to celebrate seasonal fruit.
Got another question?
Yes, you can. It’s actually easier to do this – you can even bake them, turn the oven off and leave them in there overnight to properly cool. Once they’re cool, transfer to an airtight container to store. They will keep for 2 – 3 days but are really best served earlier rather than later (the fluffy inside will start to collapse a bit after the first day).
Once you’ve topped the pavlovas they need to be eaten right away, as they’ll soften up under the filling.
This is to help stabilise the meringue so that it doesn’t collapse in the oven. This is a fragile dessert and cracking and collapsing is a common problem so these additions help prevent it. I promise they don’t taste vinegary at all.
Fresh eggs are better for pavlova – they whip up a lot better as there is still a good amount of structure in the egg whites. Older eggs mean more liquid egg whites which won’t whip as nicely.
Like this recipe? Here are more sweet treats you might like to try

If you make this recipe, I’d love to hear from you! You can leave me a comment below.
Print
Mini Berry Ripple Cheesecake Pavlovas
- Total Time: 1 hour 30 minutes
- Yield: 10 pavlovas 1x
- Diet: Vegetarian
Description
Mini pavlovas are a beautiful dessert option for any celebration. These cute mini versions of the classic are swirled with berry puree before baking, then dolloped with a velvety cheesecake topping for an elevated twist on regular whipped cream. Top with your favourite mixed berries for the ultimate crowd-pleasing dessert that’s easier to make than you’d think.
Ingredients
For the mini pavlovas –
- 4 egg whites, at room temperature
- 200g (1 cup) caster sugar
- 1 teaspoon cornflour (cornstarch)
- 1 teaspoon white vinegar (or apple cider vinegar, lemon juice or 1/2 teaspoon of cream of tartar)
For the berry puree –
- 200g/7oz frozen (or fresh) raspberries
For the cheesecake topping –
- ½ cup cream cheese, at room temperature
- ½ cup labneh (or thick Greek yogurt)
- 2 tablespoons icing sugar (powdered sugar)
- ½ teaspoon salt
- 1 teaspoon vanilla extract
- ½ cup strawberries, sliced into quarters
- 1/4 cup raspberries
- ½ cup blueberries
- ¼ cup pomegranate seeds
Instructions
- Prepare your oven and baking trays. Heat your oven to 150C/300F (to note: we’re going to reduce the temperature when we add the pavlovas) and line a large oven tray with baking paper. PRO TIP: Use a tiny bit of your meringue mixture dabbed onto the underside corners of your baking paper to secure it onto your tray.
- Make the berry puree. Add the raspberries to a small food chopper, food processor or blender, and blitz until super smooth and creamy. Set a sieve above a small bowl, then transfer the puree into the sieve. Press it through the sieve so that the seeds are discarded and you’re left with a lovely pink puree. Set aside.
- Make the meringue mixture. Add 4 egg whites to a SUPER clean bowl of your stand mixer, then fit your mixer with the whisk attachment. Set your mixer on medium, and whisk the egg whites until soft peaks form – this will take around 5 or 6 minutes. Once you have soft peaks, start to add your caster sugar, 1 tablespoon at a time, with your mixer still on medium speed. When you’ve added all your sugar, turn the mixer to high, and continue to whisk the meringue for 5 more minutes, until it’s fluffy, glossy, and there are no sugar grains remaining when you rub a bit between your fingers. Add 1 teaspoon of vinegar and 1 teaspoon of cornflour then whisk for another 30 seconds. At this point your meringue should be looking SUPER thick, and glossy and have expanded about three times in size.
- Form your mini pavlovas. You can either roughly mark circles out on your baking paper to help guide you, or you can eyeball it. I like to use an upside-down jar to help mark the sizes, or you could use a cookie cutter. This mixture should make 10 pavlovas with a diameter of 6.5cm/2.5″. Use a silicone spatula to dollop the meringue onto your baking paper-lined trays, using the spatula or the back of a spoon to create swirls in the meringue. You want them to be reasonably high – they look more impressive and will give you more of the marshmallow centre. Drizzle 1 teaspoon of the berry puree around the top of each pavlova, then use a toothpick or skewer to gently swirl the puree around the edges. You don’t want to fold it through the meringue, as it tends to collapse in the oven. Use the back of a spoon to hollow out a small, shallow crater on top of the meringues (this is where your topping will go).
- Bake the pavlovas. Transfer your trays to the oven, then turn the temperature down to 90C/195F fan and bake for 45 minutes to 1 hour, or until the pavlovas are dry to the touch. Baking time for pavlova is tricky because it VERY much depends on your oven temperature. Check them after 45 minutes and if they’re still sticky, keep them cooking for a little longer. You don’t want the pavlova to brown at all, so if you notice yours are, turn your oven down and rotate the trays. Once they’re dry to the touch, turn the oven off and let the pavlovas cool in the oven.
- Make the cheesecake topping. Add 1/2 cup cream cheese, 1/2 cup labneh, 2 tablespoons of icing sugar, 1/2 teaspoon of salt and 1 teaspoon of vanilla extract to a small food processor or chopper. Blitz into a super smooth cream, then transfer to a bowl and pop into the fridge until you’re ready to top your pavlovas. PRO TIP: You can also mix this by hand – just mix vigorously in a small bowl until thick and creamy.
- Top your pavlovas and serve. Once the pavlovas are completely cool and you’re ready to serve, you can top them. Dollop the cheesecake cream in the little shallow crater you made, then drizzle over a teaspoon of the leftover berry puree and gently swirl it through. Finish with the mixed berries on top. Serve right away – the liquid in the topping will start to break down the crispy outer crust and they’ll go soggy if you try to store them.
Notes
STORAGE INSTRUCTIONS: You can keep baked, untopped pavlovas in an airtight container in a cool, dark place for 2 – 3 days, but I recommend using them before that. The fluffy inside will start to collapse the longer you keep them. The cheesecake topping will keep well for 1 week and so will the raspberry puree, so you can get ahead by making them before you need them.
INGREDIENT NOTES: If you don’t have caster sugar, you can blitz up regular granulated sugar for a minute in a food processor. You want fine sugar here so it easily melds with the egg whites in the mixture. Undissolved sugar in your mix can result in a weeping or collapsed pavlova so it’s important you’re using fine sugar here. The cornflour and vinegar are used to help to stabilise the pavlovas so they’re less likely to collapse – you don’t get any vinegar flavour at all.
TOPPING VARIATIONS: The berries included here can be tweaked and swapped out, based on what’s in season and what you like. Stone fruits are great, as are frozen, defrosted berries. They make a kind of chunky compote which is lovely with the cheesecake topping.
WANT A LARGE PAVLOVA? Follow the recipe, but spoon the entire mixture into a large circle on your baking tray, then bake for 90 minutes at 90C/195F, or until dry to the touch. Like in the recipe, heat the oven to 150C/300F first, then reduce the heat when you put the pavlova in the oven.
- Prep Time: 30
- Cook Time: 60
- Category: desserts
- Method: oven
- Cuisine: new zealand
Nutrition
- Serving Size: 1 pavlova
Keywords: pavlova, meringue

These were a serious showstopper – my family loved them and the idea of using something other than cream on top is genius!!
★★★★★