
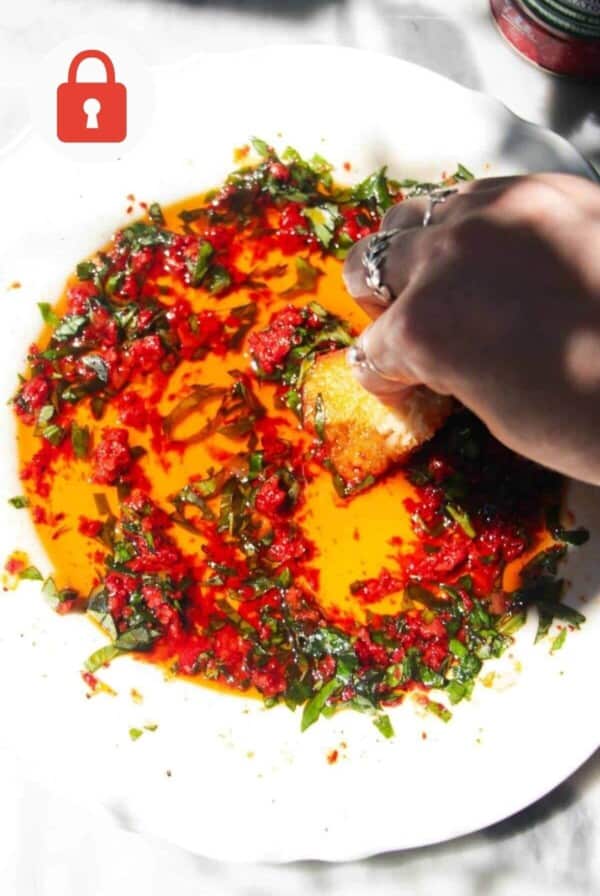
If you’re new to bread making, this super easy no-knead cheesy chili oil focaccia is the best place to start. No fancy ingredients, no special equipment – just mix, then let the dough rise and do its thing. It’s gorgeously light, airy, and loaded with pockets of gooey cheese and spicy chili oil. Pair with loaded bread dipping oil for a wonderful appetizer.
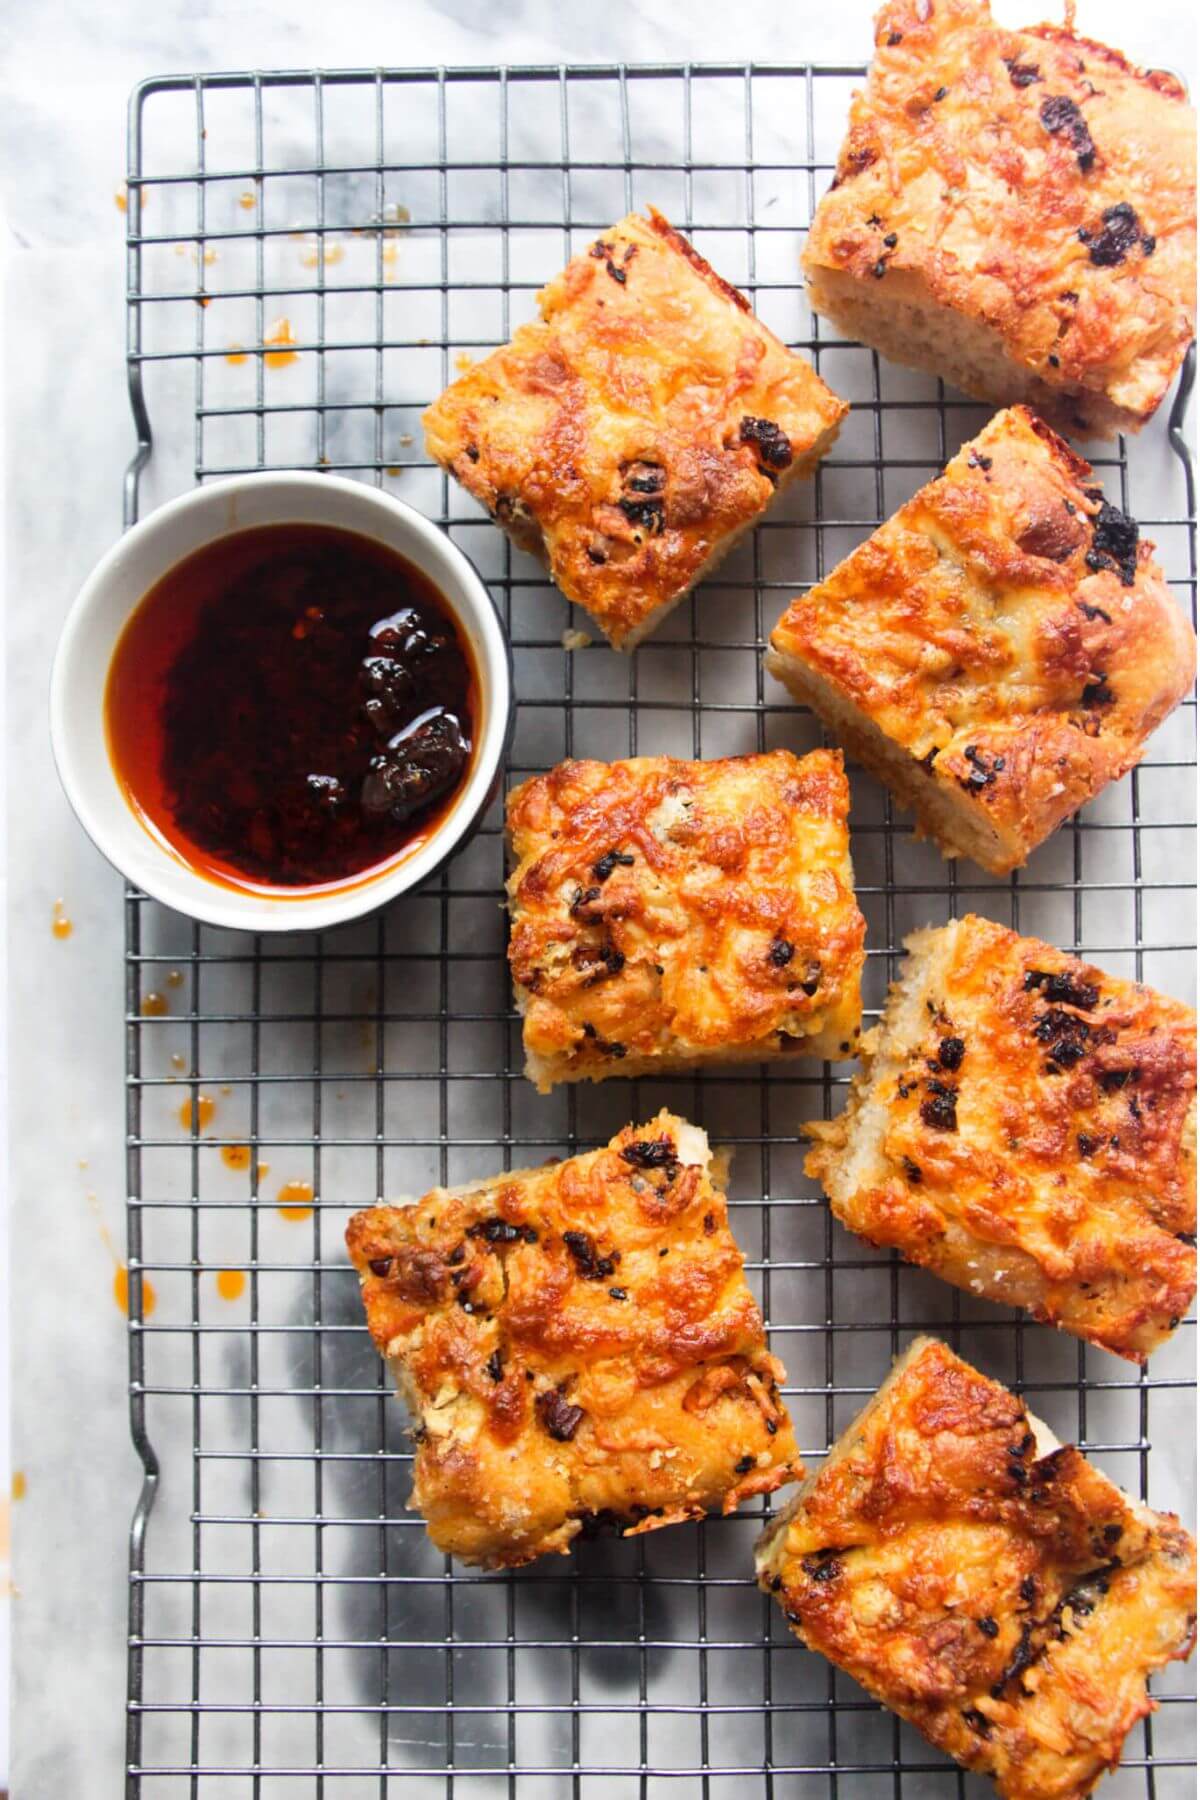
Table of Contents
- No-Knead Cheesy Chili Oil Focaccia, at a Glance
- The Perfect Focaccia for Beginners
- Ingredients You’ll Need
- How to Make Your No-Knead Focaccia
- Kate’s Top Dough Rising Tip
- Kate’s Top Focaccia Tips
- How to Make this Focaccia Work With Your Schedule
- No-Knead Focaccia FAQs
- Watch How to Make Focaccia
- Like this recipe? Here are more easy breads you might want to try
- Easy No-Knead Cheesy Chili Oil Focaccia Recipe
No-Knead Cheesy Chili Oil Focaccia, at a Glance
⏰ Hands-On Time: About 15 minutes, with the remaining time totally hands-off
🍽️ Makes: 1 large focaccia
🛒 Key Ingredients: Bread flour, instant yeast, salt, olive oil, chili oil, cheese
🧠 Skill Level: Genuinely beginner-friendly, with no mixer or kneading needed
👩🍳 Cooking Method: Oven
🍳 Equipment Needed: One mixing bowl, non-stick baking pan, parchment paper
💃 Perfect For: Party spreads, sandwiches, sharing with friends, or an easy baking project
🥖 Serve With: Loaded bread dipping oil, soups (it’s gorgeous with this cauliflower cheese soup), pasta, salad spreads, or just by itself.
The Perfect Focaccia for Beginners
One of the biggest barriers when it comes to baking bread is the kneading, at least, it was for me! I always found it tricky to know if I was doing it properly or long enough. But that’s where this fabulous no-knead focaccia comes in.
Focaccia is a GREAT place to start with bread. It’s a really forgiving dough that’s great for beginners. Even my very kitchen-adverse younger brother nailed this one which is a great testimonial.
All you need to do is mix the ingredients in a bowl, do a few ‘stretch and folds’, then leave the dough to rise and do its thing.
You can top your focaccia with whatever you like (you could even try this GORGEOUS pepperoni pizza focaccia bread) – but I recommend trying chili oil and oozy cheese like I’m doing here.

Ingredients You’ll Need
- Bread flour. This gives the focaccia that lovely, chewy texture. If you can’t find it, regular all-purpose flour works well too.
- Instant yeast. You can use active yeast if you can’t find instant – you’ll need to dissolve the active yeast in a little water for 10 minutes first, before adding it to the bowl with everything else.
- Olive oil. Because you’ll be using a lot, I recommend using good quality extra virgin olive oil if you can. The flavor comes through in the finished bread, so it does make a difference if you use a good one.
- Chili oil. Use homemade (try this 30 minute chili oil), or store-bought chili oil or chili crisp here. Make sure you taste it before adding it to your dough as they vary wildly in heat and saltiness. You also want to spread it evenly across the dough, and into the dimples.
- Cheese. Chilli, cheese and fresh bread is a match made in heaven. I like grated mozzarella for the ultimate melty, cheese-pull factor, and often use a little grated cheddar or Gruyere for flavor too. Even creamy blue cheese is excellent.
I bake this focaccia in a deep 24cm/9.5″ x 35cm/14” baking pan, but you can use something smaller or larger.
Just be mindful that it will affect the thickness of your finished loaf and impact baking time. If you use something larger, your focaccia will be thinner and may take a little less time to cook (check after 25 minutes) and if you use something smaller, your focaccia will be thicker and may take longer to bake through (check after 30 minutes and leave it in the oven for a further 10 minutes if it still looks a little light in color).
How to Make Your No-Knead Focaccia
This is a step-by-step photo overview of how to make the focaccia – the full recipe with ingredient quantities is at the bottom of the page for you.
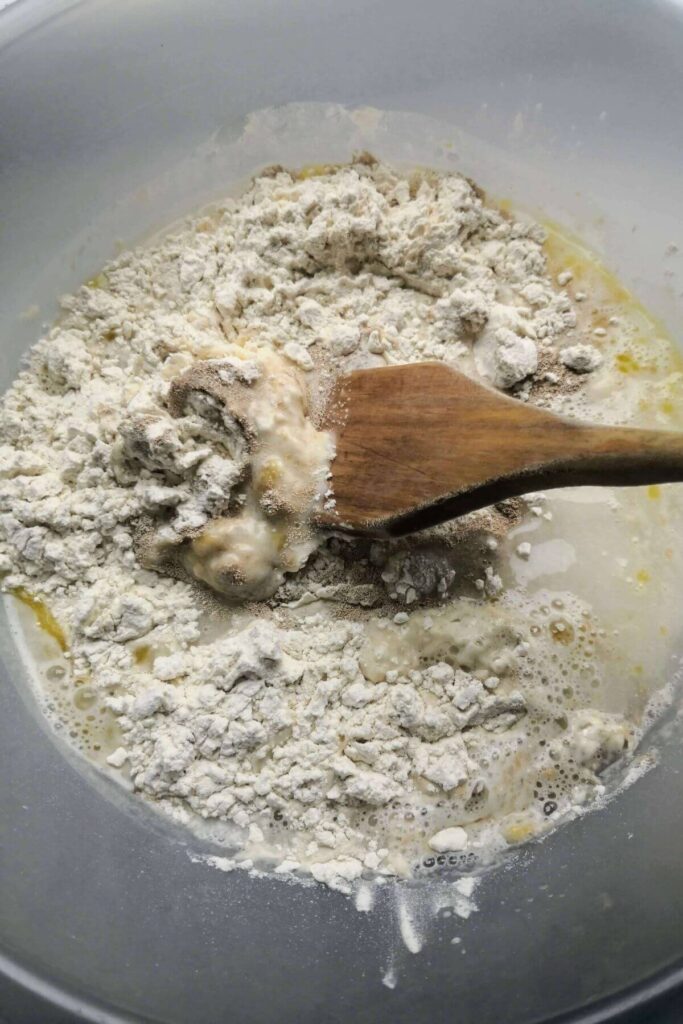
- Add your bread flour, salt, and instant yeast to a bowl. Mix, then pour in the lukewarm water and olive oil.
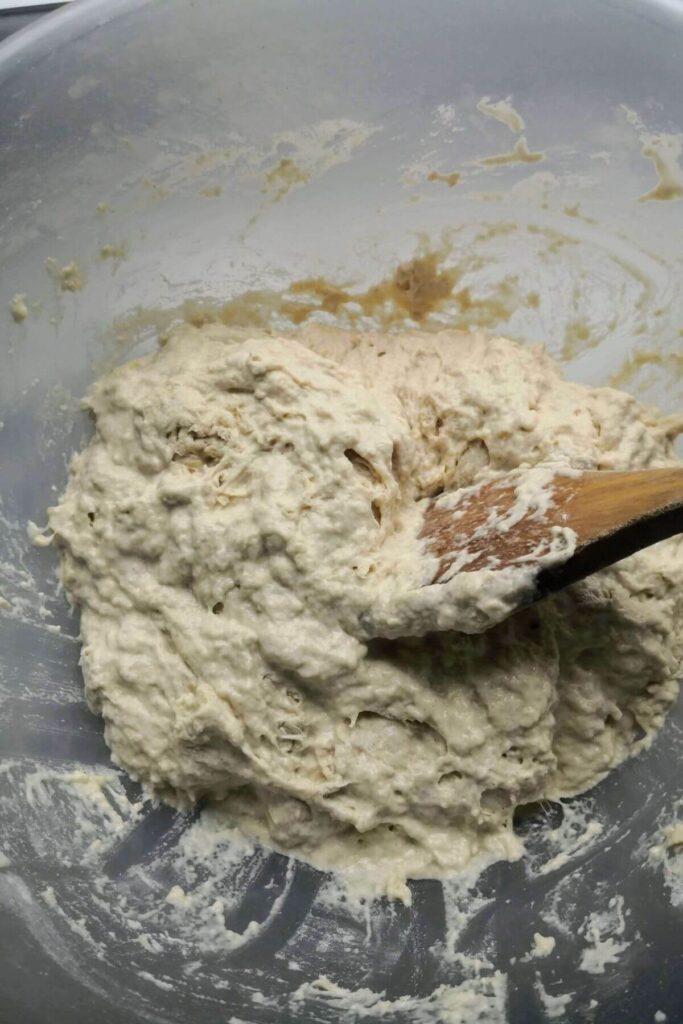
- Mix everything until a sloppy, shaggy dough forms. Then cover the bowl with a kitchen towel and let it rest for a couple of minutes.
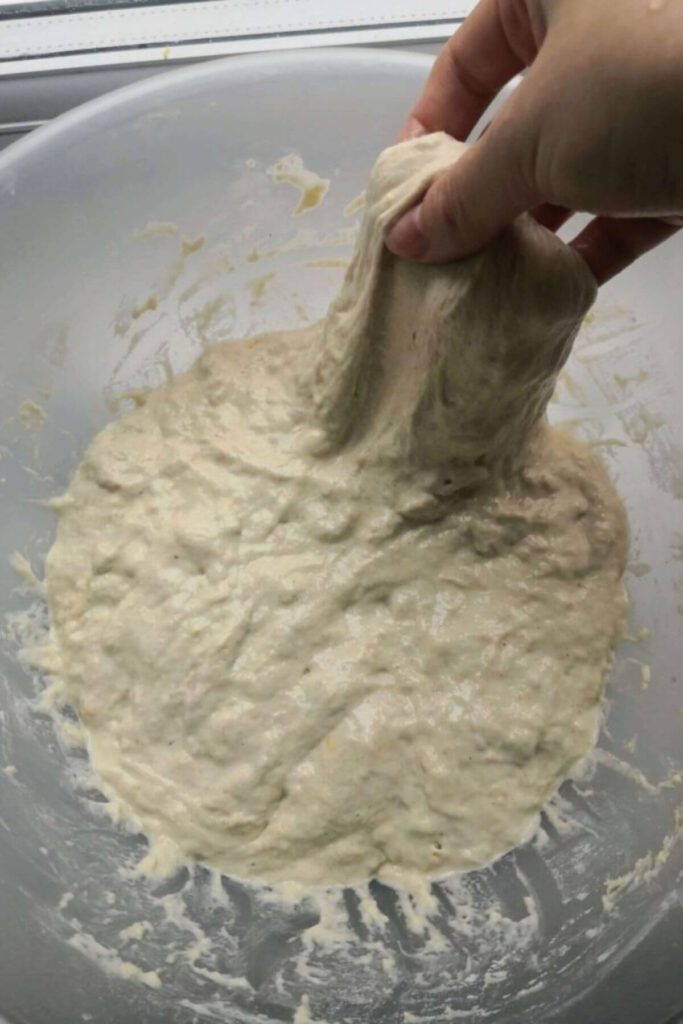
- It’s time to ‘stretch and fold’ the dough to develop strength. With a wet hand, scoop underneath one portion of the dough, then gently lift it and fold it over itself into the middle of the bowl.
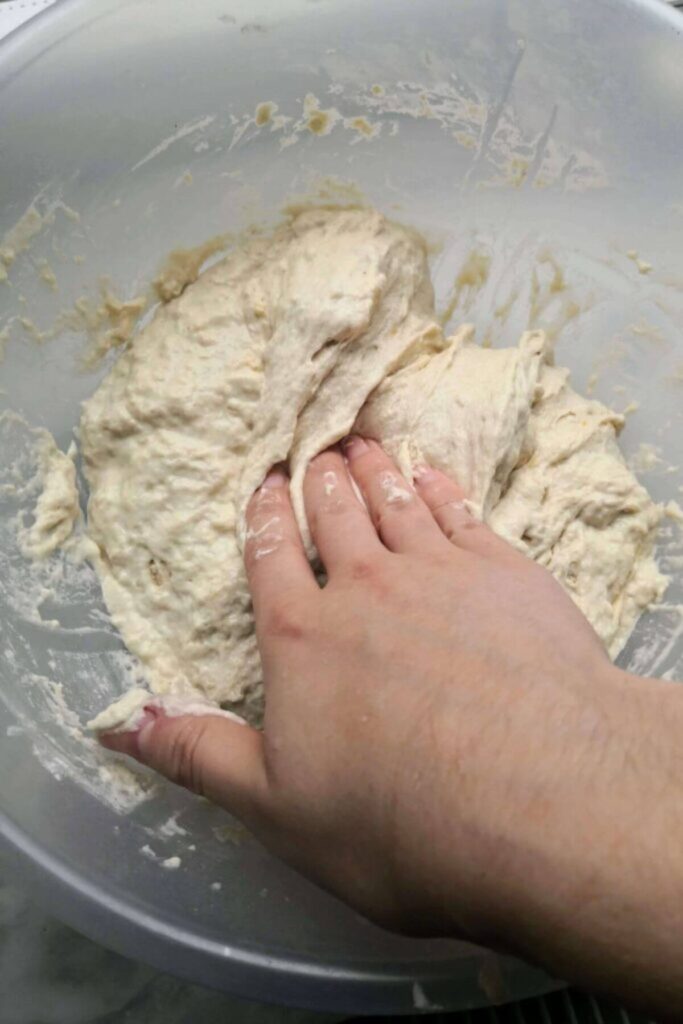
- Turn the bowl a quarter, then repeat with another section of dough. Do this twice more, stretching and folding all sides of the dough. Then cover the bowl and let it rest for another few minutes.
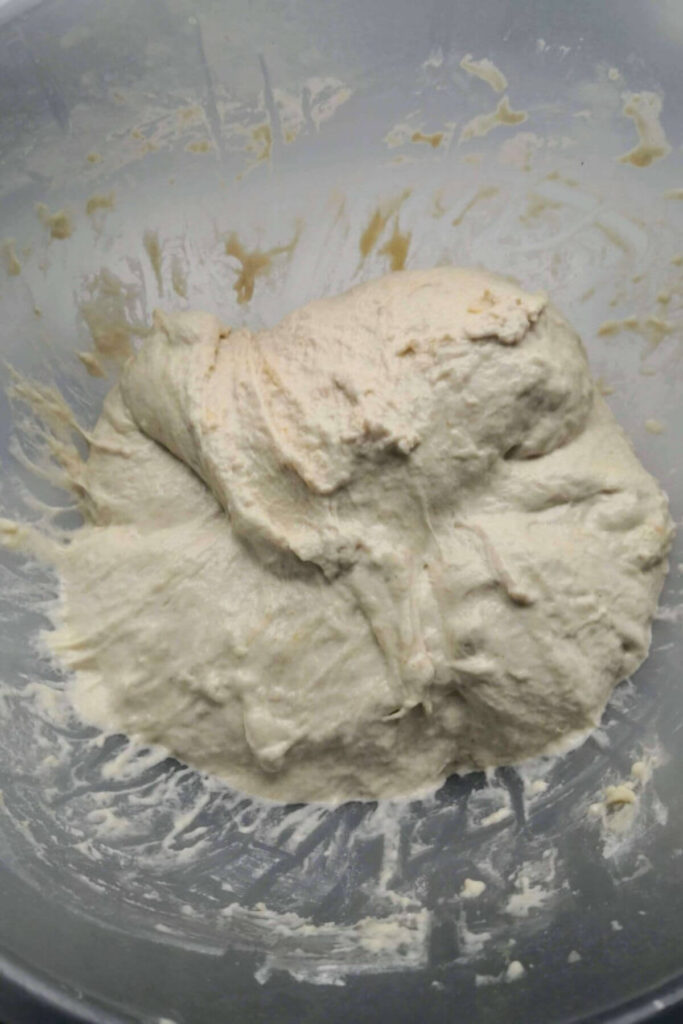
- Repeat the stretch and fold process. You’ll notice the dough will have become a little more pillowy. At this point, it’s time for the first rise. Either cover the bowl in plastic wrap film and do this at room temperature or pop it (covered) in the fridge to rise overnight.
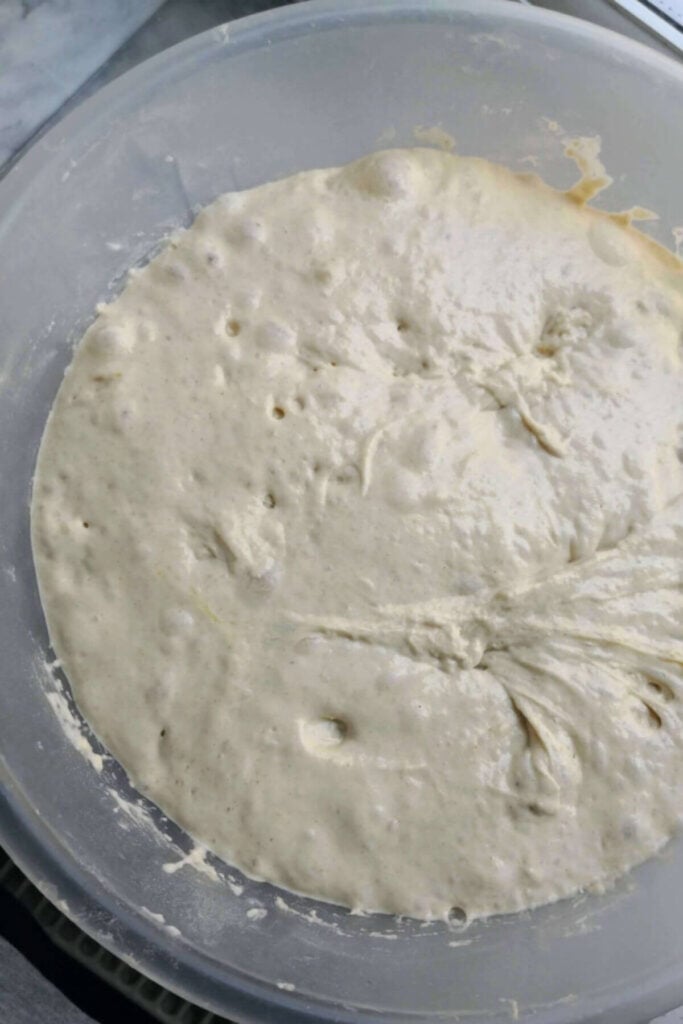
- This is my dough after the first rise (I did this at room temperature). You can see how it’s risen and how bubbly it is on the top.

Kate’s Top Dough Rising Tip
While the first rise usually takes around 90 minutes, it’s very dependent on the temperature of your kitchen. In summer, it can take as little as 45 minutes.
Because of this, I like to take a photo of my dough when I cover it, so I can easily compare and see if it’s ready. You want it to look very puffy, bubbly, and airy.
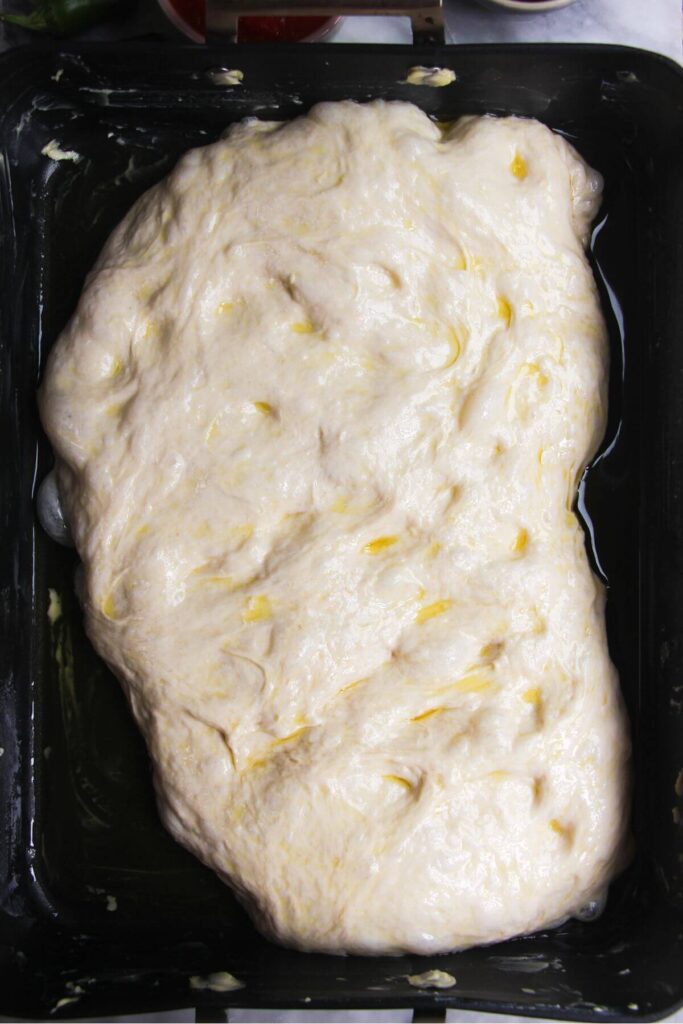
- Drizzle your baking pan with olive oil, then transfer the risen dough into it. Drizzle a little more olive oil on top, then let it rise again until very bubbly and wobbly.
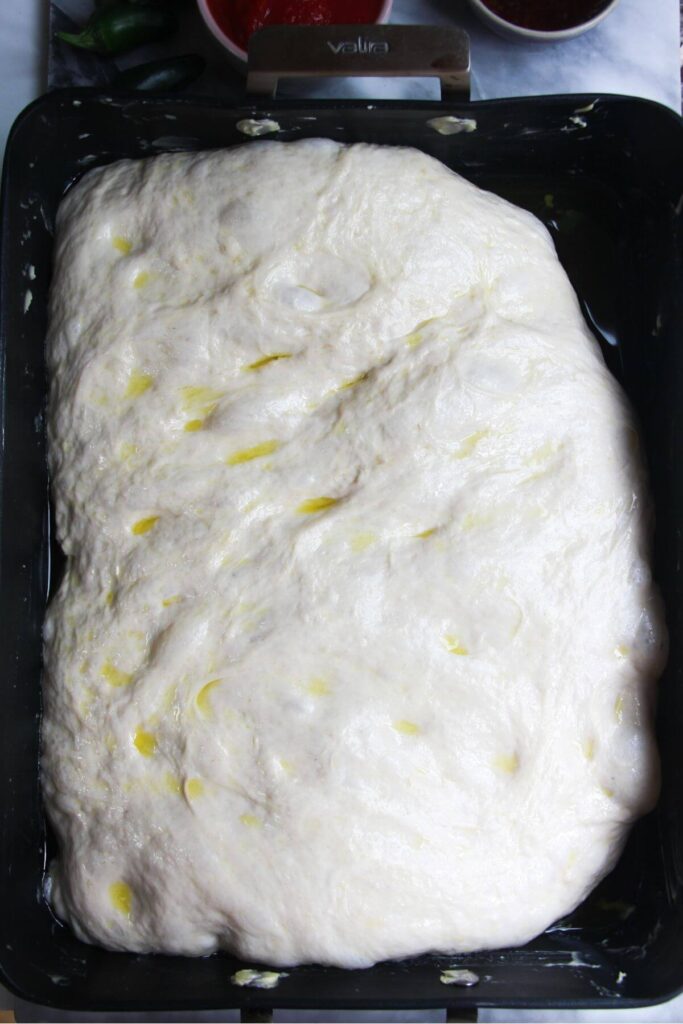
- This can take around 45 minutes at room temperature, but again, use the dough and your eyes as the guide rather than the clock.
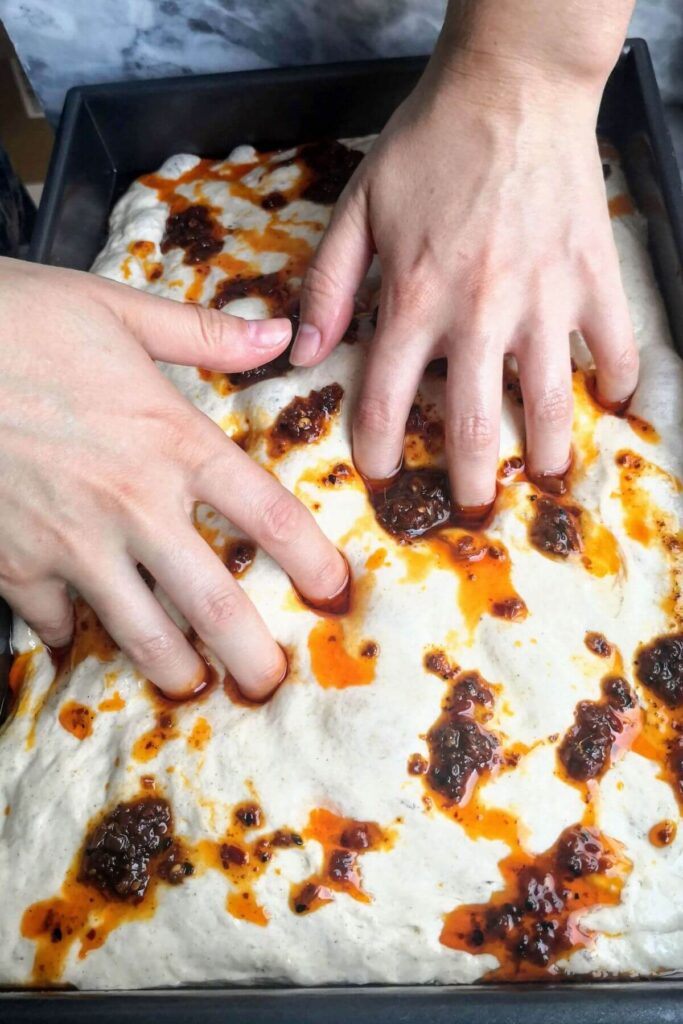
- When your dough is lovely and bubbly, drizzle your chili oil on top, then use your fingers to dimple the dough all over. The crevices you’re making will collect all the pockets of chili oil.
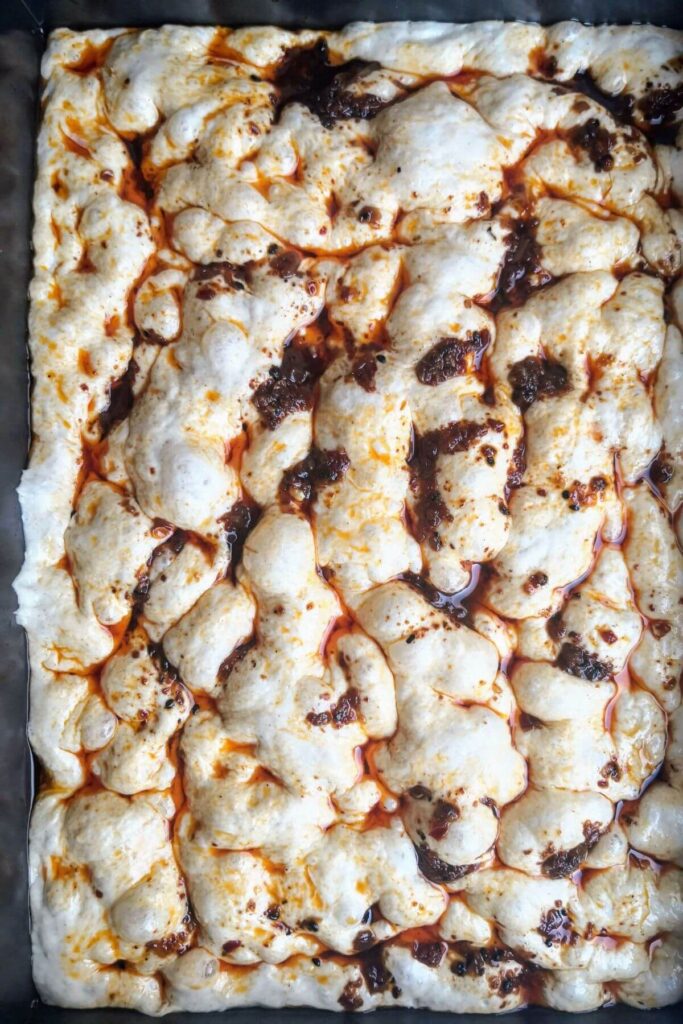
- Once you’ve dimpled the dough all over, sprinkle over the cheese, then scatter flaky salt on top.
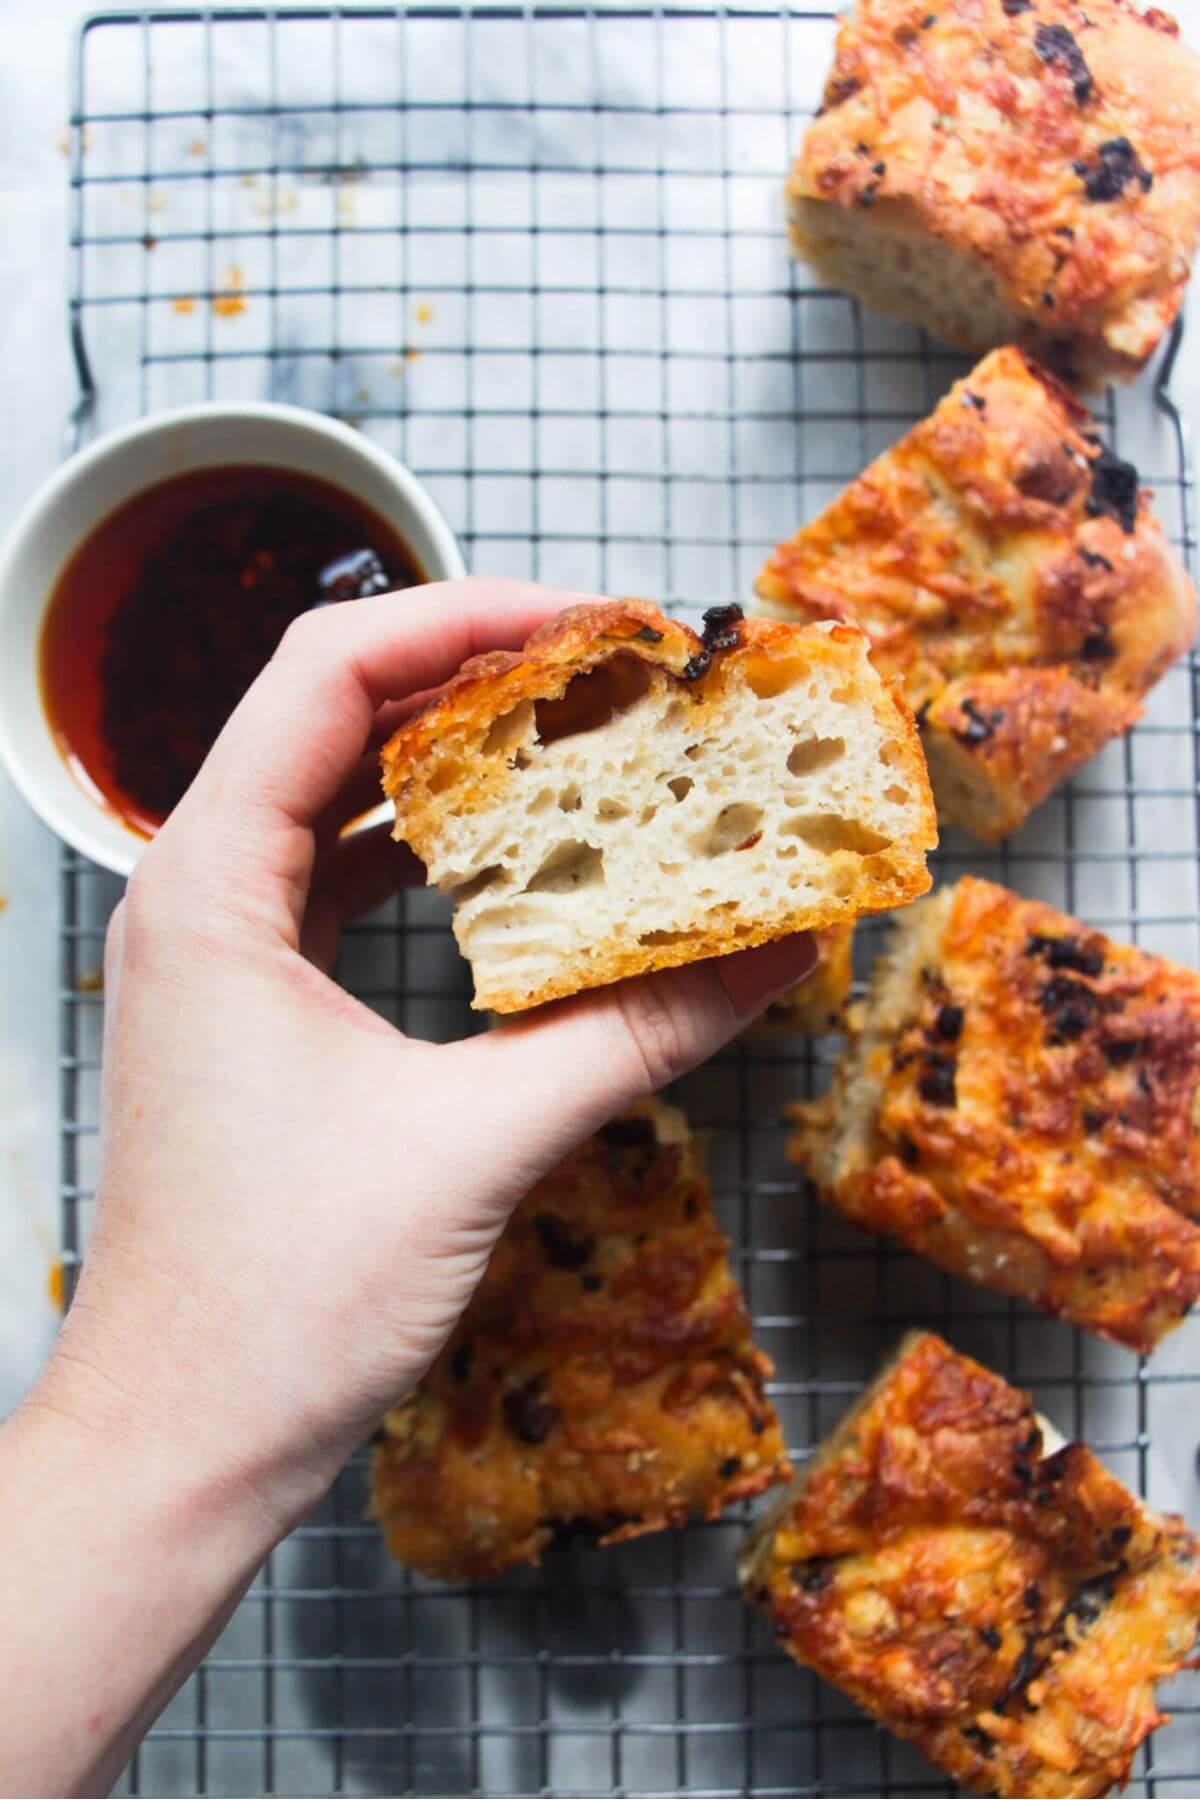
- Bake until golden and crispy, and the sides of the bread are pulling away from the pan. Let it cool in the pan for a few minutes, then transfer to a wire rack to stop the bottom from going soggy.
Kate’s Top Focaccia Tips
- Watch the dough, not the clock. The temperature of your kitchen impacts how long your dough takes to rise. I like to take a photo of it before I leave it to rise, to easily see how it’s going. You’ll know it’s ready when it’s very bubbly, wobbly, and airy.
- Spread out your toppings. Try to evenly scatter your chili oil and cheese on top of your focaccia, and press them into the dough itself when you dimple it. This helps the flavor get right into the dough.
- Don’t skip cooling on a wire rack. Leave the focaccia in the pan for about five minutes after it comes out of the oven, then move it to a rack. This will make sure the bottom stays gorgeously crispy.
How to Make this Focaccia Work With Your Schedule
While this recipe is SUPER hands-off, the dough does need time to rise. You can make and bake it all on the same day, or let it rise slowly in the fridge overnight.
For same-day focaccia:
This is the method in the recipe at the bottom of the page, and it’s usually how I make it.
- Mix the dough and perform your ‘stretch and folds’.
- Leave it to rise at room temperature until doubled in size.
- Transfer it to your pan, then leave it to rise again until bubbly and airy.
- Dimple, top, and bake.
You’ll want to allow at least 3 hours, from start to finish, though the exact timing will very much depend on the temperature of your kitchen. In summer it can take less time for the dough to rise, and in cooler months it will take a little longer. Watch the dough, rather than the clock.
For overnight focaccia:
This method is perfect when you have less time to play with. You can mix the dough in the evening, let it slowly rise overnight, then bake it in the morning.
- Mix the dough and perform your ‘stretch and folds’.
- Transfer it to an oiled bowl, cover, and place in the fridge to rise overnight.
- The next day, transfer it to your pan and let it rise at room temperature until puffy and bubbly.
- Dimple, top, and bake.
Focaccia is incredibly forgiving, but it’s best not to leave the dough in the fridge for much longer than 24 hours. If it overproofs, it might not rise as well in the oven.
Because the dough will be colder, the second rise will take a little longer than the same-day method. Depending on the temperature of your kitchen, allow at least 90 minutes. It’s ready to bake when it looks very bubbly and airy.
No-Knead Focaccia FAQs
No problem! Just mix the 2 teaspoons of active yeast with 200ml of the lukewarm water, and let it sit for 10 minutes before adding it to the rest of the ingredients.
Make sure to do this step first – you can’t just add active yeast to your dough the same way you would instant yeast.
Focaccia is definitely best the day it’s baked, but leftovers will keep well in an airtight container at room temperature for about 3 days. Let it cool completely before you store it, to keep it from going soggy.
To freshen it up, I like to pop individual slices into the toaster.
This is where you can get creative! I love combinations like sundried tomatoes with thyme, Kalamata olives, cherry tomatoes and garlic, or simply sea salt and rosemary.
Fresh basil pesto, caramelized onions, and nutty dukkah are also excellent topping ideas.
Definitely! Let it cool completely, then cut it into individual slices and freeze it ziplock bags.
You can quickly and easily defrost the pieces by popping them into the toaster.
There are a couple of reasons you might end up with dense focaccia:
– Your measurements were a little off. For the best accuracy when doing any baking, use a scale to measure your ingredients by weight, rather than relying on a conversion to measuring cups. That’s because in general, measuring by cups isn’t consistent – the way you pack the flour into a cup can have a big impact on the actual weight. Baking is precise, so if your measurements are off, you risk getting a different result.
– The dough needed longer to rise. You may not have let your dough rise long enough (or let it rise for too long). Make sure you take a photo of the dough as it starts rising to compare, rather than just relying on time. When your dough is ready, it should look very bubbly, airy, and wobbly.
– Your yeast was inactive. Make sure your yeast is active by dissolving 1 teaspoon in a little water (about ½ cup) along with 1 teaspoon of sugar. Stir it and let it sit for 10 minutes. If it’s active and thriving, it’ll look bubbly and foamy. If it’s dead, the yeast won’t properly dissolve, and it won’t foam up.
Watch How to Make Focaccia
Like this recipe? Here are more easy breads you might want to try
If you make this recipe, I’d love to hear from you! You can leave a recipe rating and a comment below. And remember to tag @DishedByKate on Instagram, Facebook and TikTok if you’ve made one of my recipes. Seeing your recreations really makes my day 😊.

Easy No-Knead Cheesy Chili Oil Focaccia
Ingredients
Equipment
Method
- Mix the dough. Add 600g bread flour, 1 tablespoon of salt, and 2 teaspoons of instant yeast to a bowl, then add the 2 tablespoons of olive oil and 535g lukewarm water.Give it a really good mix with a large wooden spoon until a shaggy dough starts to form, and there are no dry patches of flour. It's going to look wet, but don't worry! Cover the bowl with a tea towel and let it rest for two minutes.
- Perform three sets of stretch and folds. While you're not kneading the dough, you do need to develop a little strength to end up with lovely airy focaccia at the end. You're going to give the dough some 'stretch and folds'. With a wet hand in a 'C' shape, pick up a section of the dough and fold it back onto itself. Rotate the bowl and do this 4 more times, going all around the dough.Cover the bowl for another three minutes, then do the stretch and fold process again. Cover the bowl and let the dough rest for two more minutes, before repeating the stretch and folds one more time.
- Give the dough its first rise.Drizzle 1 tablespoon of olive oil over the top of the dough, then with wet hands, lift it up and turn the dough over to coat it in the oil. This is going to make transferring it from the bowl to your oven pan a lot easier and will stop it from drying out.Cover the bowl with plastic wrap and let it rise until it's doubled. This will depend on the temperature of your kitchen – in summer it can take 45 minutes, but can take 1.5 hours, or more in winter for me. Watch the dough, rather than the clock. You want it to be puffy, with visible air bubbles on the top.
- Transfer the dough to the pan and let it rise again. Drizzle your large pan with another tablespoon of olive oil, then tip the risen dough onto it, carefully using your hands to release it from the bowl if needed. Drizzle another tablespoon of olive oil on top of the dough, then gently stretch it into a rough rectangle. Leave it to rise again until it's very puffy, bubbly, and jiggly.Again, I recommend taking a photo of the dough as you transfer it to the pan so you can easily compare – it will roughly take another 45 minutes. You're looking for it to have almost doubled, and be really pressing against the sides of the tin.
- Top your focaccia.When the dough is rising in the pan, heat your oven to 400℉ (210℃ fan bake). When the dough is super wobbly, jiggly with lots of visible bubbles and doubled in size again, it’s time to bake.Drizzle the 3 tablespoons of chili oil all over the top of the dough, and then, using oiled fingers, dimple the dough all over. Pretend you’re playing the piano on the dough, pressing right to the bottom of the pan.Finish by scattering the grated mozzarella and 1 teaspoon of flaky salt all over the dough.
- Bake the bread. Transfer the focaccia to the oven and bake for 30 minutes or until super golden, crispy, and you can see the edges are starting to pull away from the sides of the pan.Let sit for five minutes in the pan before transferring to a large cooling rack.

What a wonderful and straightforward recipe!! Thank you for showing us the steps we made it this afternoon and all loved it. not sure how much more there will be for dinner!
I’m so happy you loved it!! And pleased you could follow it easily 🙂 🙂
I just tried this and it was AMAZING. Everyone, even my kids, LOVED it! Thank you!
Woohoo!! Amazing to hear Cynthia, I’m so happy you and your kids loved xx Kate